
|
-----------------------------------------------------------.::.
vehicles .::. civilian aircrafts .::. military aircrafts .::.
miscellaneous .::.---------------------------------------------------------- |

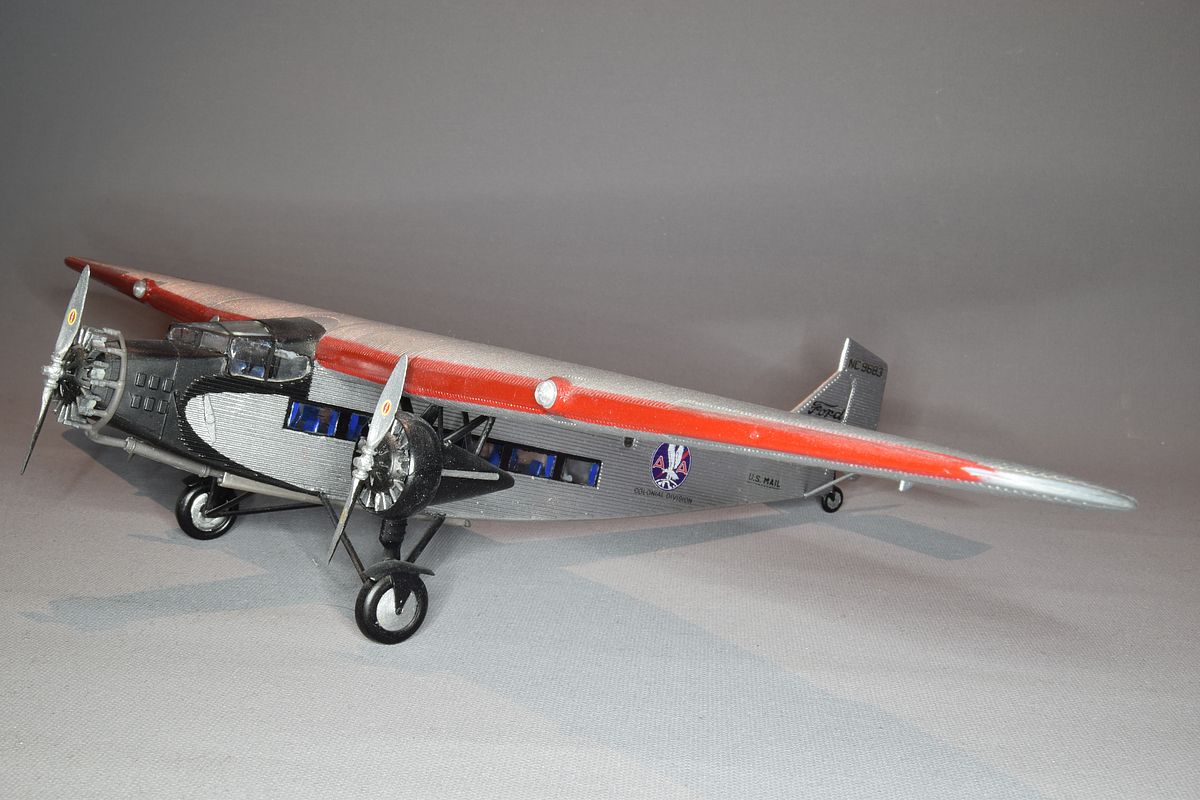
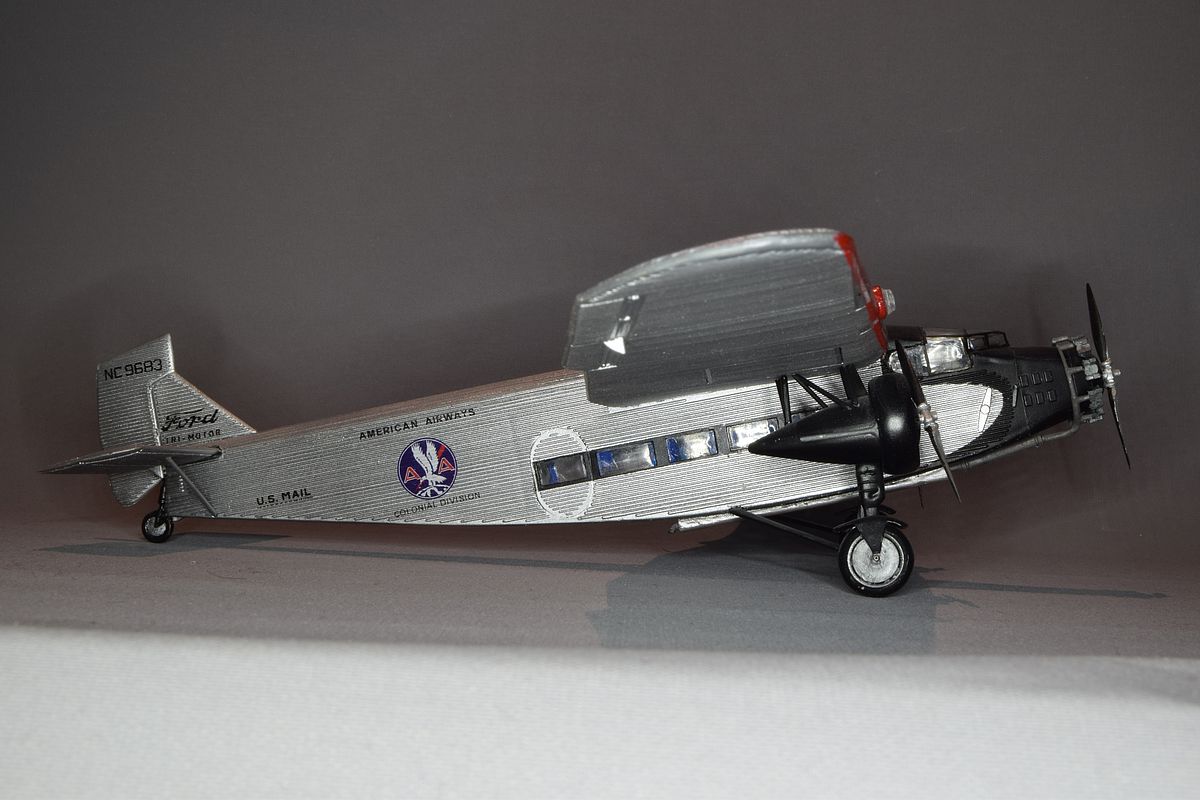
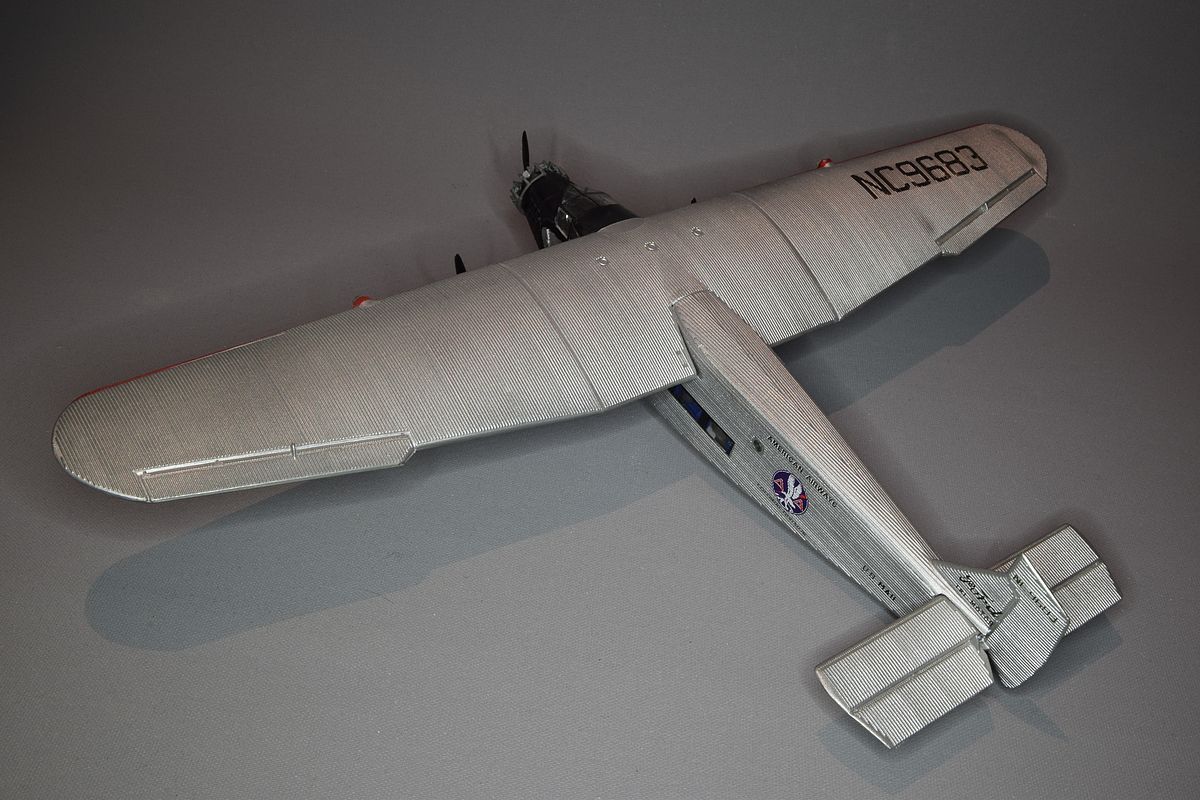
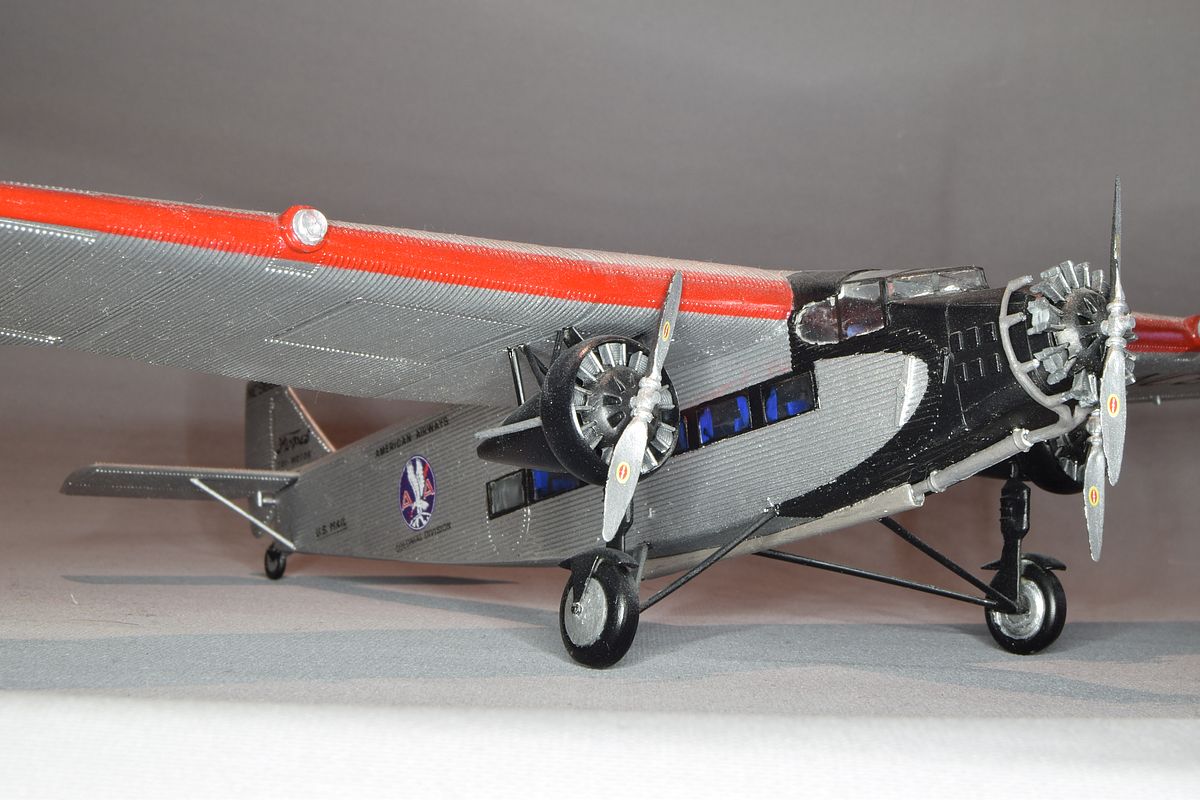
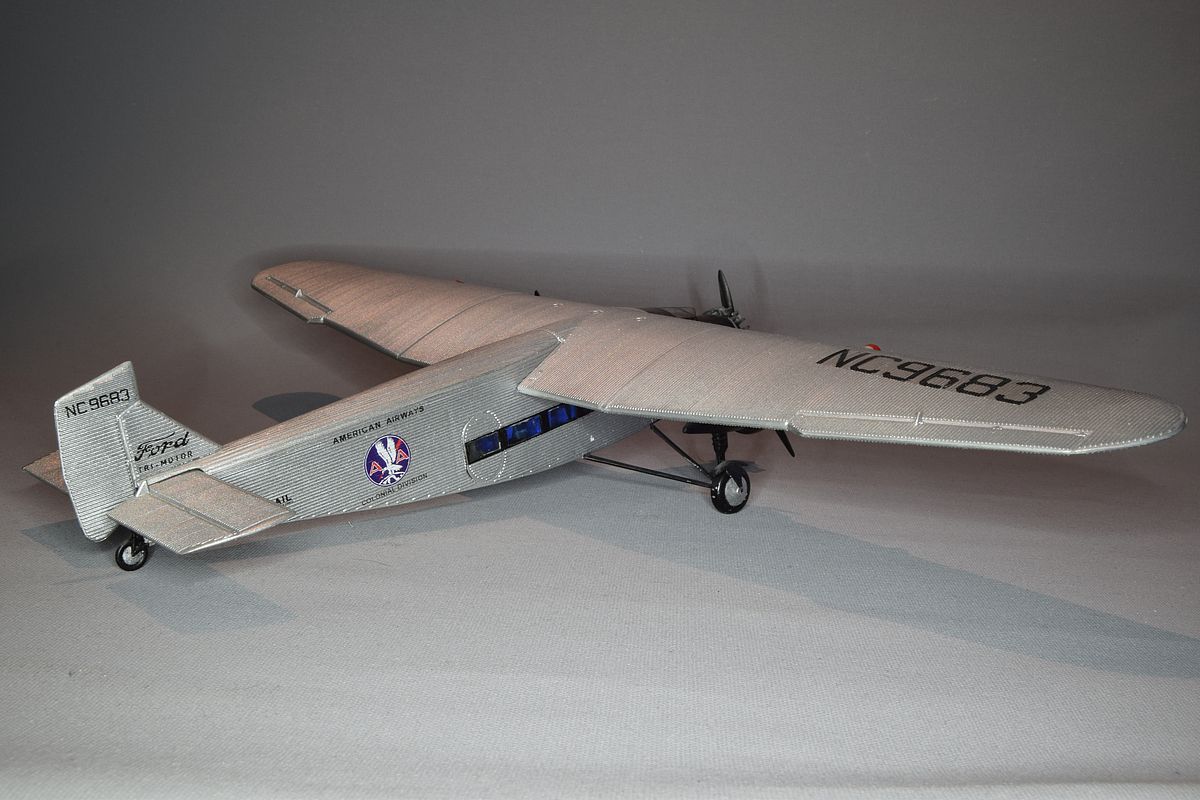
Lately I have grown fondness to pre WW2 airliners. This is the first model that I have finished of such types. It is the old Airfix Ford Trimotor in 1/72 scale. No strange things here, no conversions or such. Just a build straight out of the box. All I did was to replace the old hard decals with new thin copy’s.
|
I built it in 2008 while on holiday. I like it even though it is not a Junkers but it has a corrugated surface like a real airplane.
|
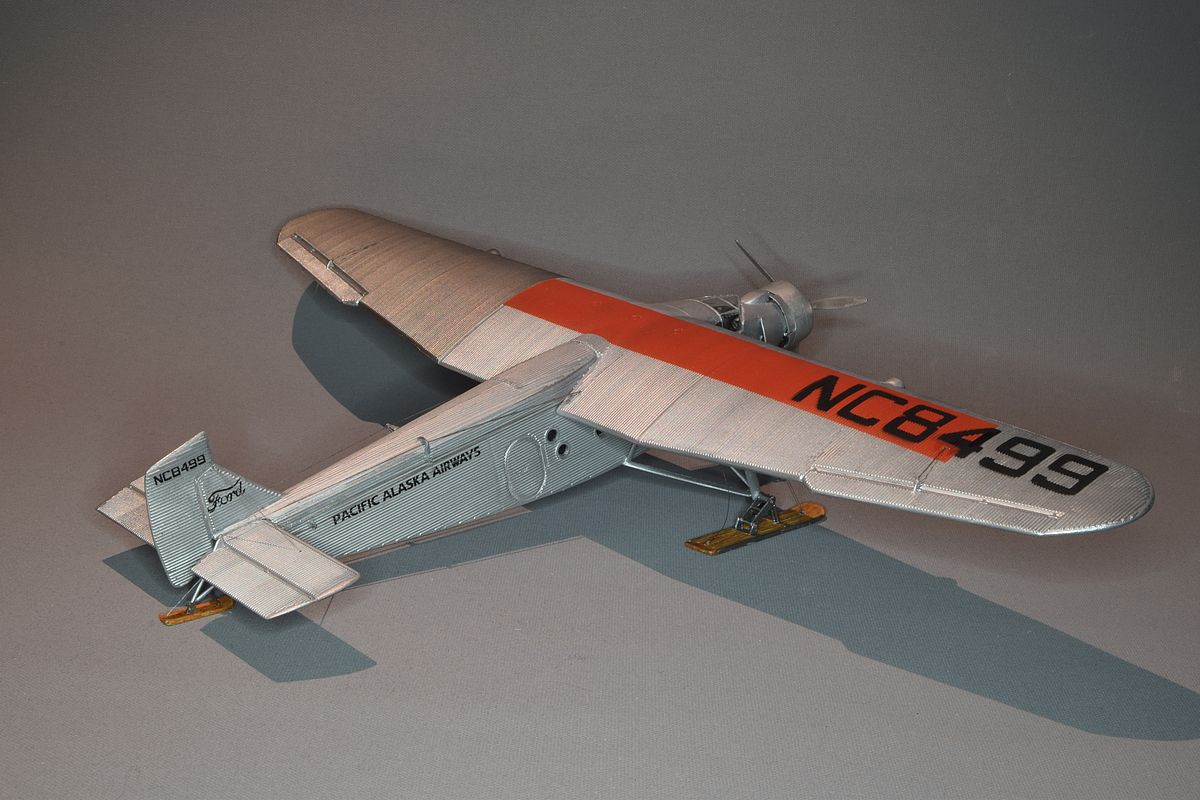
I have had plans for a transport variant of the Ford Trimotor for a very long time. I bought this kit 2005 and now 2017 I guess it was time to do something with it. But unable to build out of the box I had to convert it a bit.
|
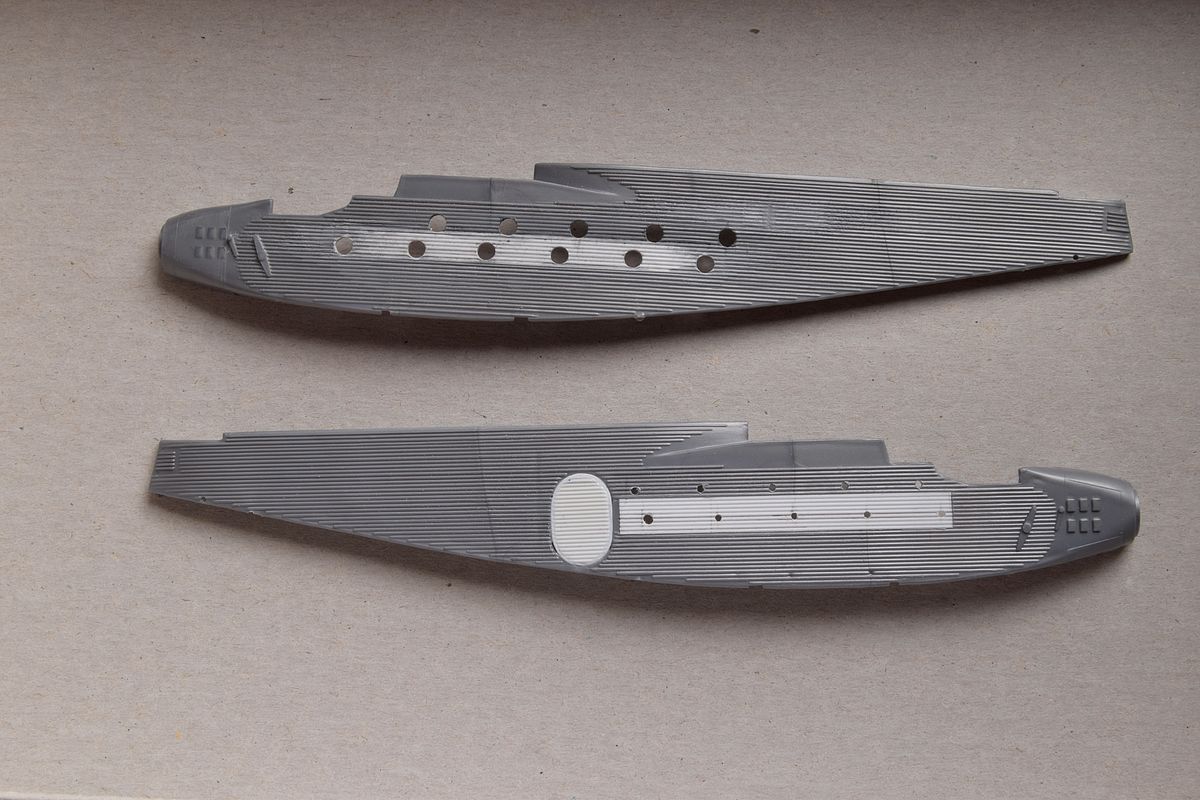
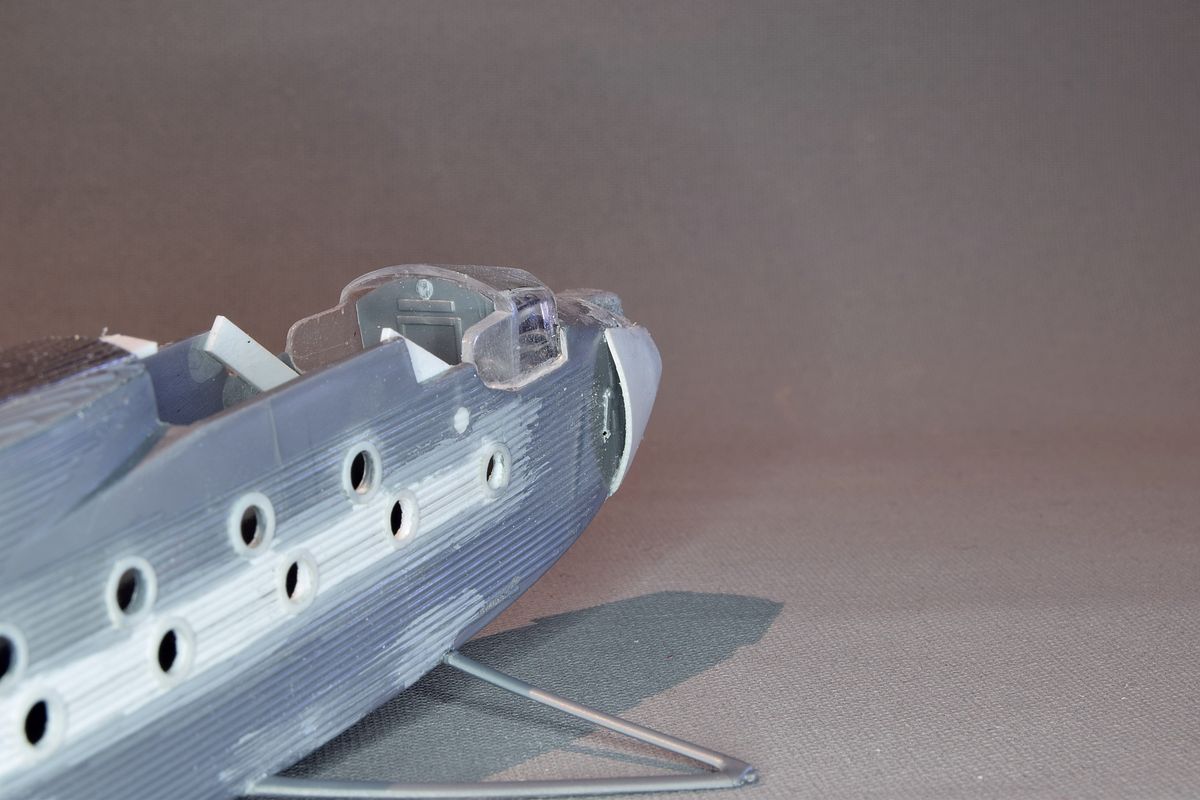
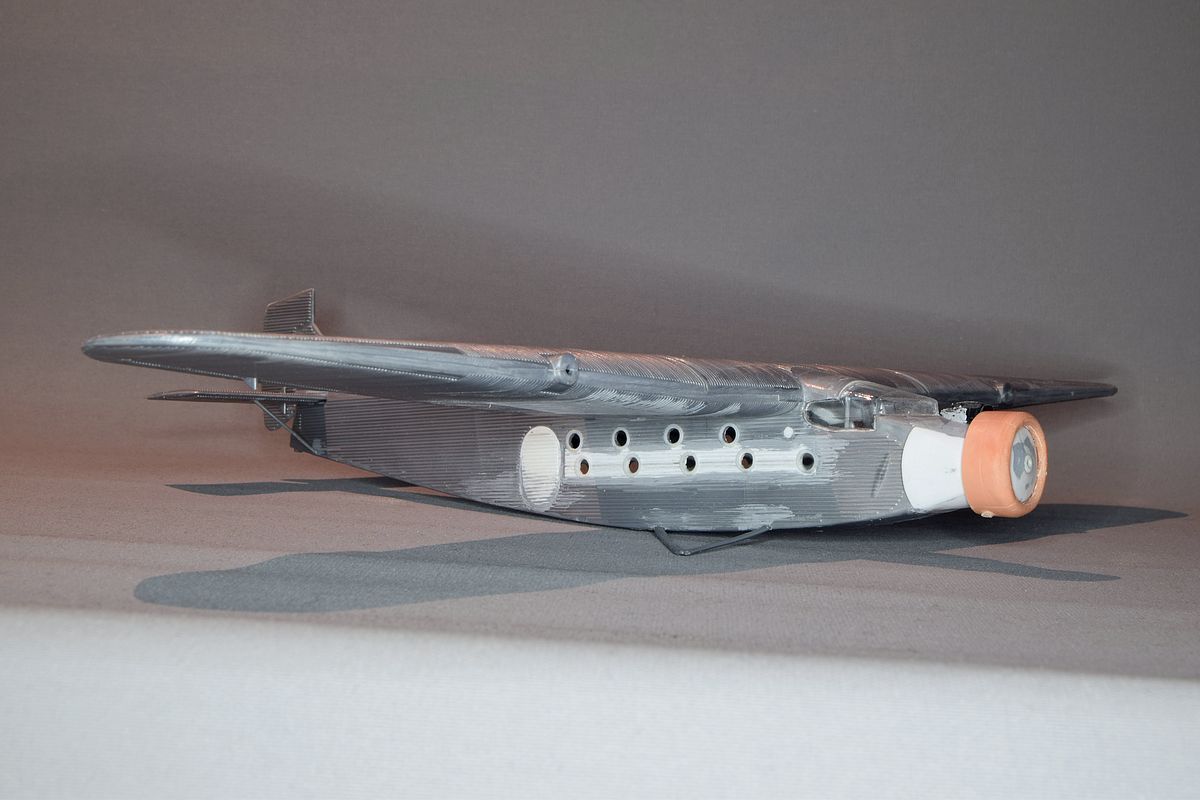
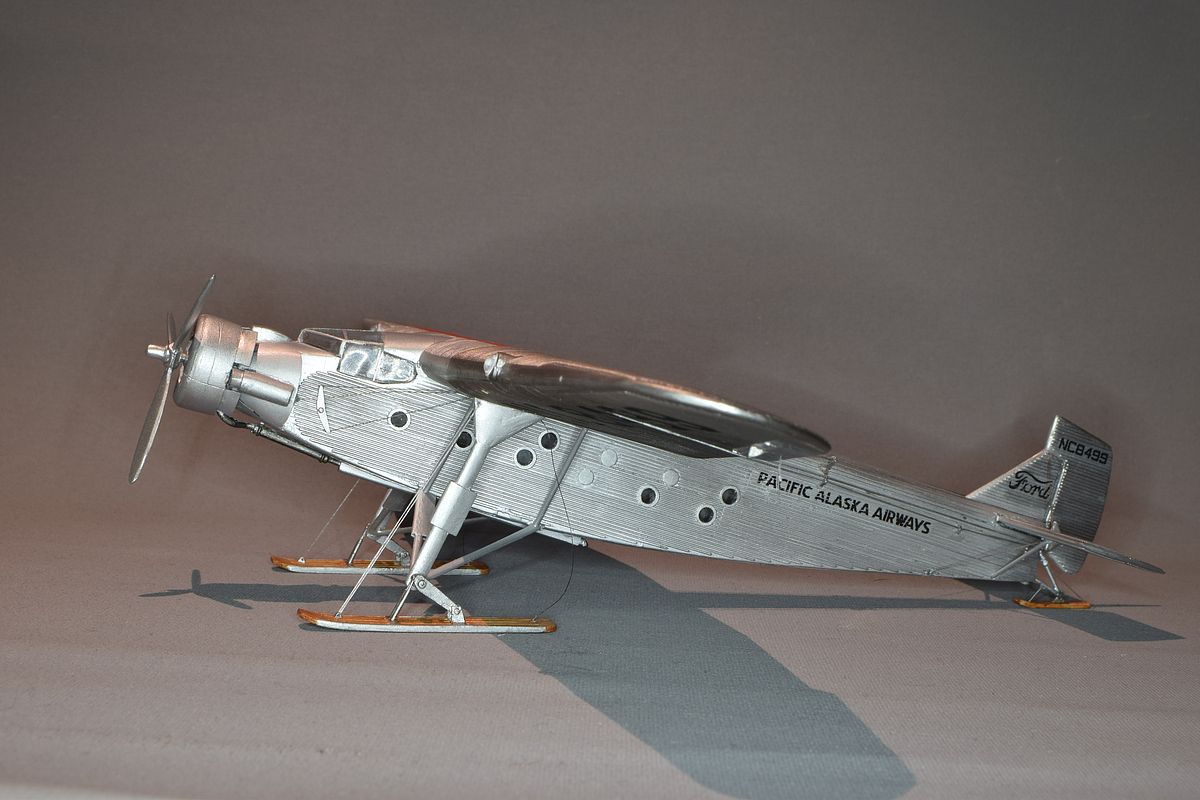
This cargo plane had a very different window configuration and I was unsure on how to fix the new windows, so I decided to have a look and see if I could do it. I thought that I would have to add plastic rods to rebuild the corrugation like I've done on my Junkers Ju52 but when I looked at some corrugated plastic card it looked very similar. It was easy to cut out a hole following the recess for the windows on the inside of the fuselage as the plastic was very soft. The plastic card was a perfect match to the kits corrugation. Cutting thin slivers out of a plastic tube wasn't as easy as I thought. I ended up building a jig to help me with that. |
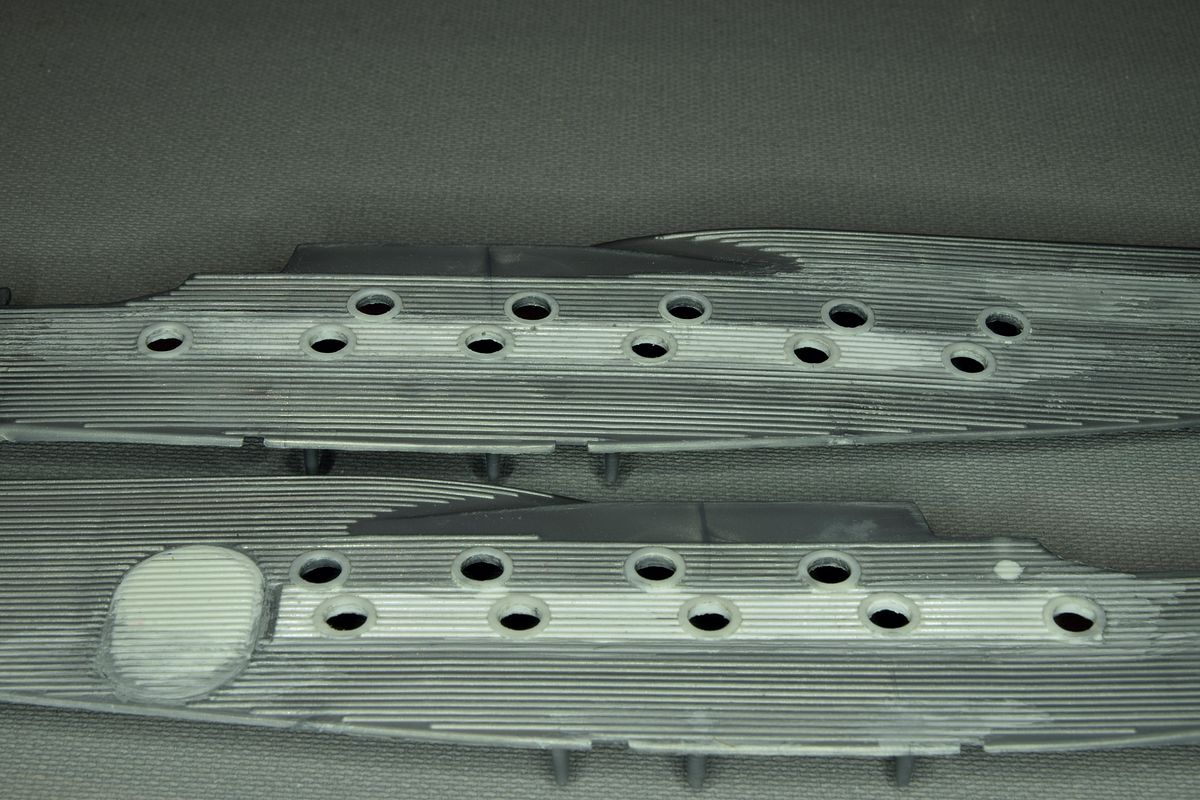
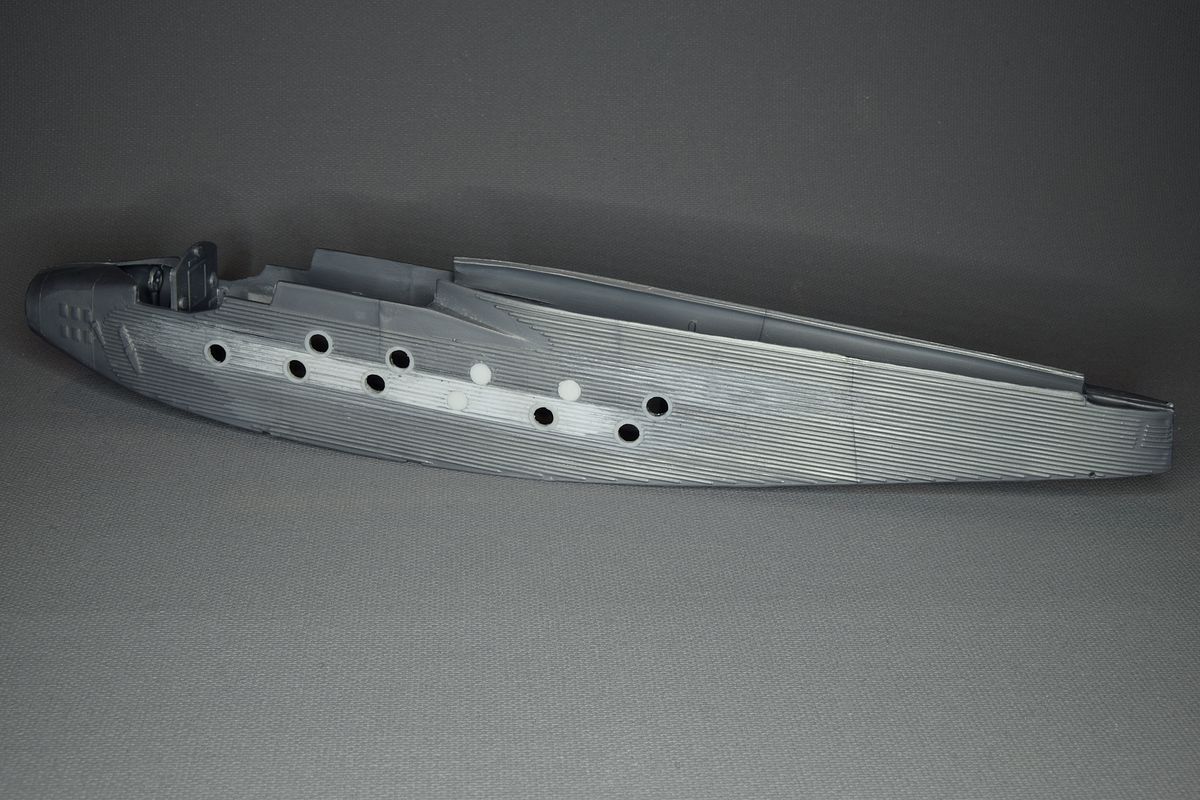
They were used for the port holes. I also needed to make a new door without a window. So, in the end I felt that I was off to a good start. But then I learned that three of the small windows later was closed on this plane, so I had to do the same. |
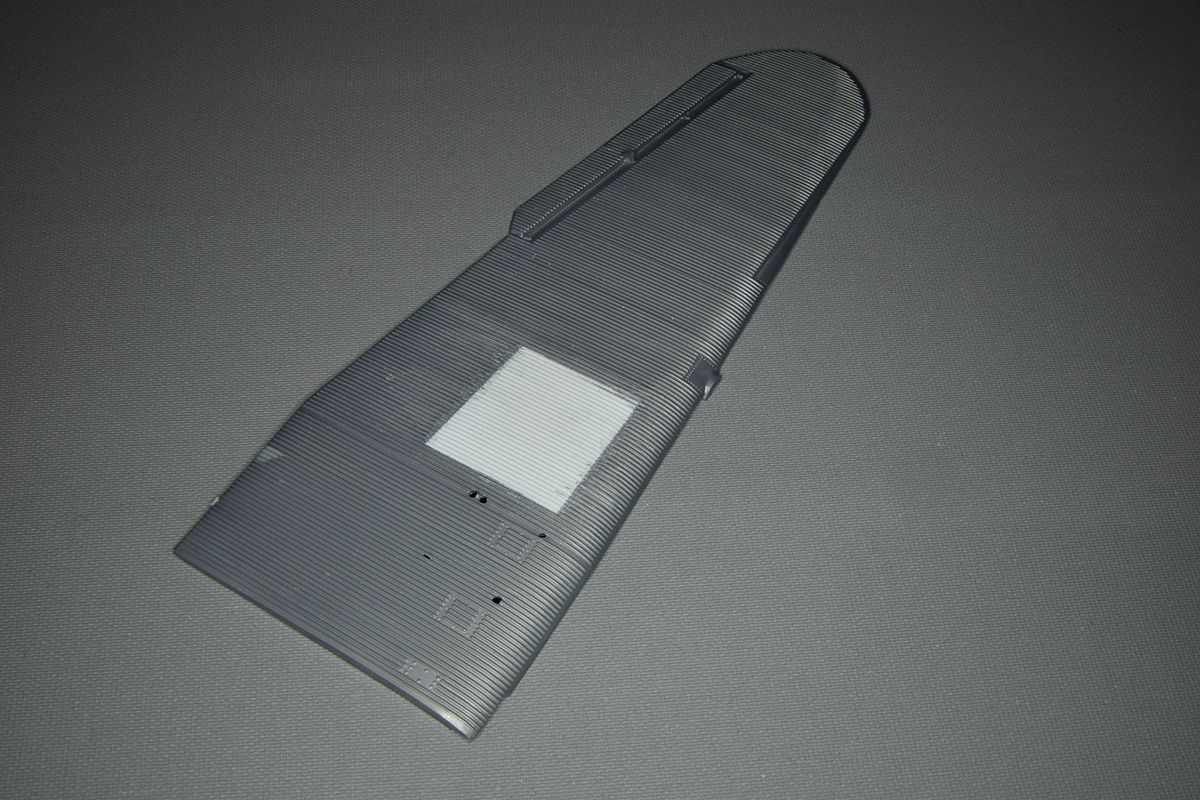
The cargo bays under the wings had to go to. More plastic card to the rescue, but the biggest problem probably was that the canopy was to wide. |
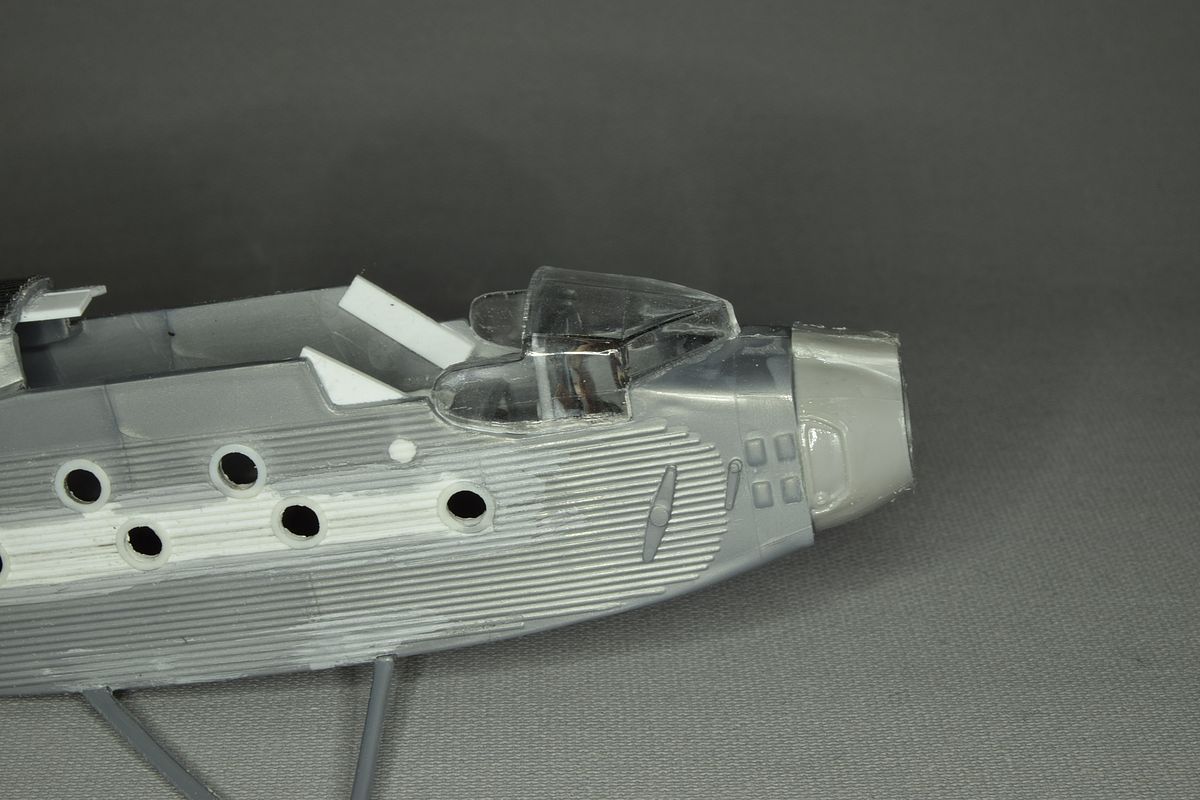

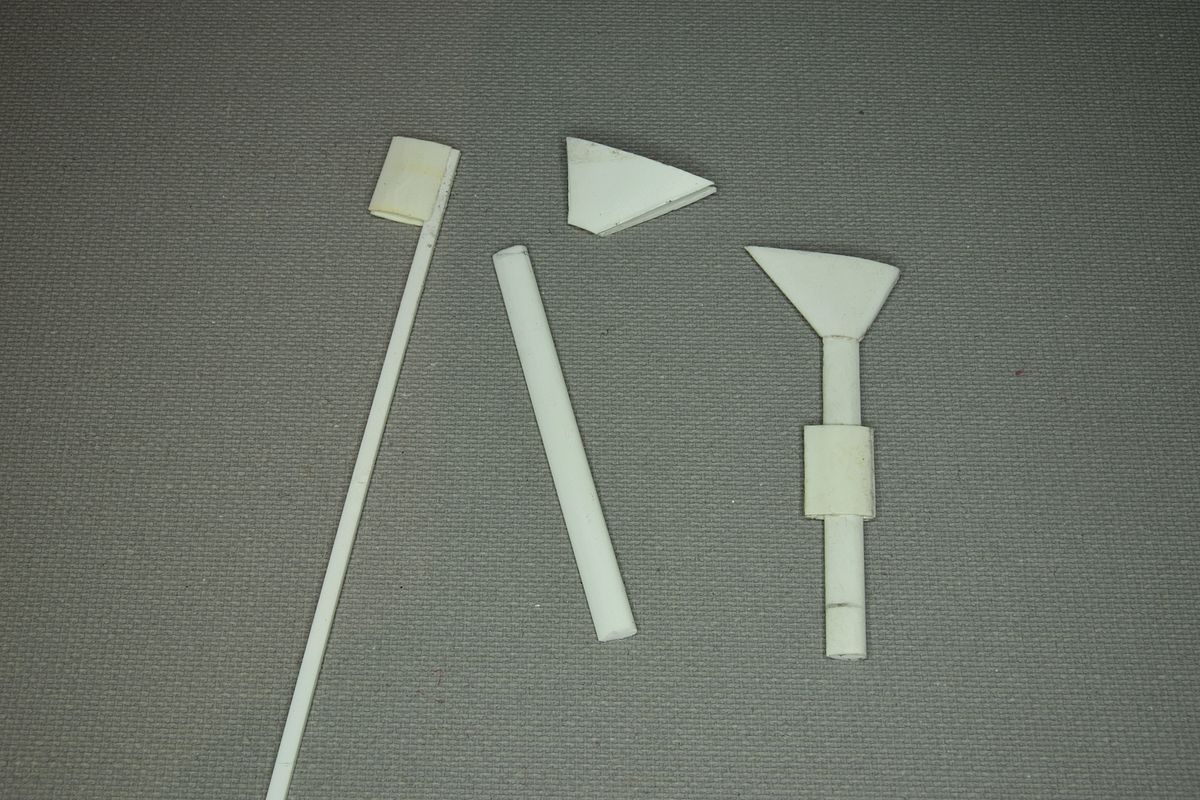
I cut a part off the nose and replaced it with some Williams Bros. Northrop Gamma parts. Perhaps not the best way of doing things but I find it mentally easier to start with something shape wise close rather than start from scratch even if that would be smarter. This plane flew with six different engine arrangements and of course I choose one where I had to rebuild it. As I don't have to many pictures it will be some "guesstimate". |
But I can live with that as there aren’t many persons who will know how it looked anyway. After the nose had been done I put the wing and the tail in place. |
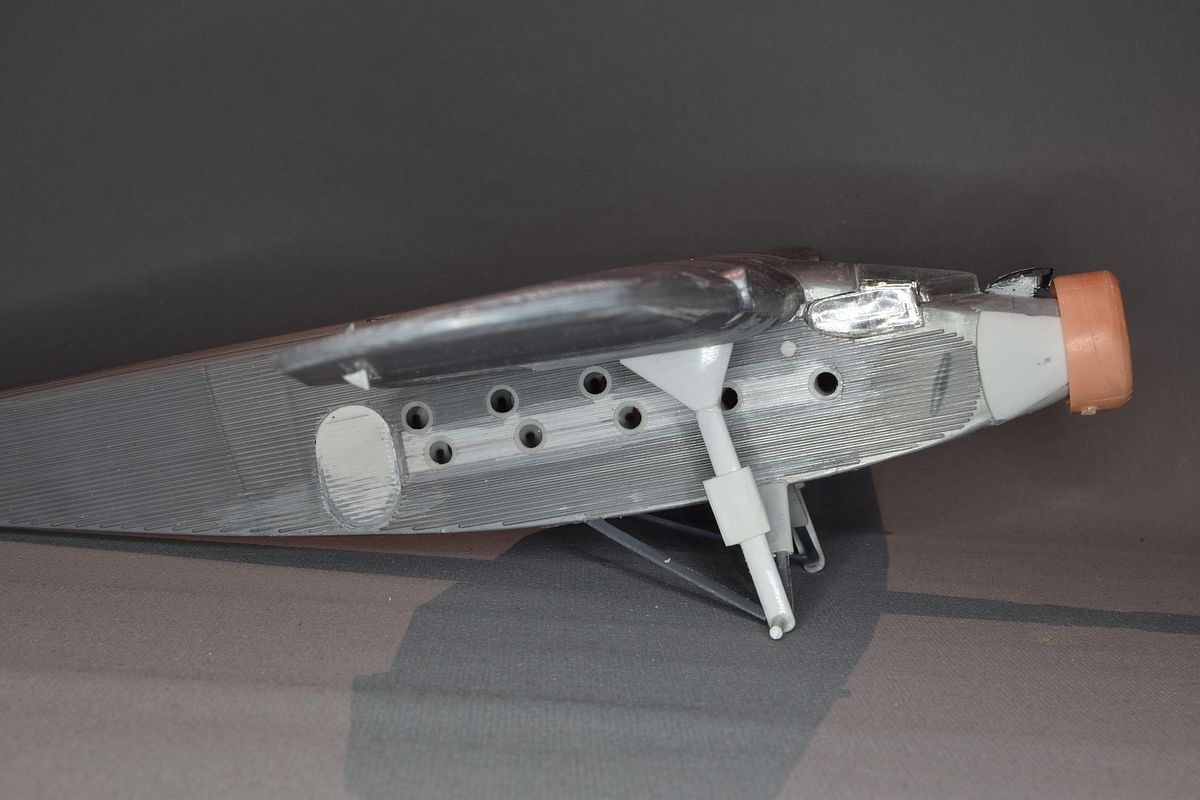
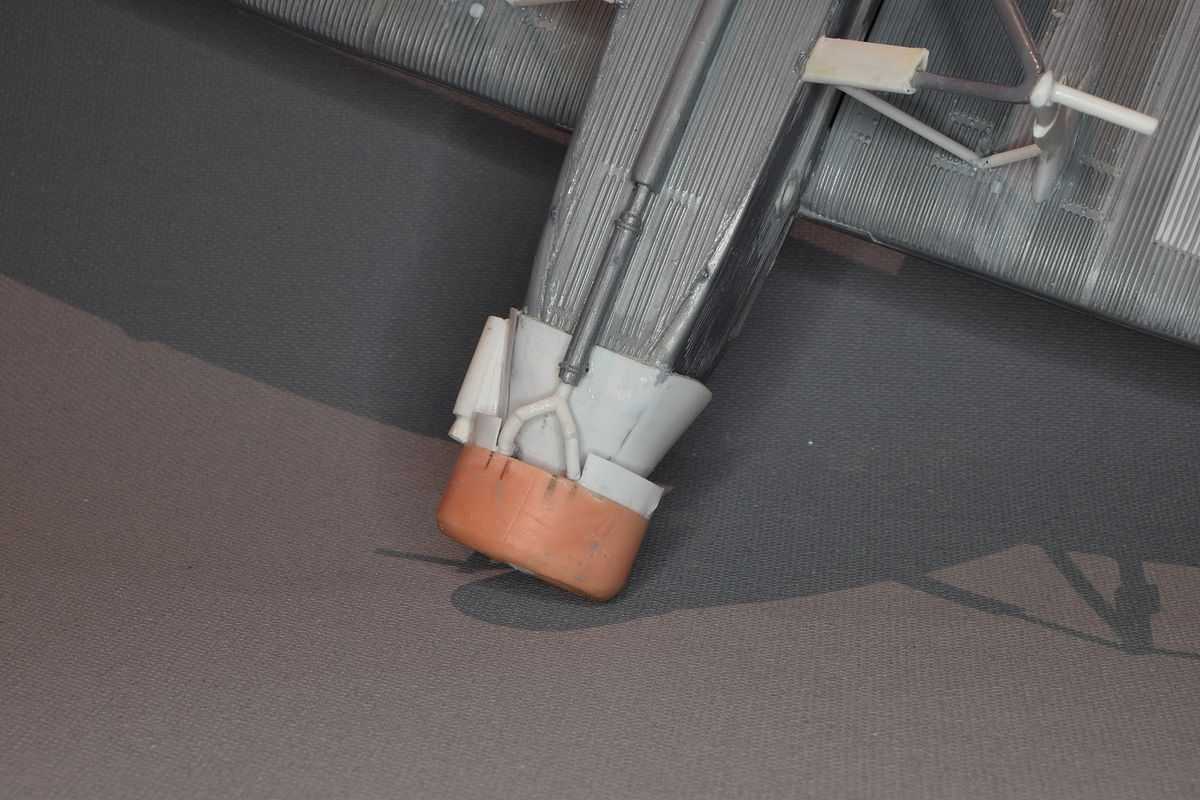
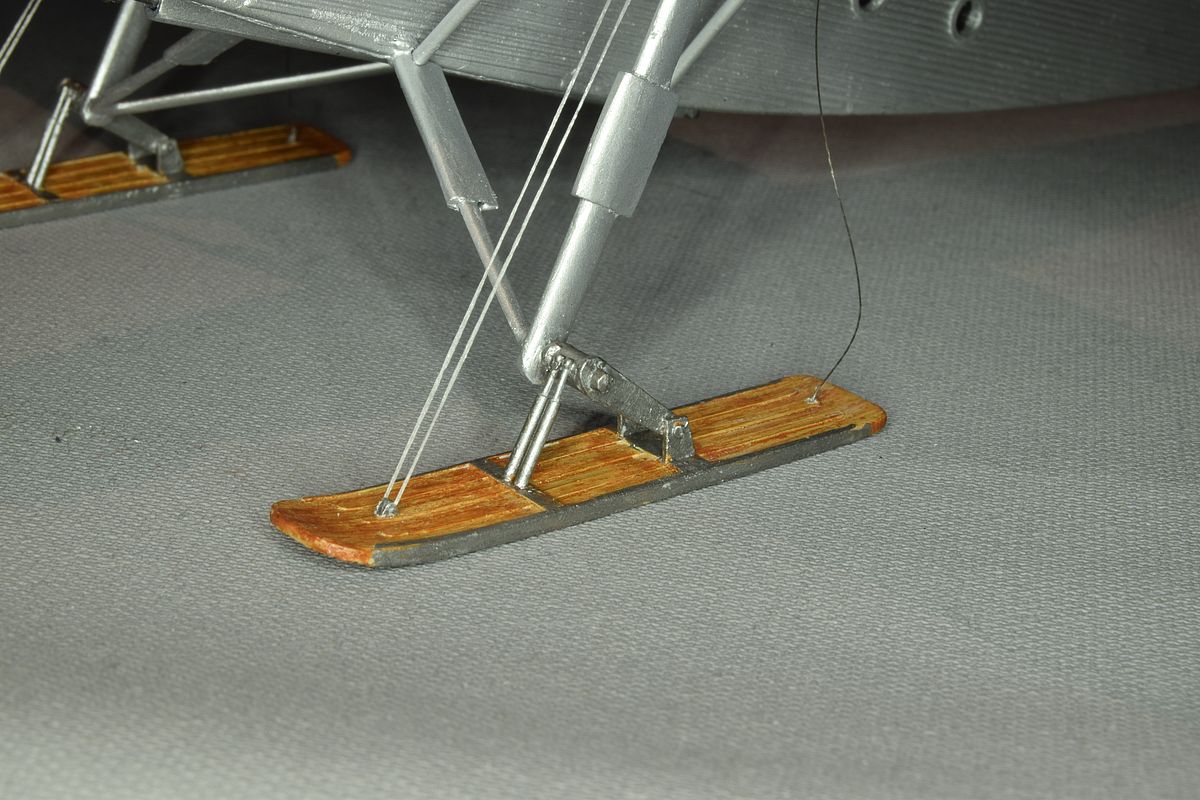
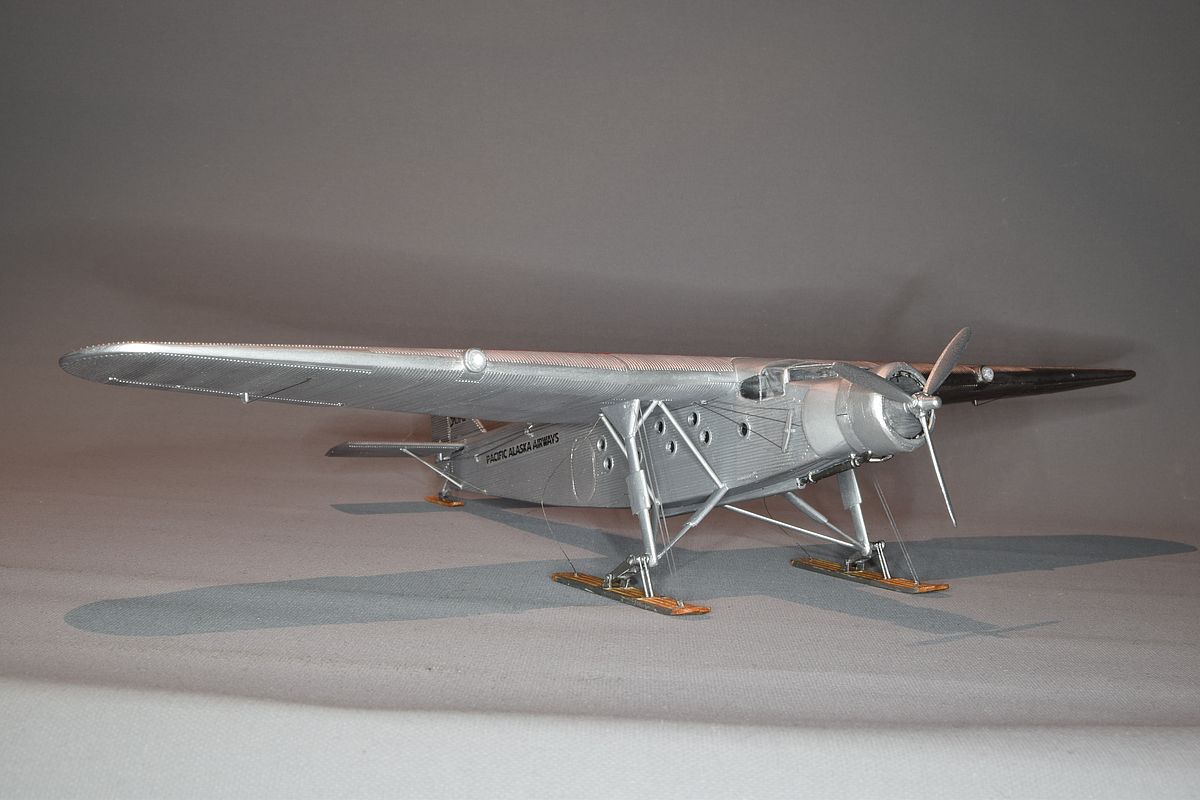
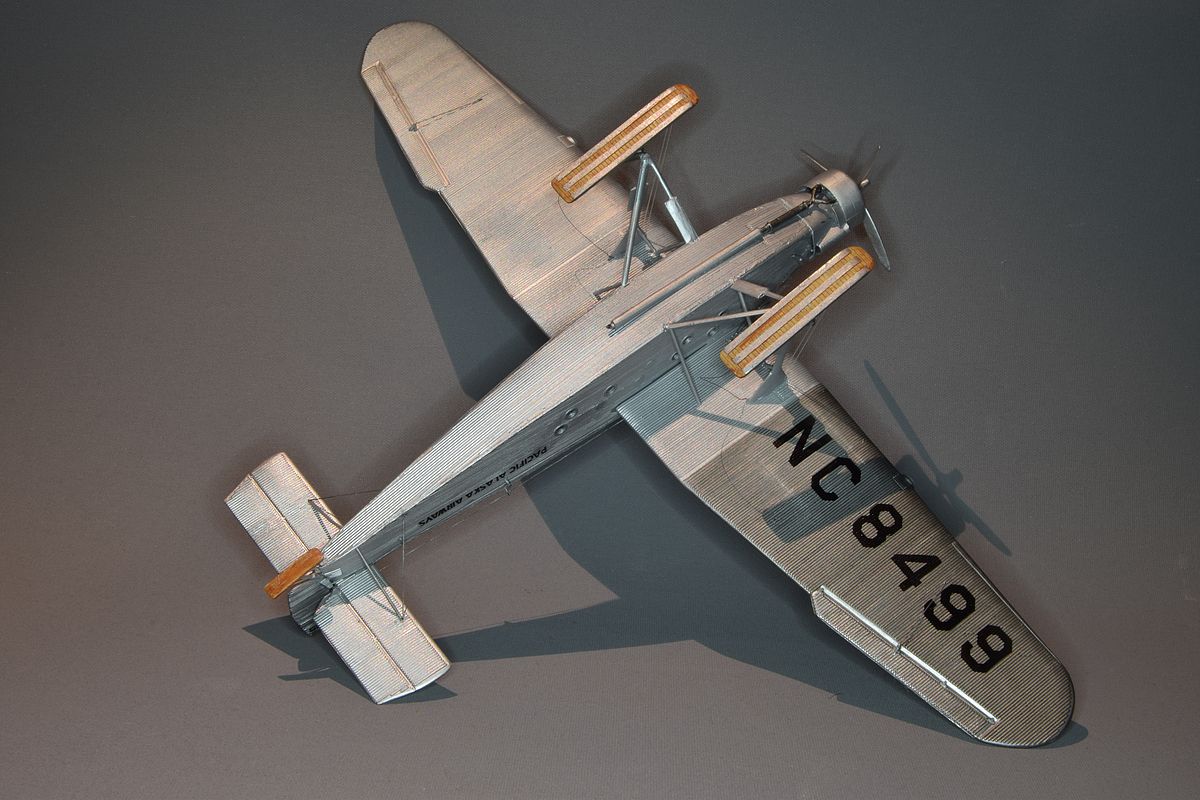
Then it was time to start building some landing gear. I had thought about floats, but I found some skis in the scrap box and felt that it was the right thing for an Alaska plane. |
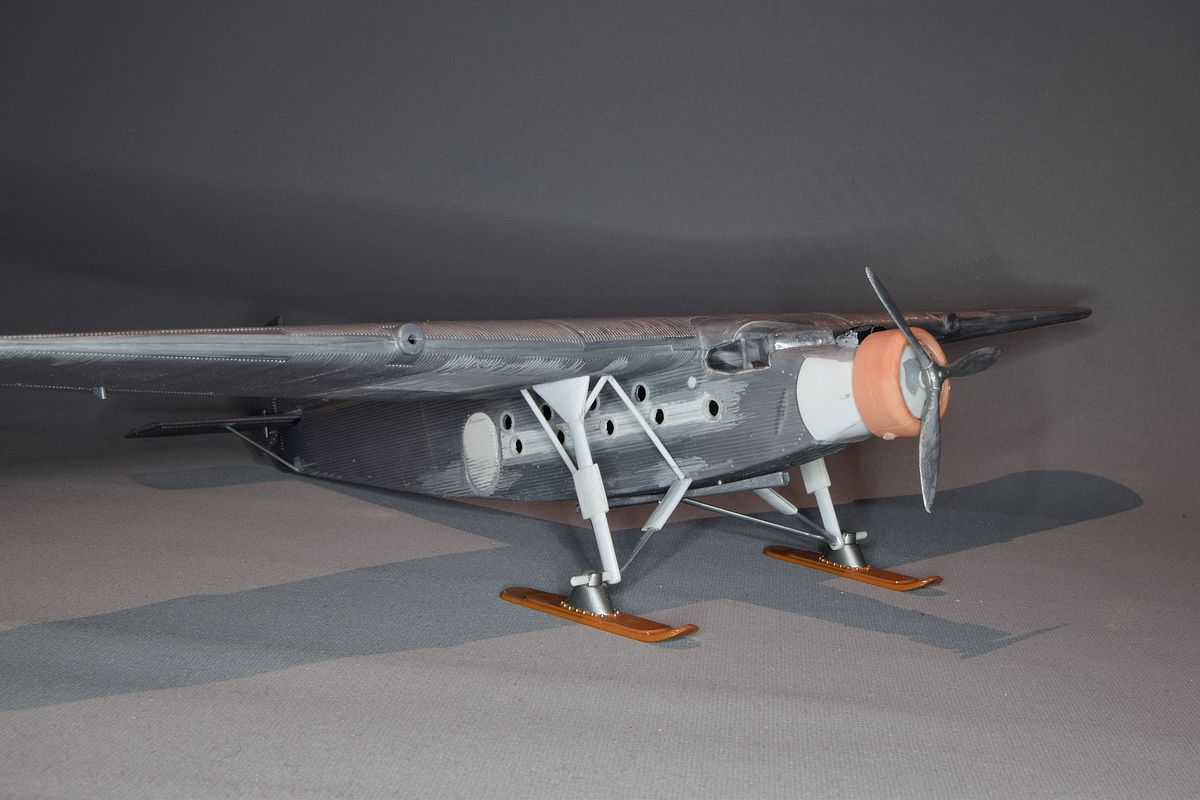
I tried the skis from the Monogram kit on this and found it to "look right" on it. |
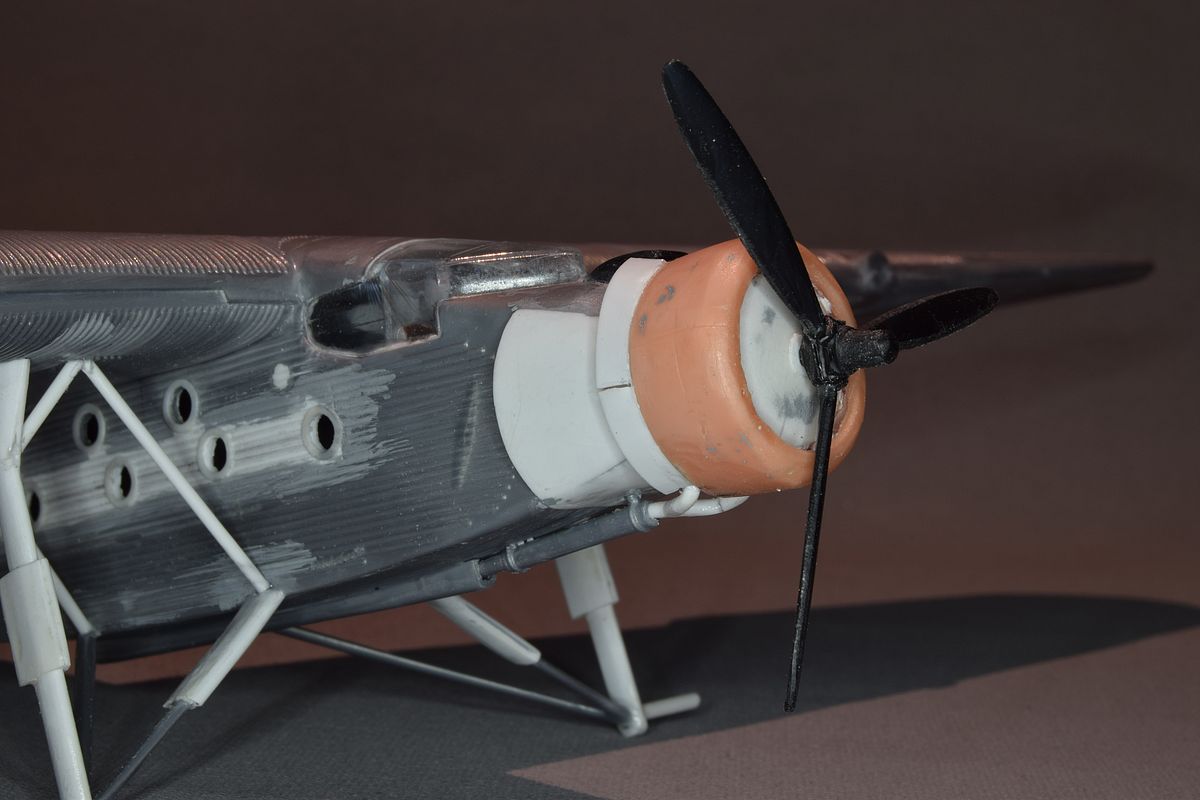

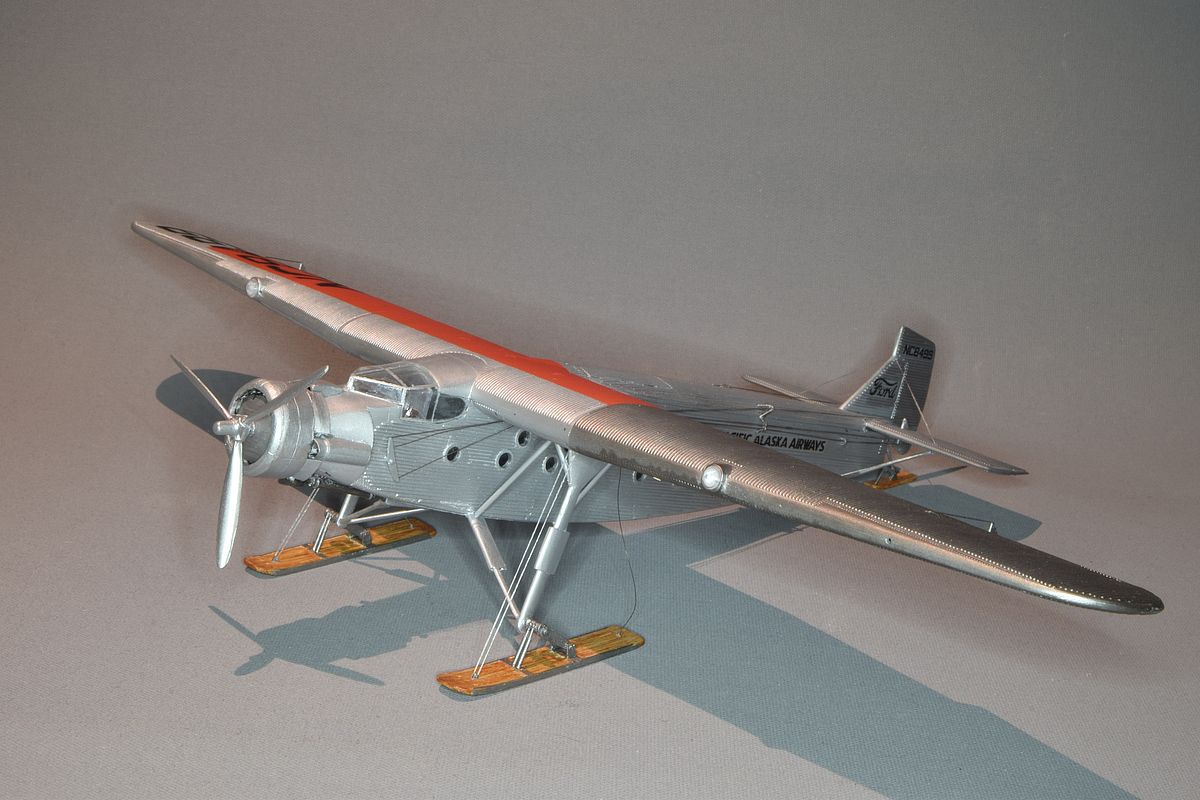
Once again it was time for the "re-do and do it right" I removed the engine (Un-cure for super glue did work) as I wasn't happy with it. I also found a larger propeller for it. |
I had to convert the exhaust system as the original didn't fit any longer. The engine was nicked from a Dekno Northrop Delta kit. |
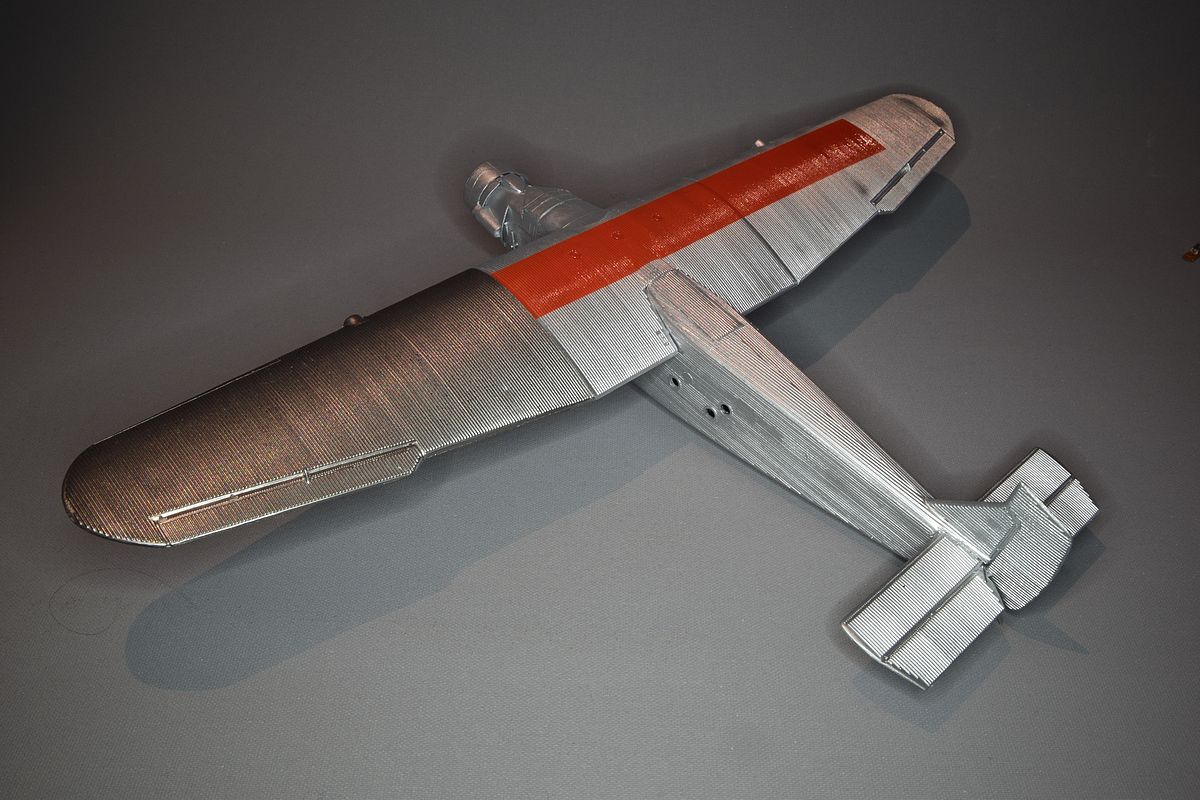
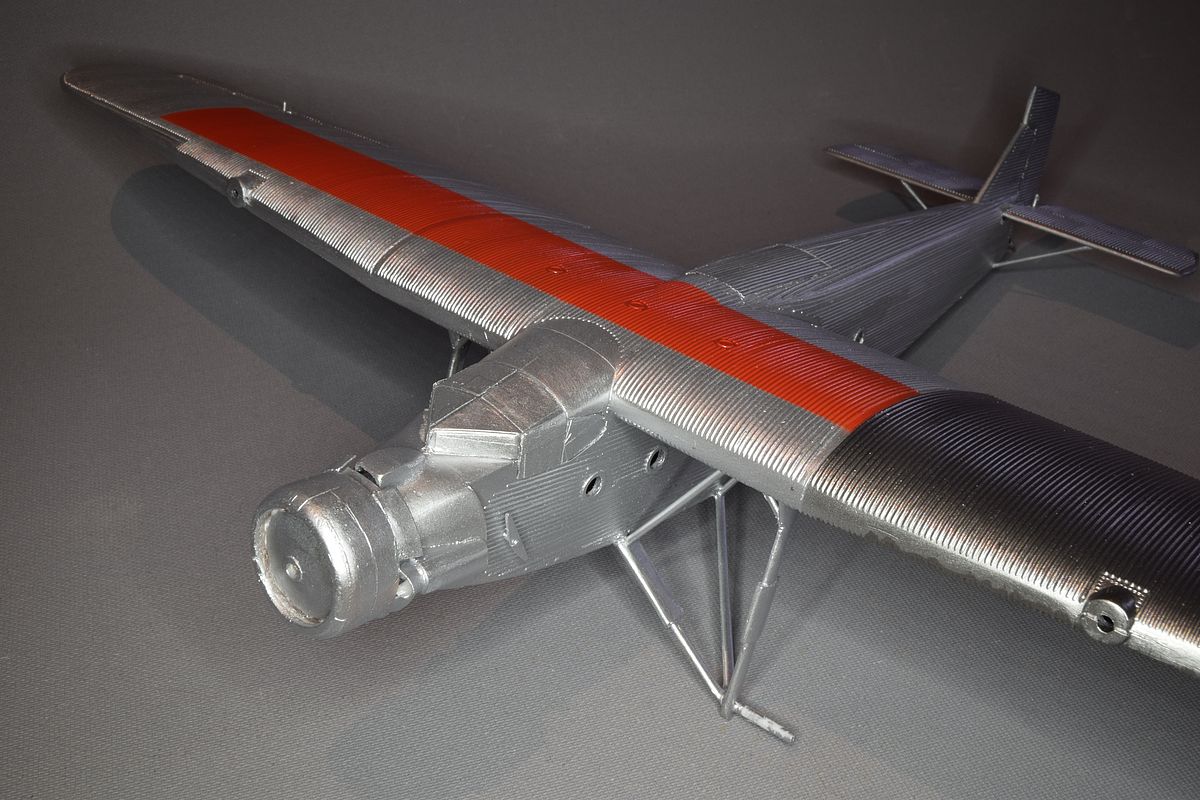
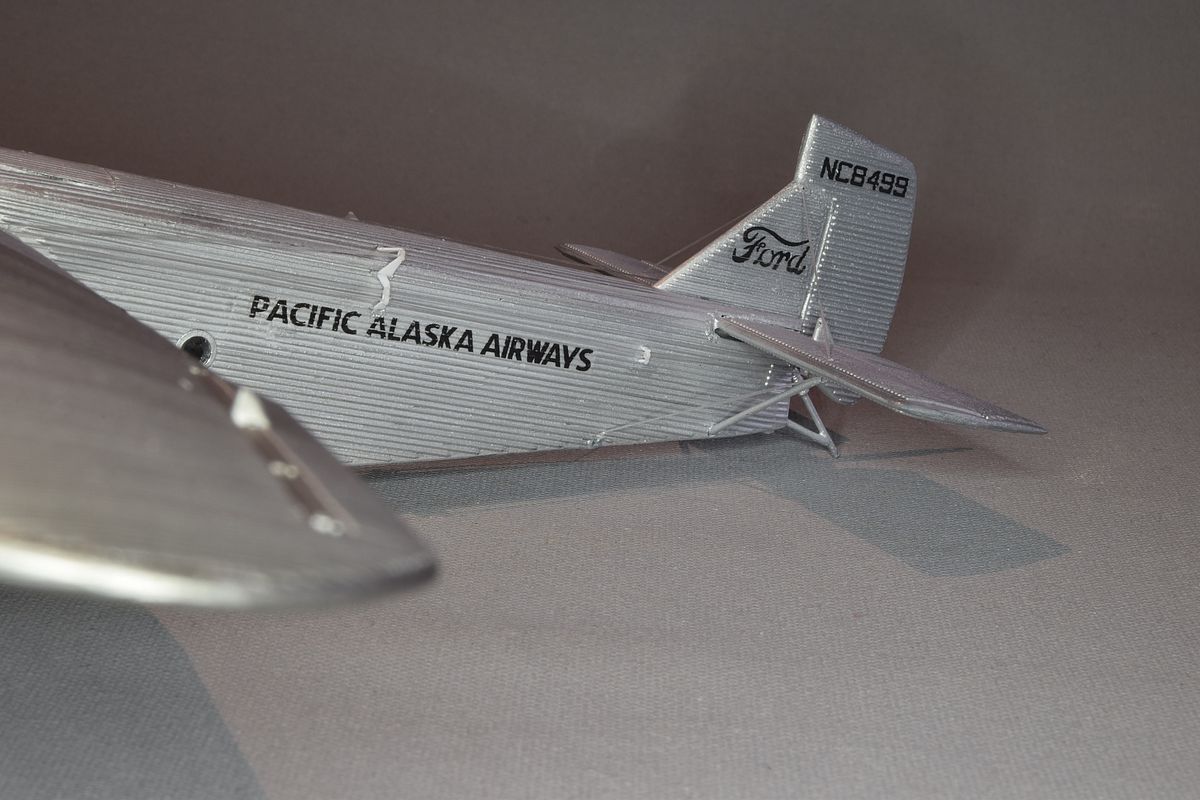
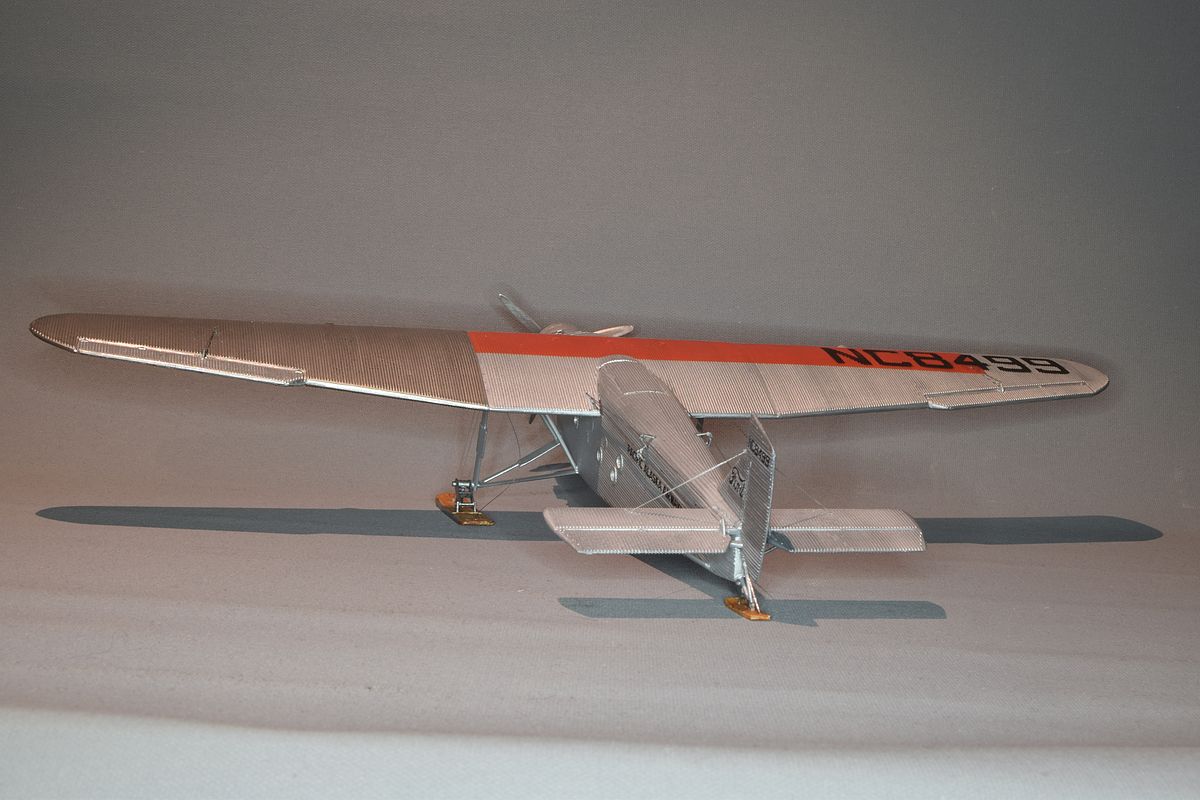
Then it was time out the airbrush. The stripe look more orange in the pictures than in real life but it was to shiny. I had to put on a flat clear coat. |
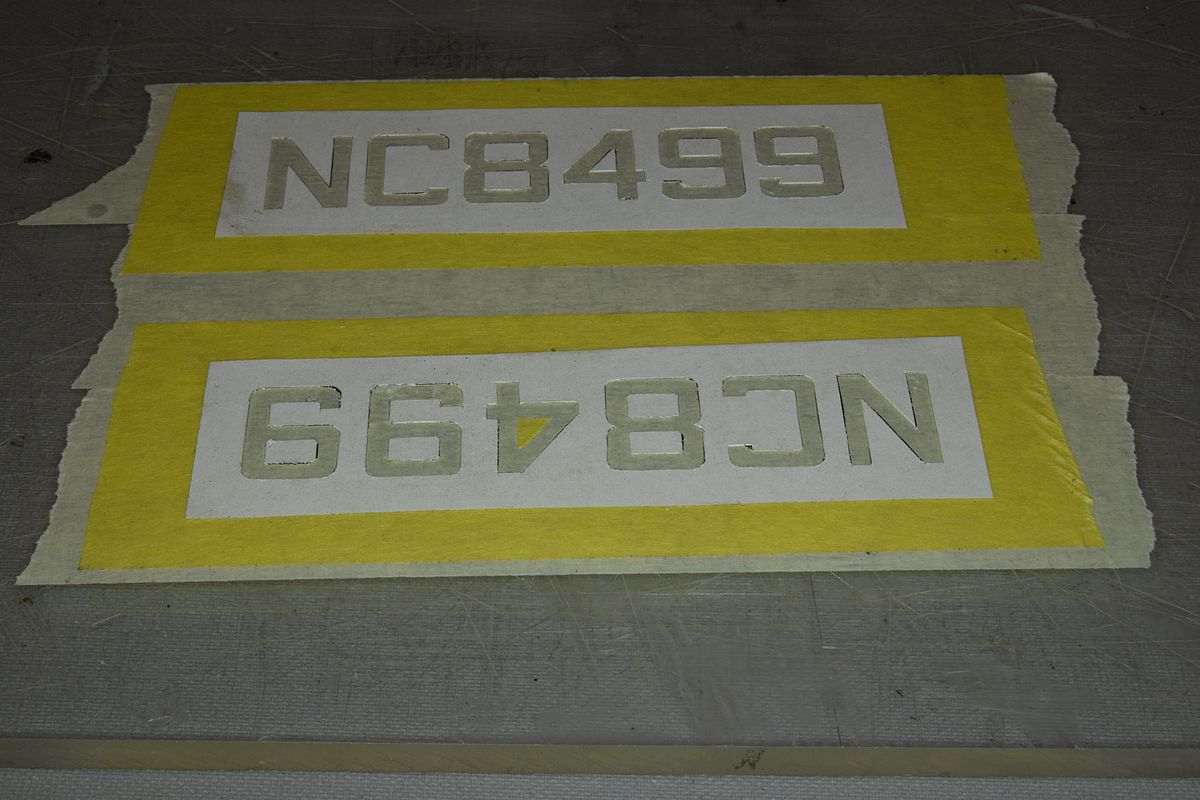
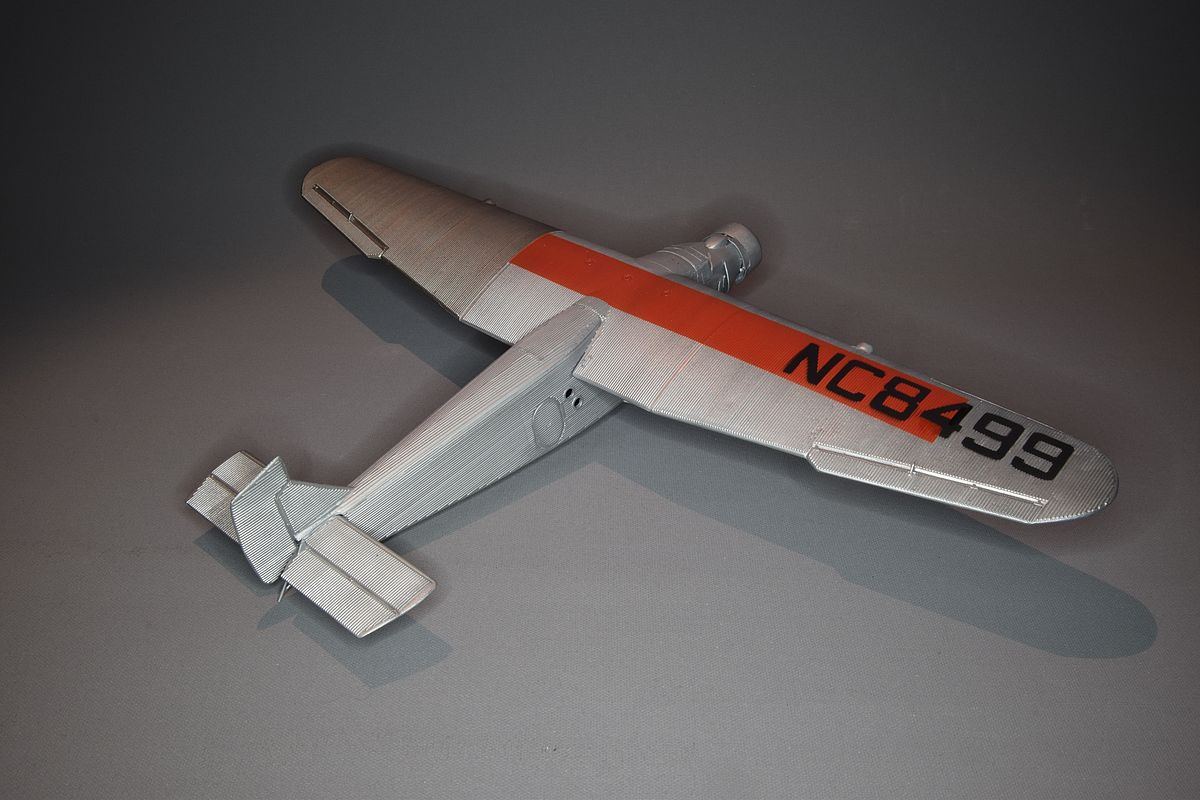
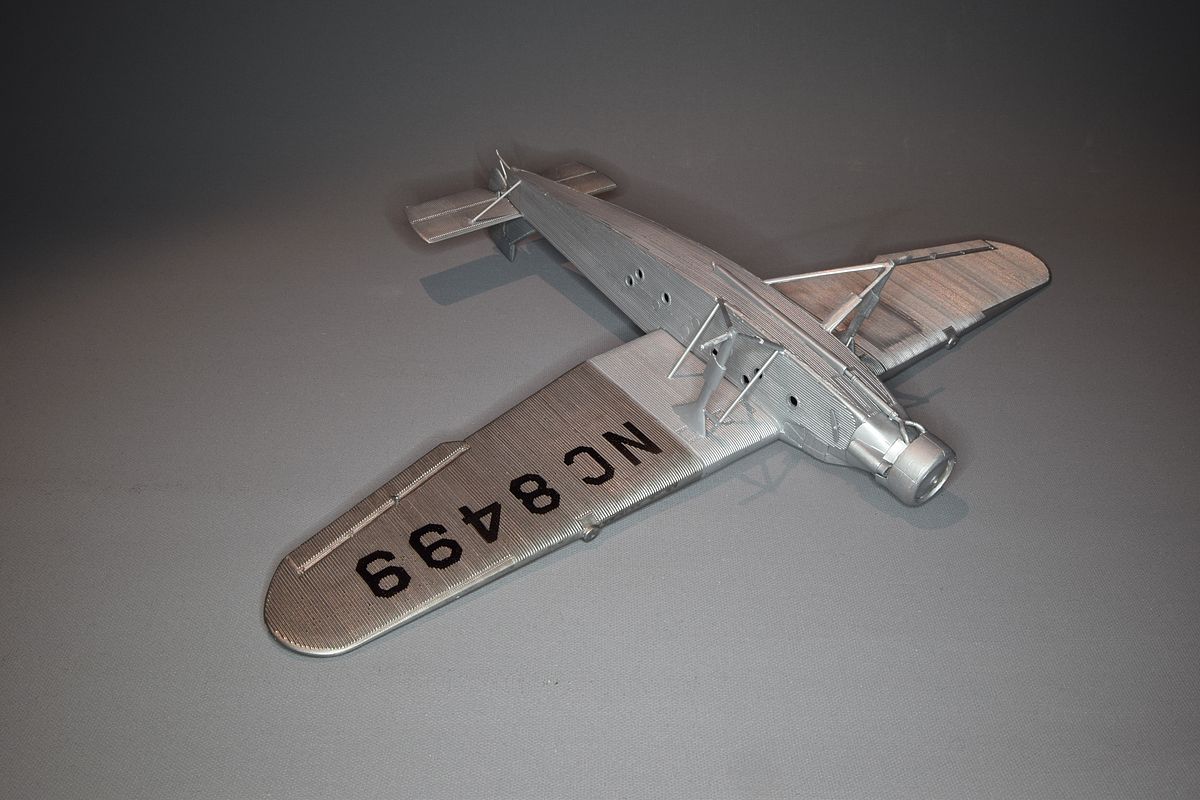
Masks for the wing letter were cut. A new blade in the hobby knife helps. This plane got a new left wing at some point, so the red stripe was missing on it. The letters under the wing had a different font as well. |
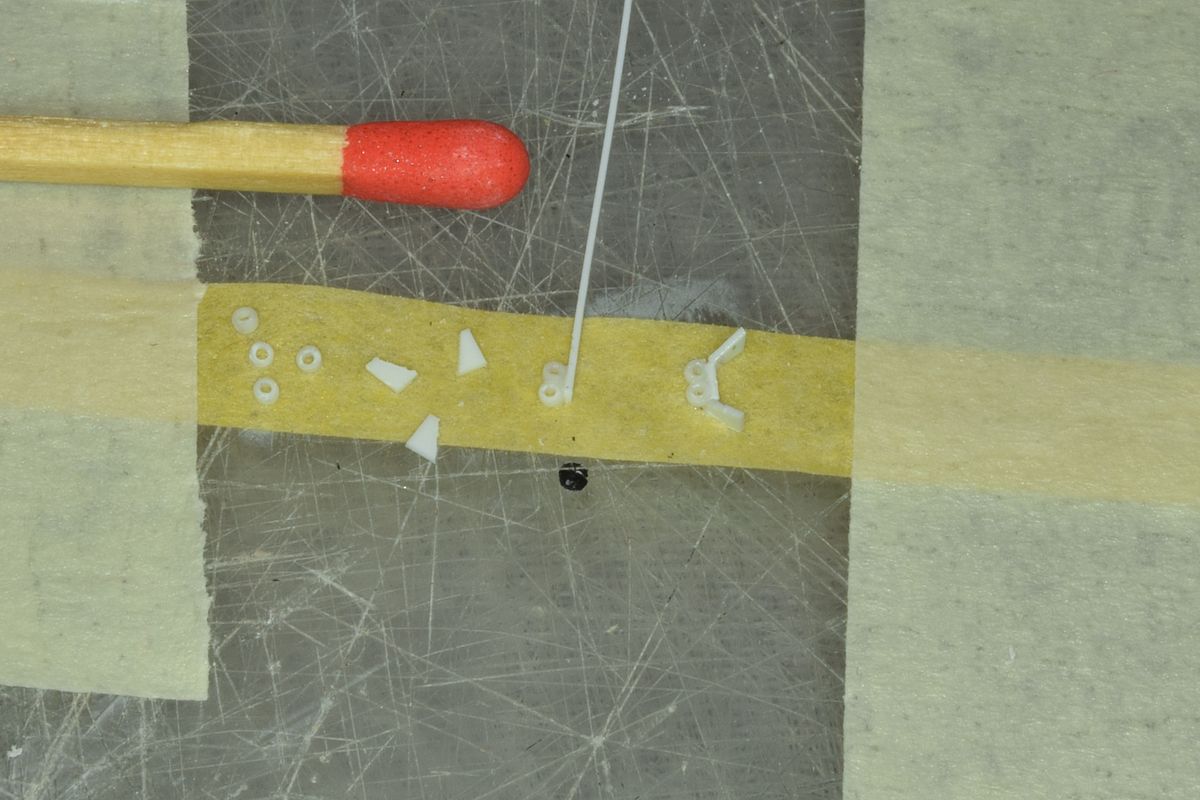

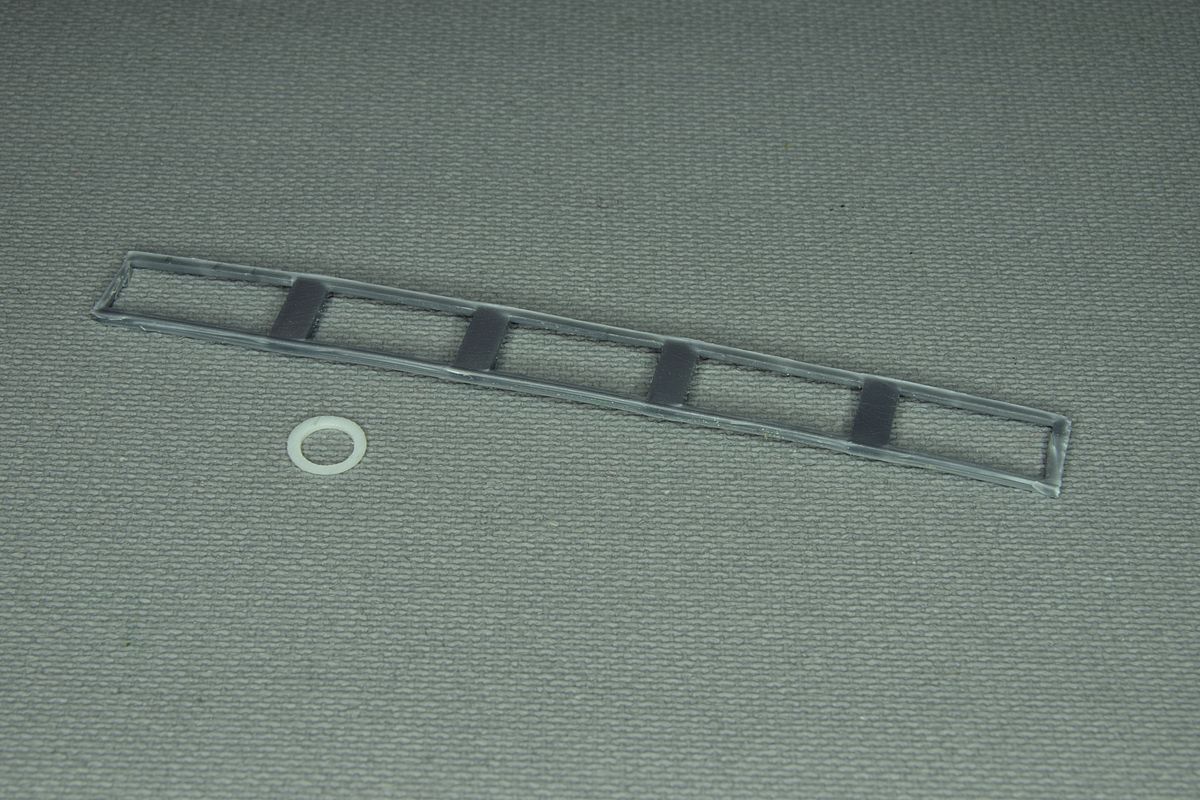
I have managed to build the fittings that will steer the rudder lines. They look large on the picture, but the holes are just 0,4 mm (.015) and the thickness of the plastic strips are 0,25 mm (or .010) so I didn't expect that I would succeed. I used "invisible thread" for the rigging. I think that I had to redo it three times because it is almost invisible. I managed to cross the lines, get two lines in the same hole. and other small mishaps. But as it is transparent I have to paint them, and it is flat not round. But on the positive side is that it is flexible so less risk to break them. |
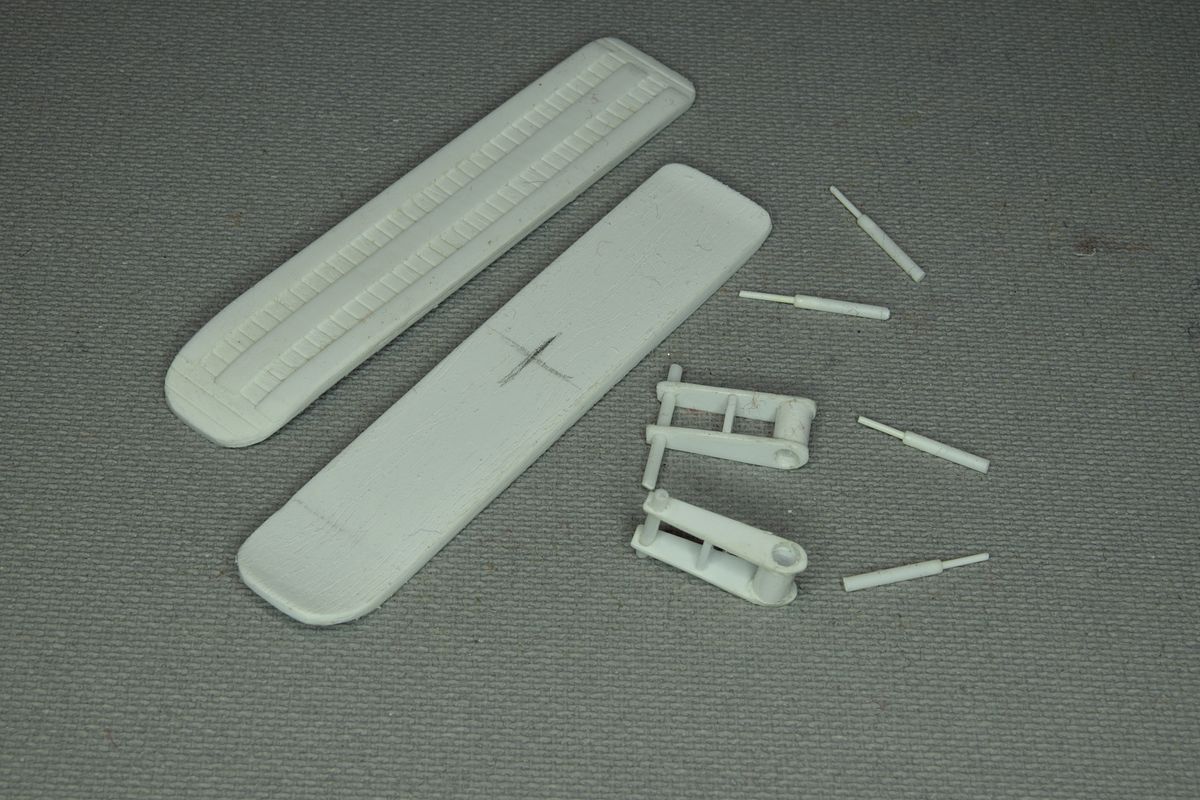

With the strings out of the way I started to make parts for the skis. In the Wings of peace discussion group, I learned that the Monogram skis would be wrong for this plane so with the information about skis given to me I decided to build new ones. |

|
They are of a more modern type than the ones in the Monogram kit. They had shock absorbers. This plane had the "deluxe" variant with twin shock absorbers. For once I am pretty happy with the result and I am glad that I didn't take a shortcut using the Monogram parts. |
Finished at last. |
But I might have missed a frame on the canopy. |
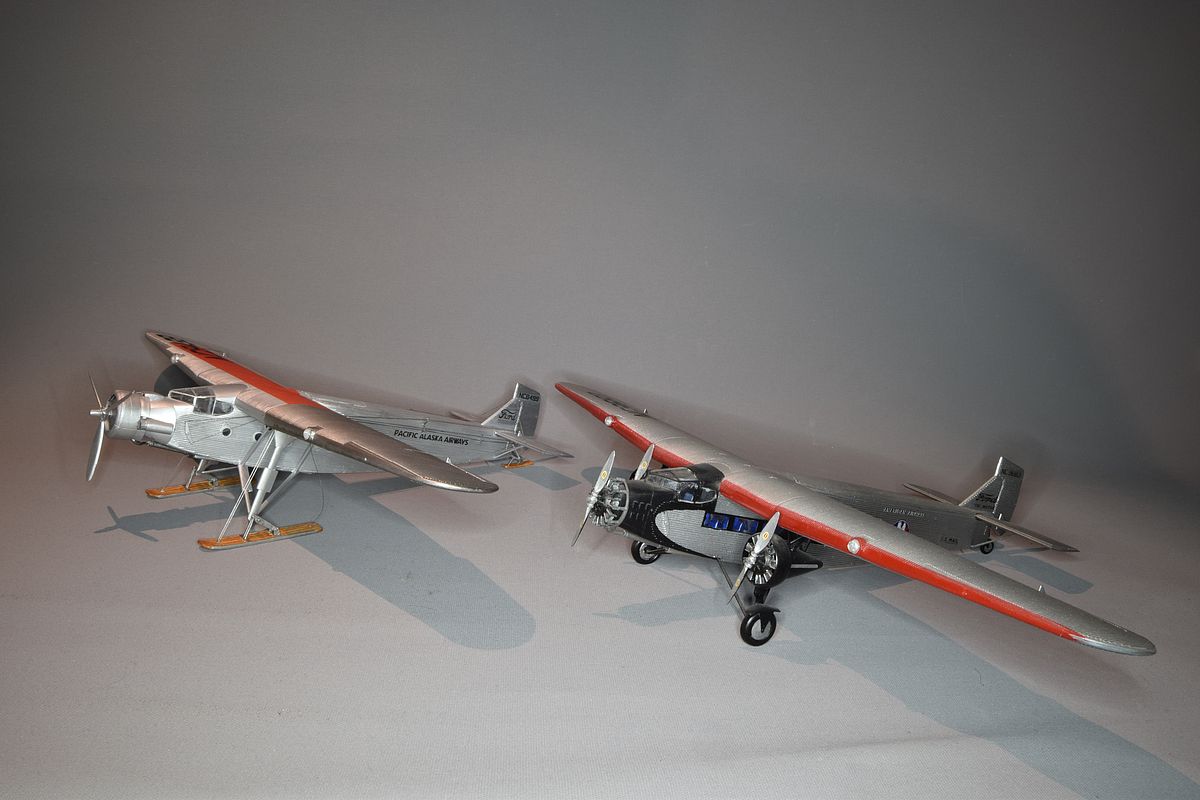

Here it is with my old Trimotor. Same, same but different. |
| Stockholm May 27, 2002 |  |
September 18, 2017 |
----------------------------------------------------.::.
vehicles .::. civilian aircrafts .::. military aircrafts .::.
miscellaneous .::. home .::.------------------------------------------------------ |