
|
-----------------------------------------------------------.::.
vehicles .::. civilian aircrafts .::. military aircrafts .::.
miscellaneous .::.---------------------------------------------------------- |
|
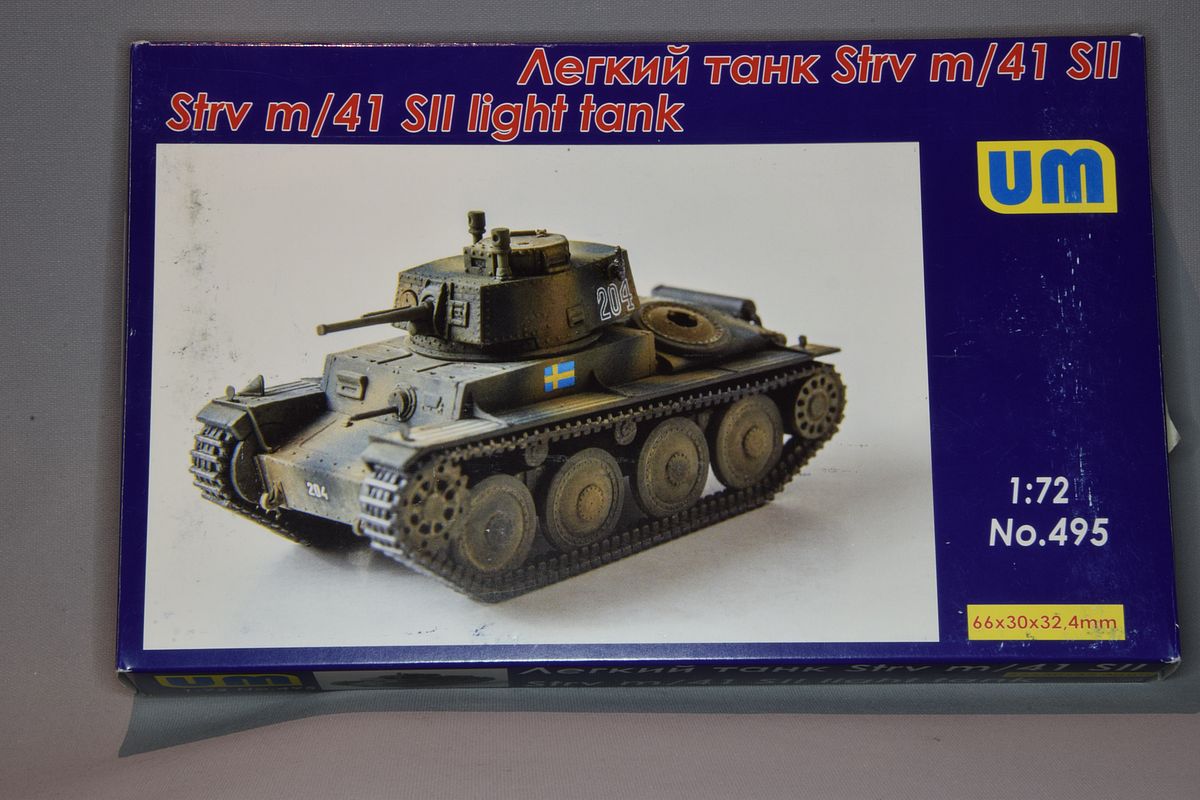
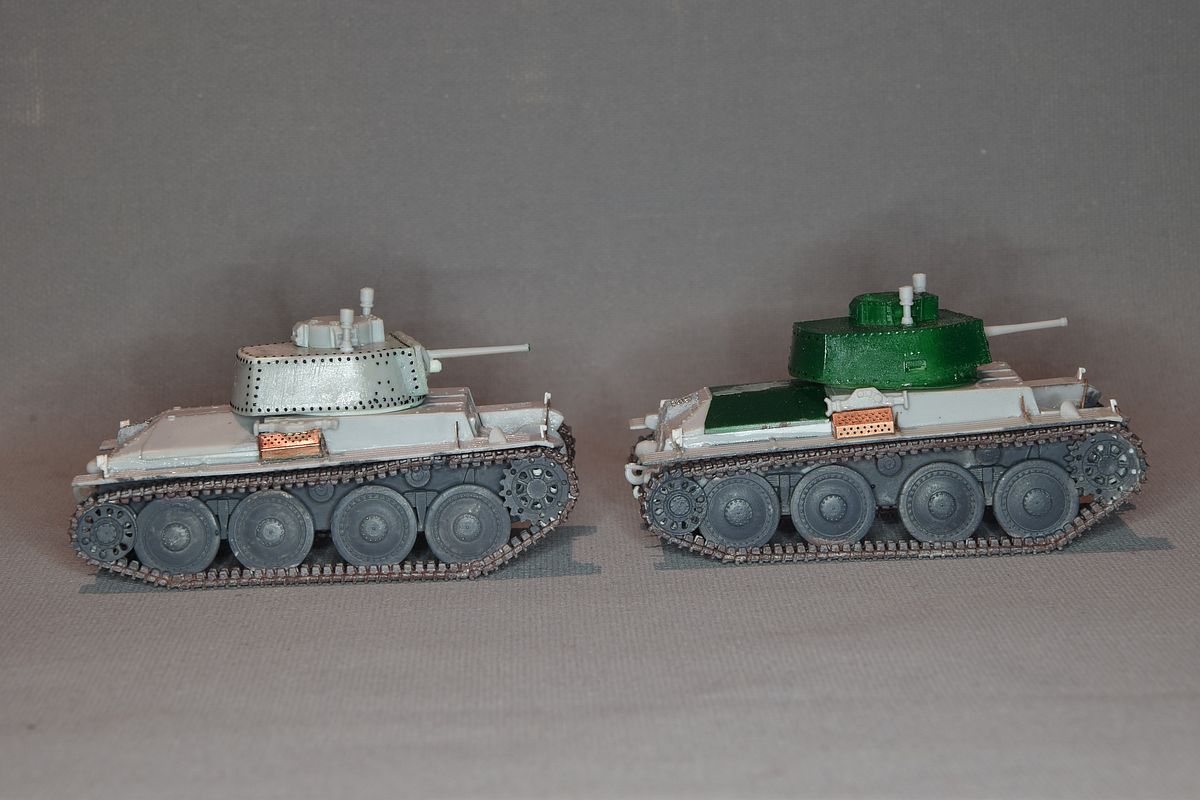
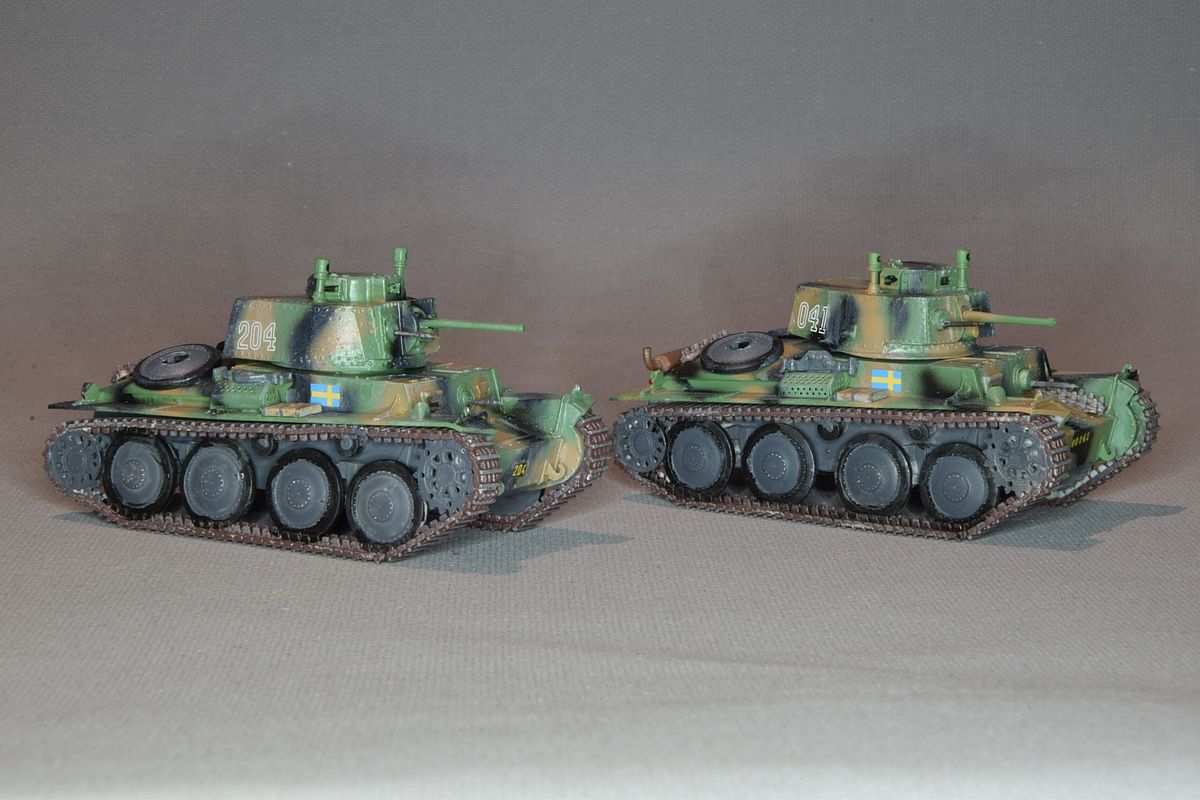
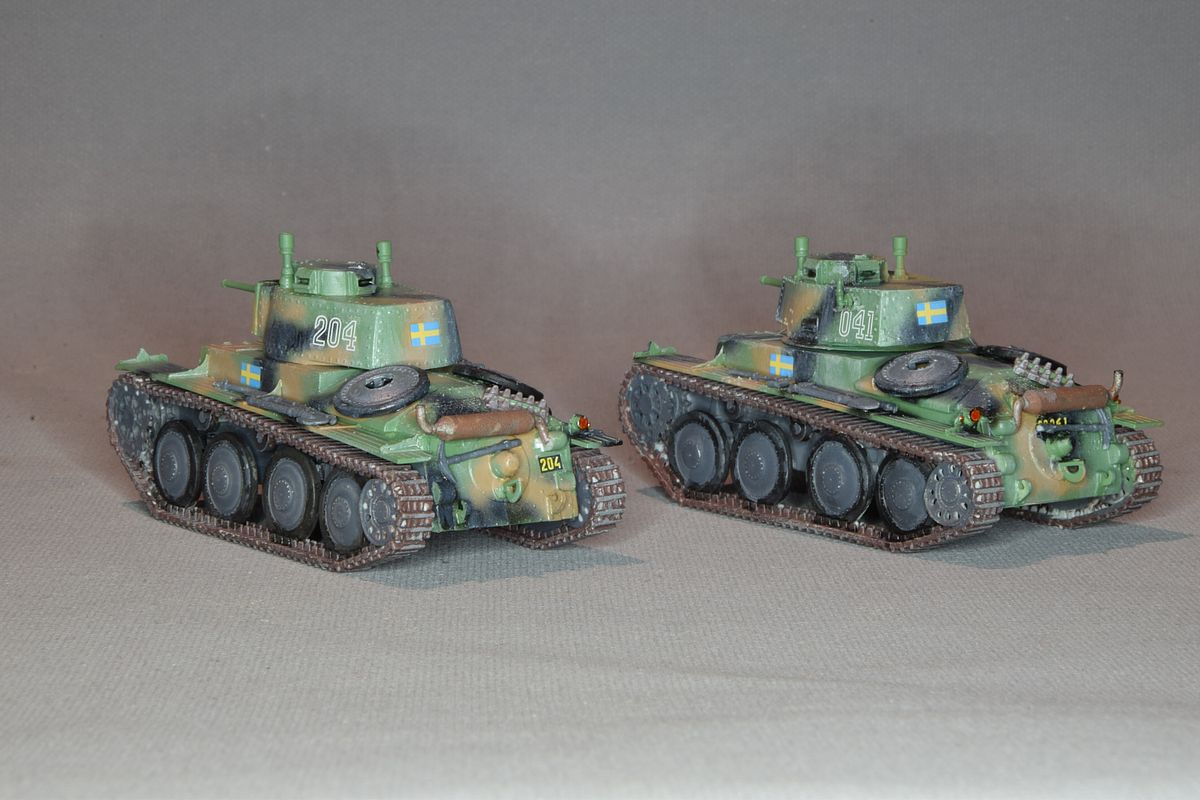
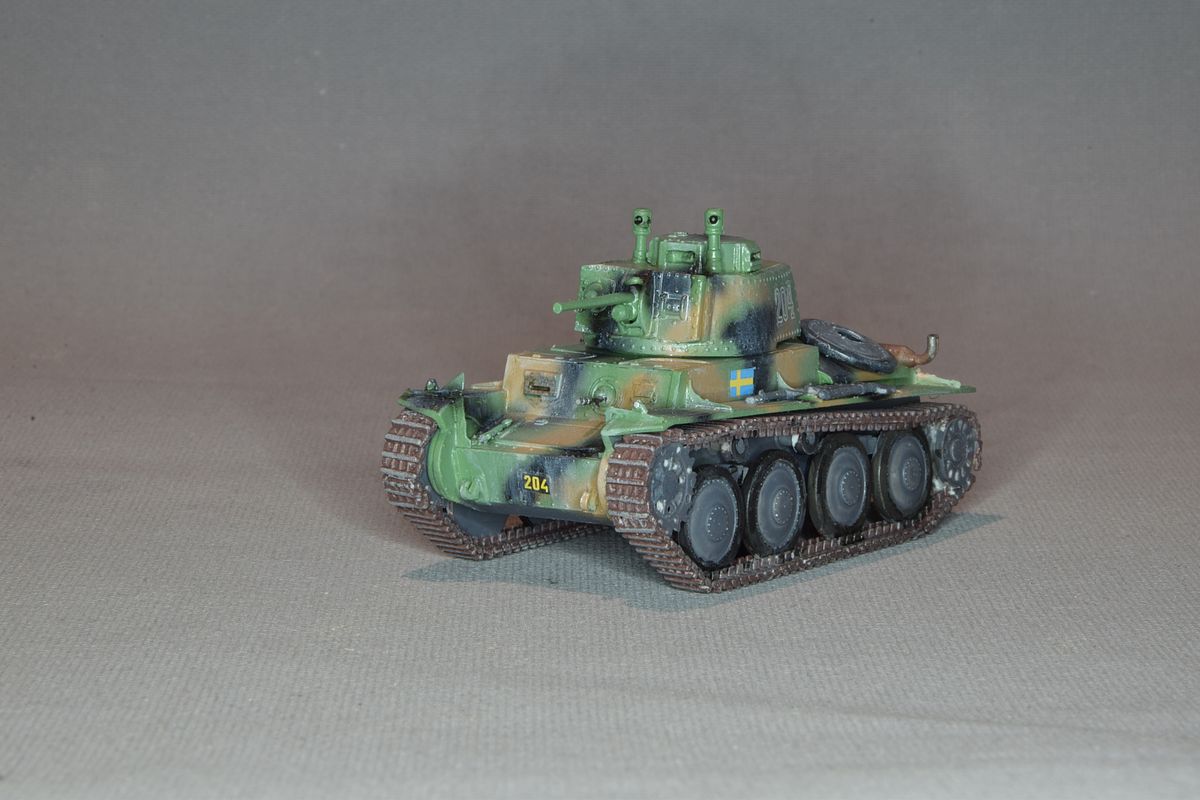
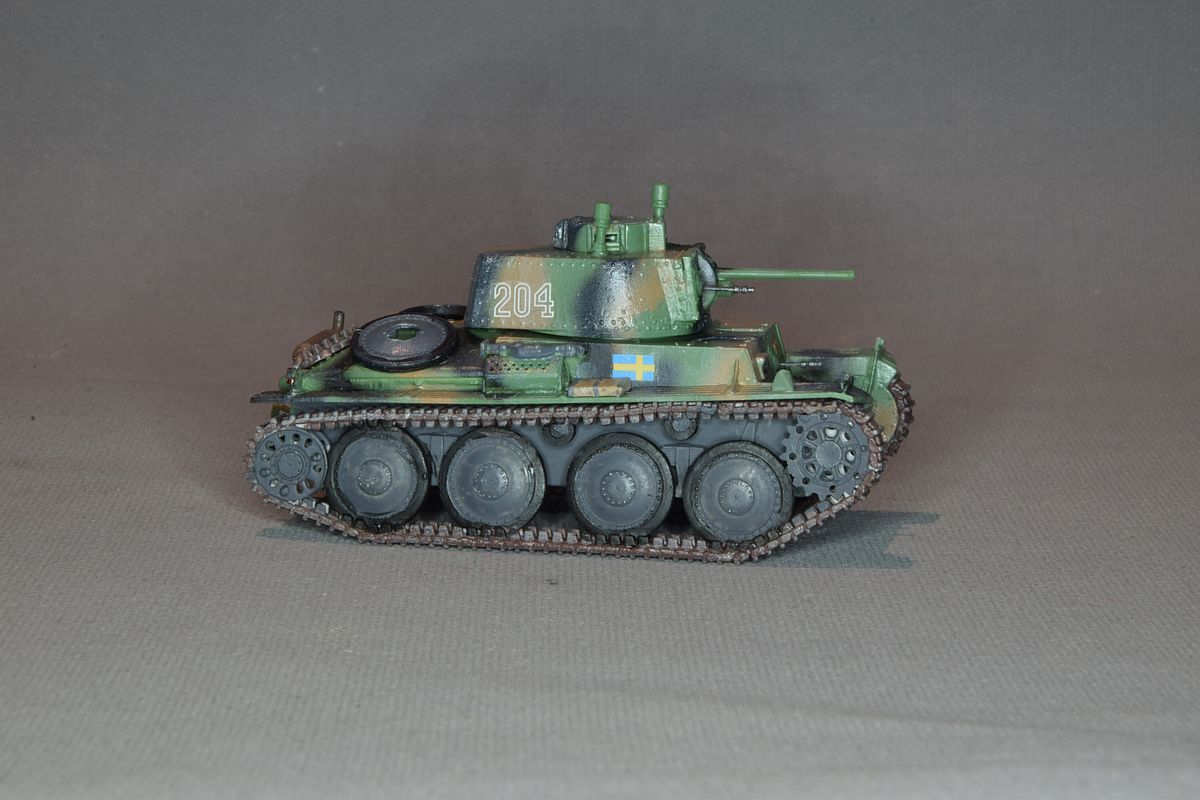
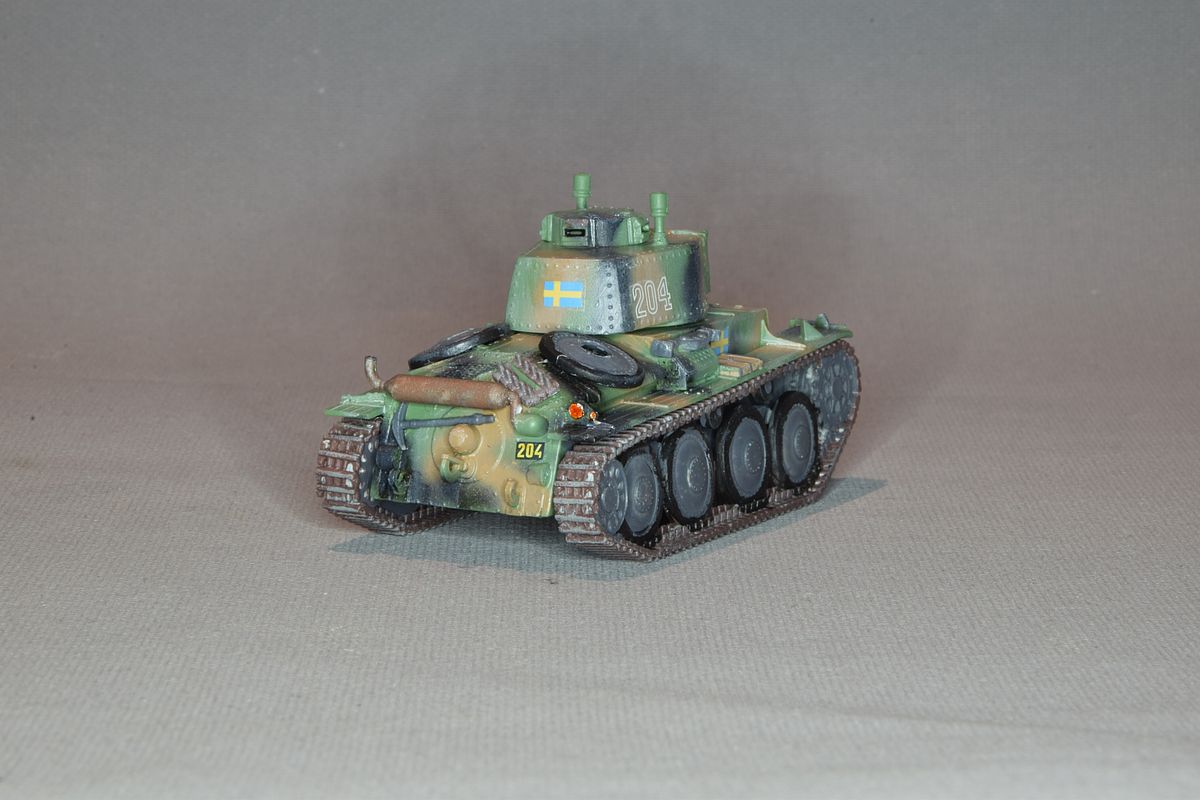
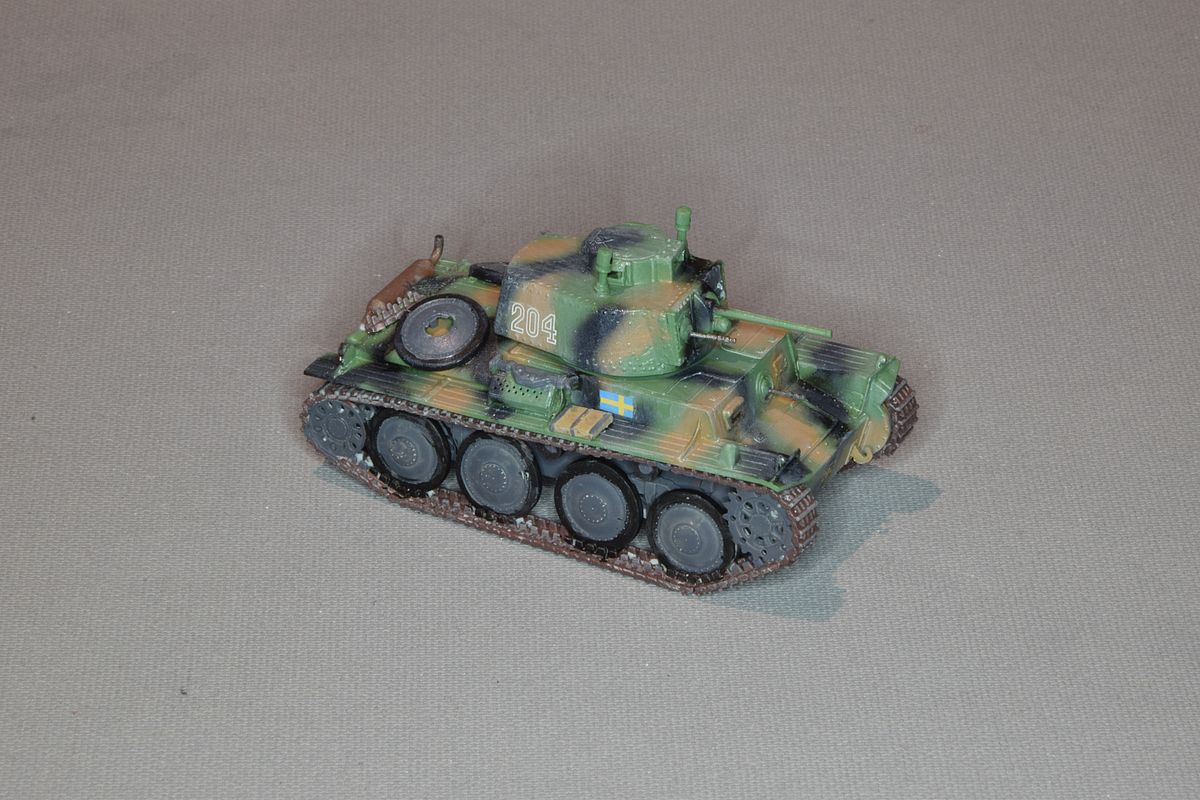
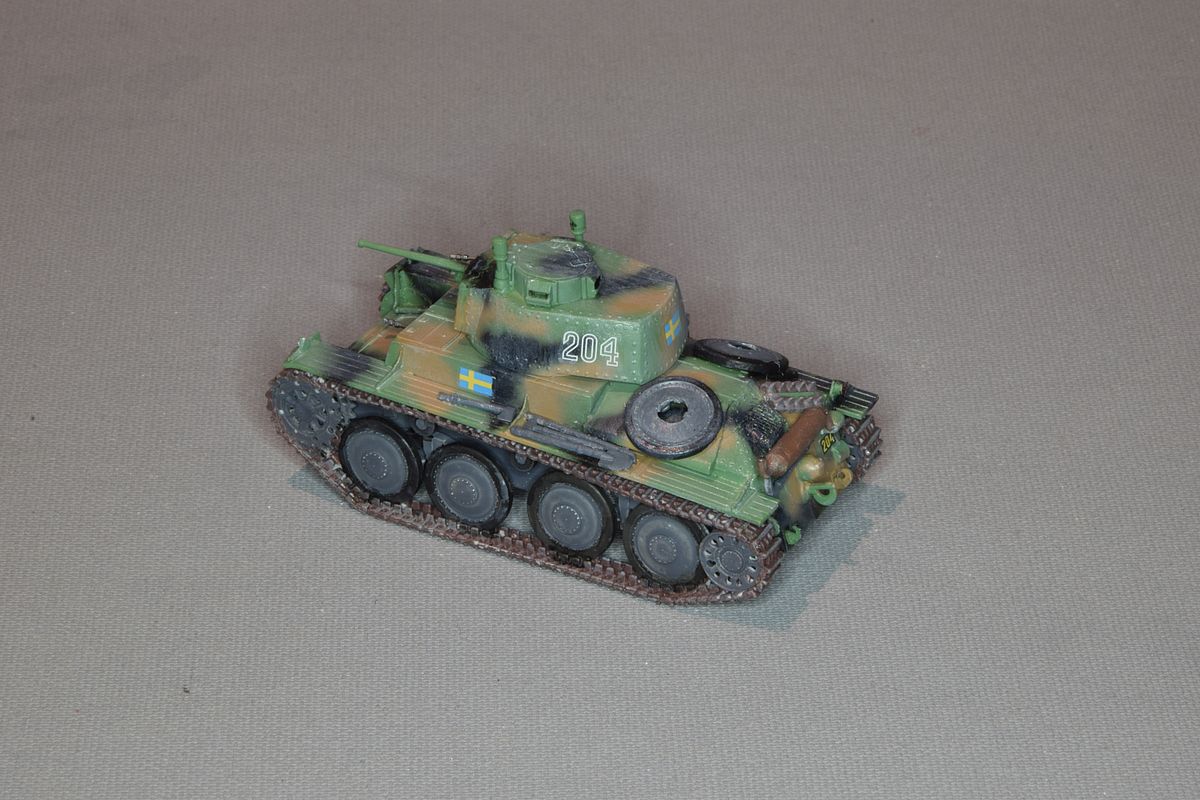
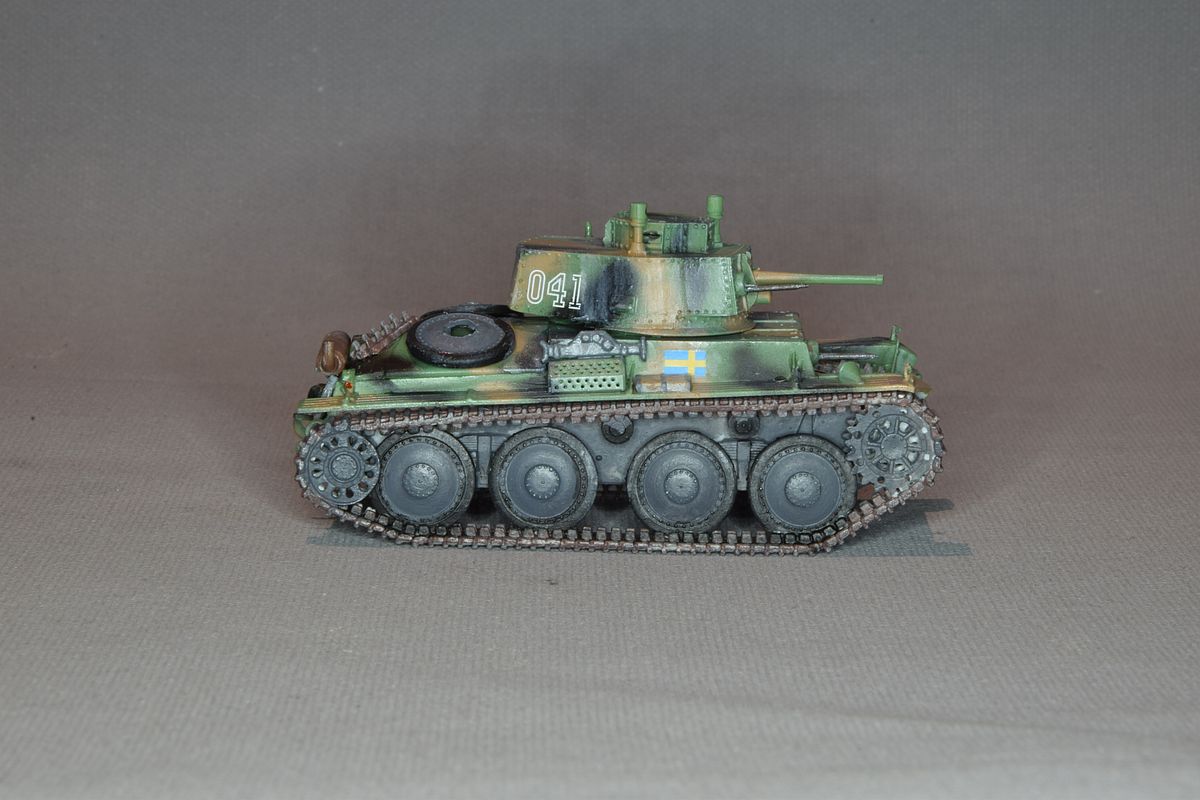
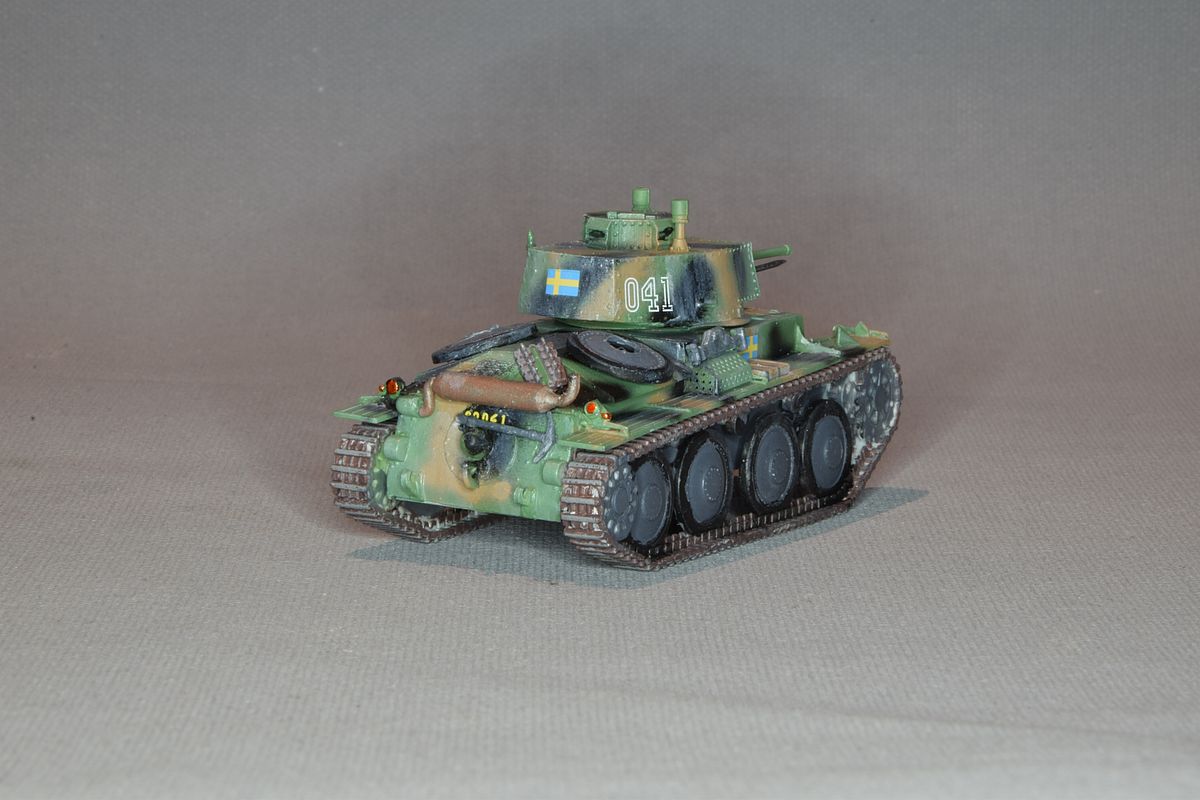
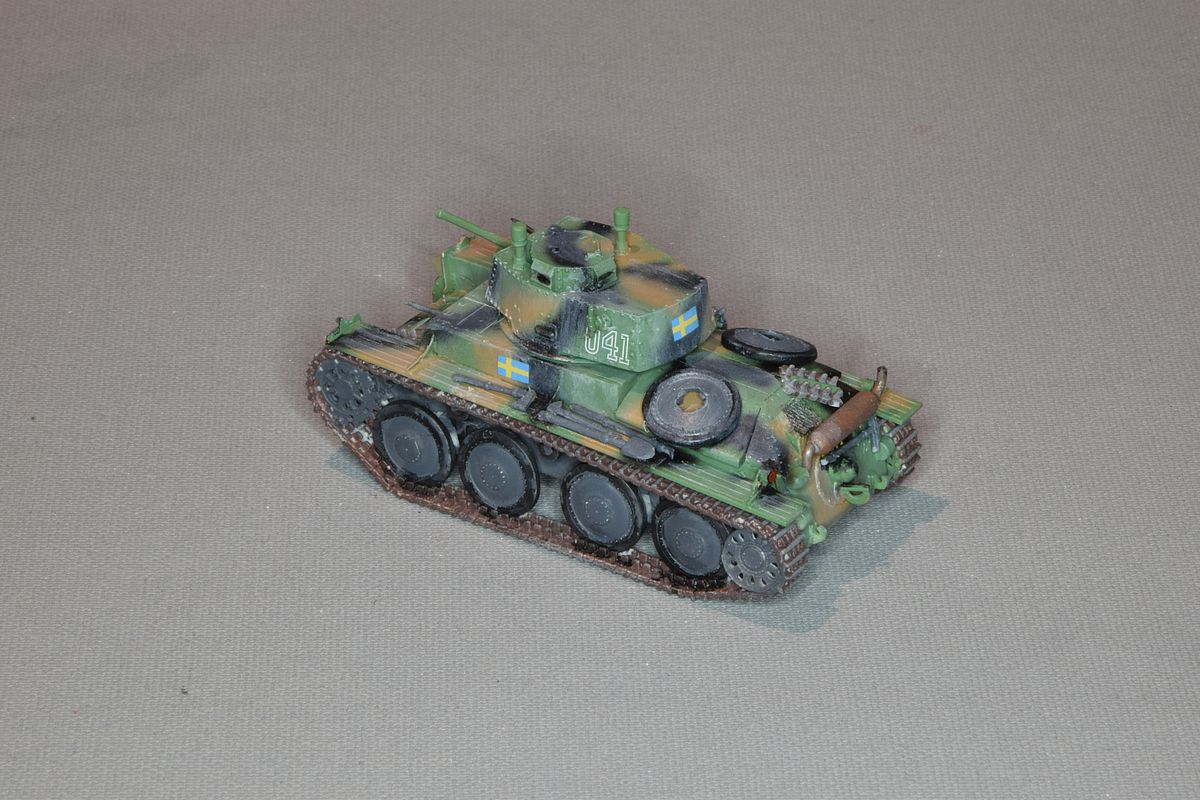
Sweden bought 90 TNH-S tanks, but the delivery was seized by the Germans. They were renamed Panzer 38(t) Ausf.S. Instead, Sweden got a production licence and built the Strv m/41. One thing that differs from the Pz.38 is the turret roof. The Swedish turret has a flat roof all the way back. The Strv m/41 were built in two series. The Strv m/41 SI had an 145 hp Scania Vabis engine. The Strv m/41 SII got a 160 hp Scania Vabis engine. It also got thicker frontal armour and a different turret. The new engine meant that the tank had to be longer for it to fit. The engine deck is longer and the distance between the second and third road wheel are longer. I had tried to build a SI converting the Pz.38(t) from Attack but this project went to sleep. Next, I tried to build a SII converting an UM Pz.38-kit but that also failed. When UM released a Strv m/41 SII kit I decided make another attempt to build a Swedish Panzer 38. |
| (Models finished 2022) |
|
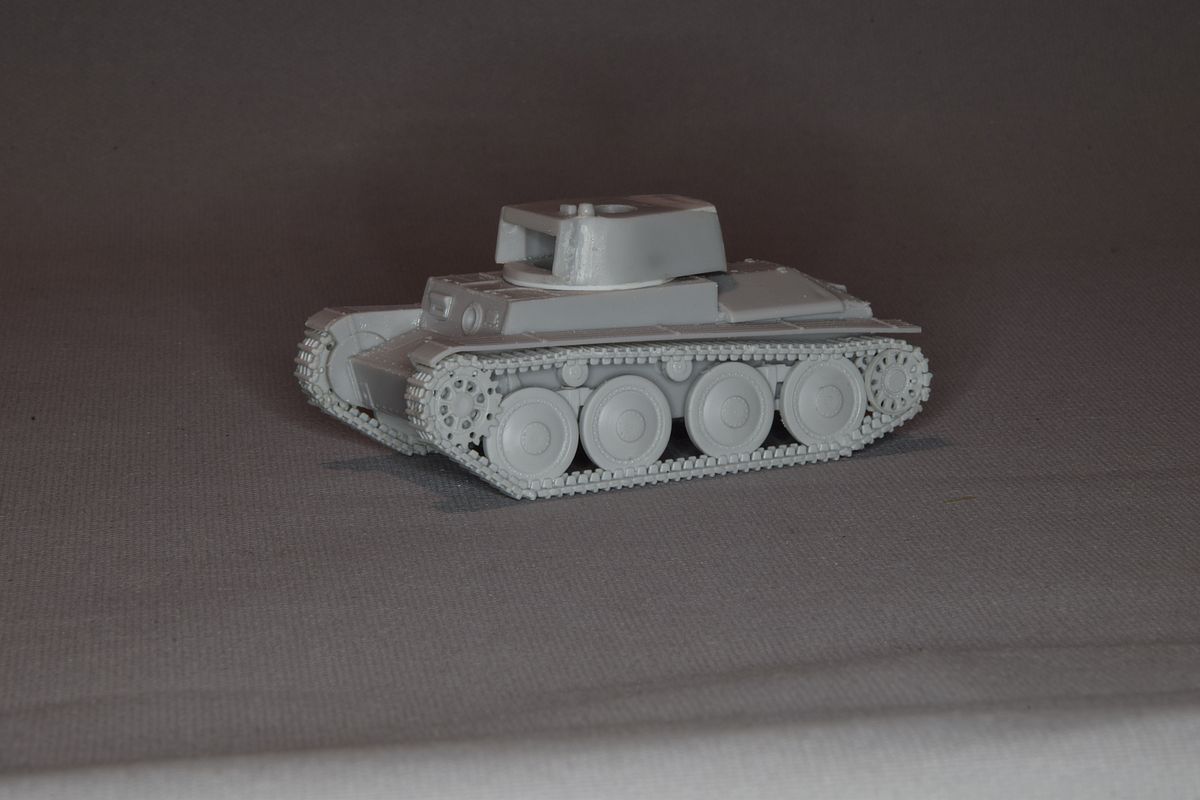
I had been looking at pictures of the sprues in the kit and noticed that the hull was still the same as the Pz38 so it would be to short for a SII version but I saw other things that would help me build a Strv m/41 SI instead. As I already had the Pz38(t) turret from UM largely rebuilt as a Swedish SI version I decided to use it. There are a few other things that need to be done to get the SI. |
|
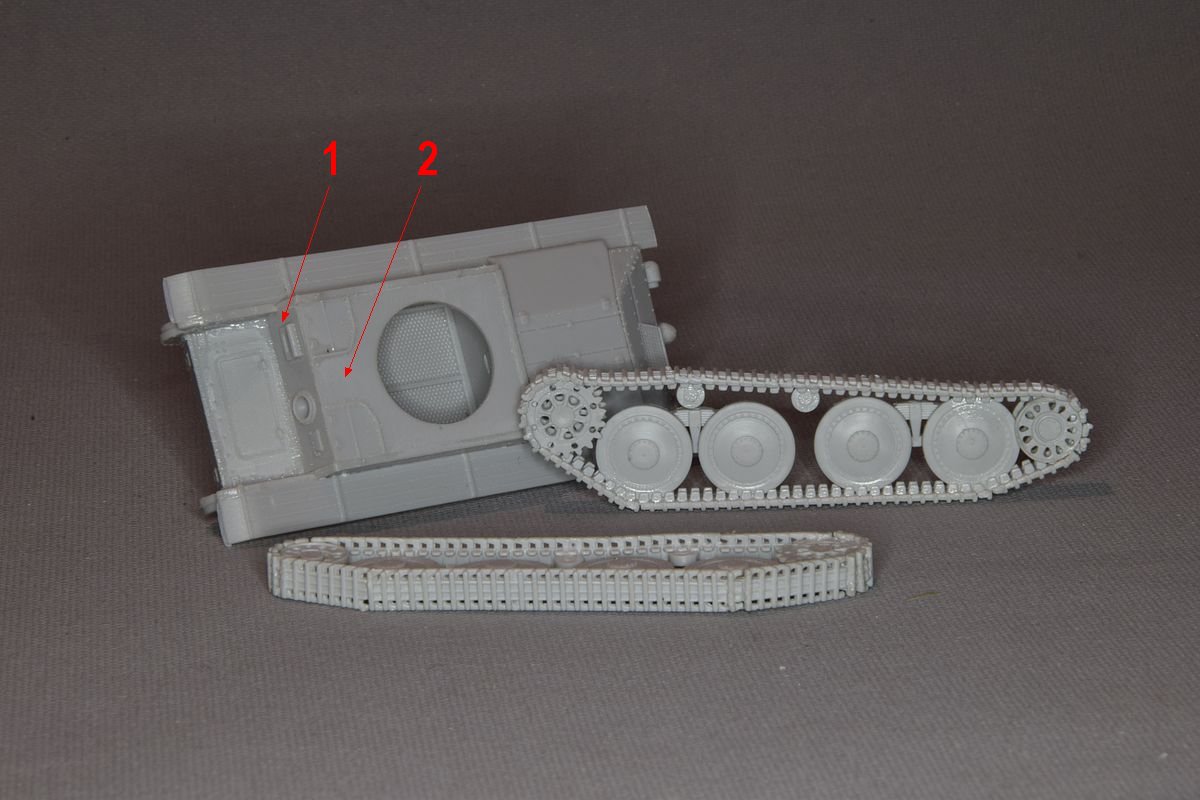
There were some benefits buying the Strv kit instead of continuing the Pz38 conversion. 1. The front plate was correct for a Swedish tank. 2. The roof had two hatches and they were larger. |
|
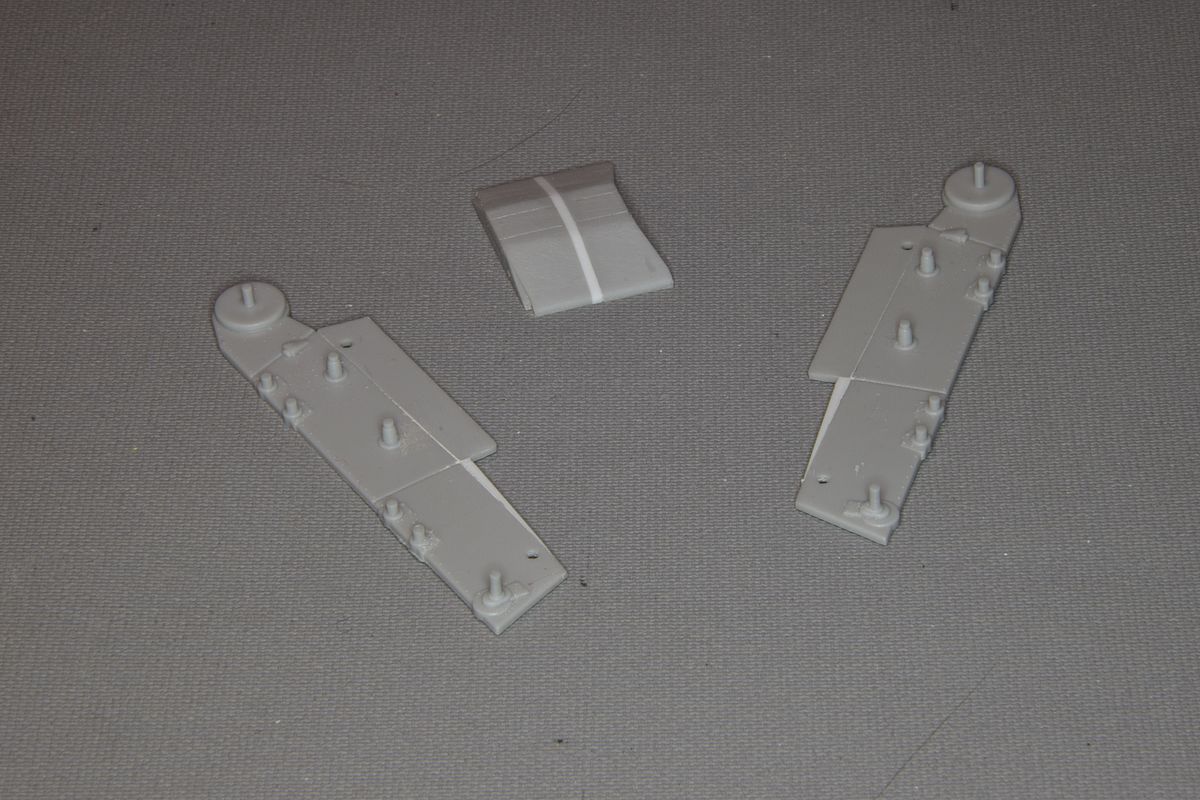
1. I used the standard Pz38 rear plate as the exhaust system is different on the SII versions because of the engine change. 2. But I made some changes so the details became the same as the SII part in the kit. 3. Fenders shorter at the rear. |
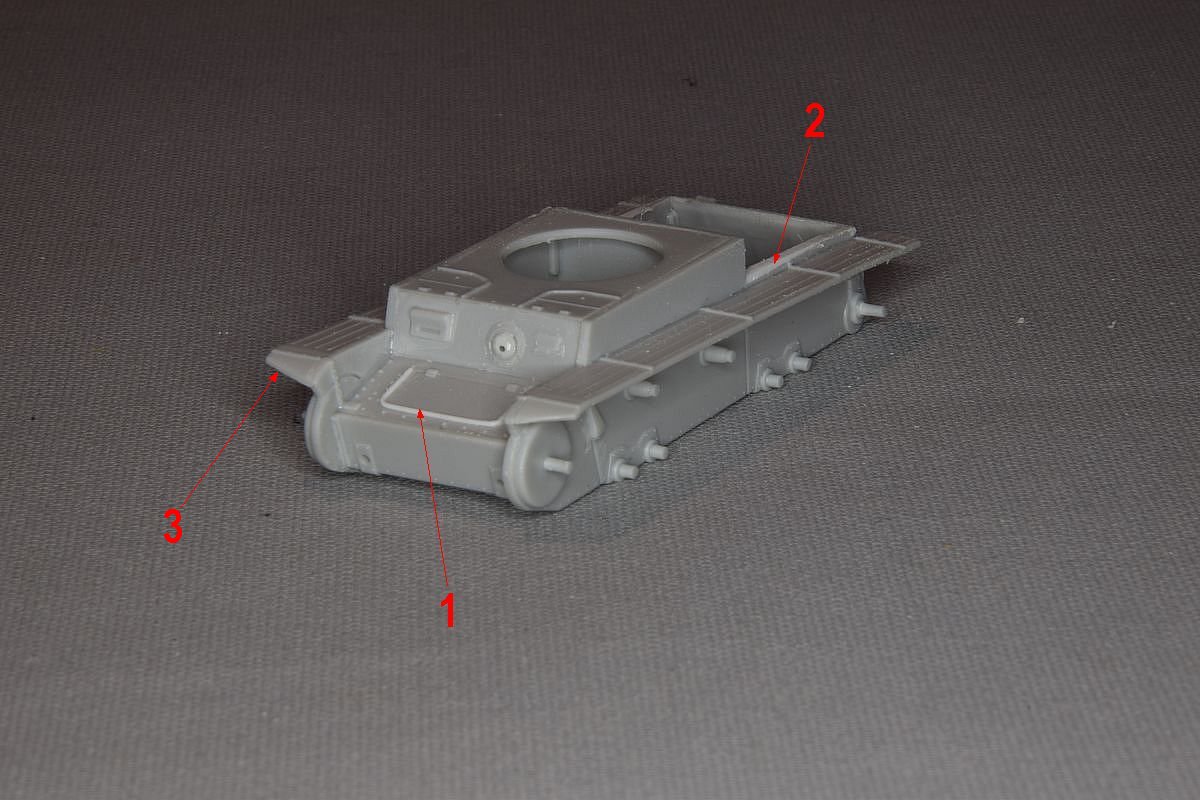
|
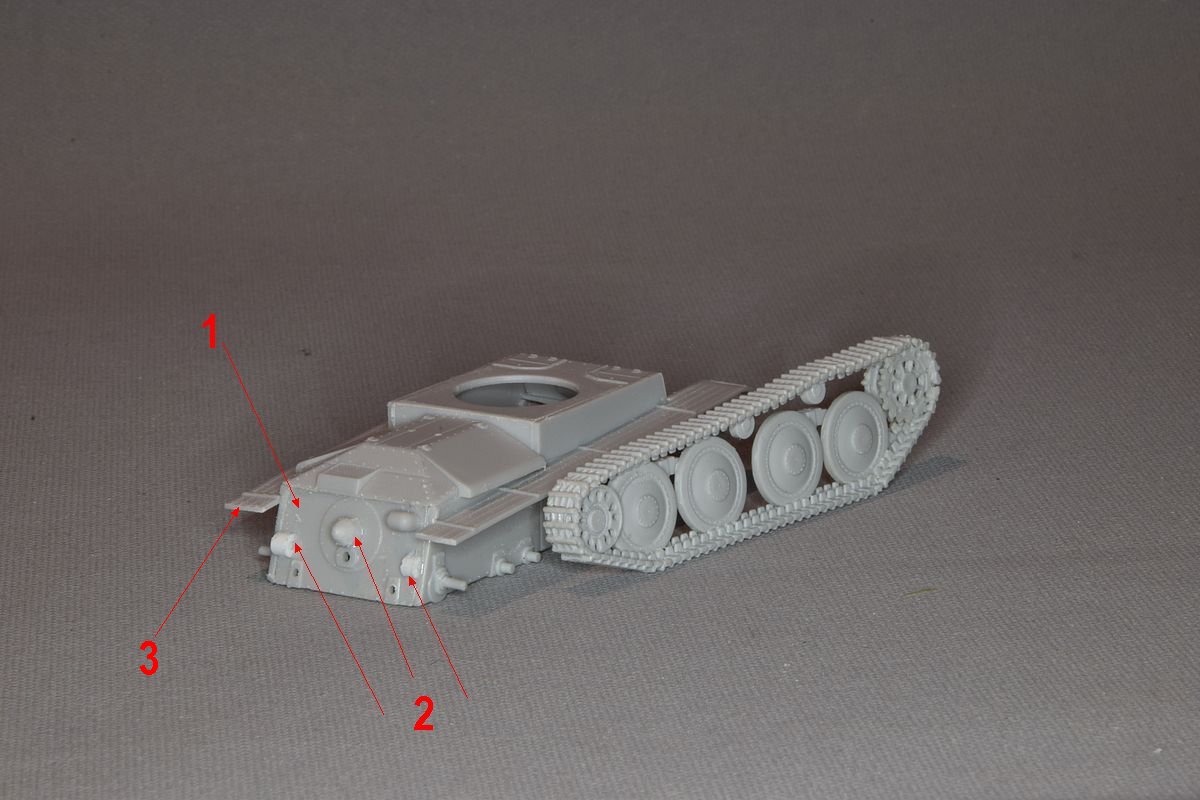
1. I raised the "guard" with 0,3 mm square plastic strip. 2. A 0,7mm high plastic wedge was added under the engine hatch to raise it in the front to the same level as the hull. 3. Front of the fenders reshaped. |
|
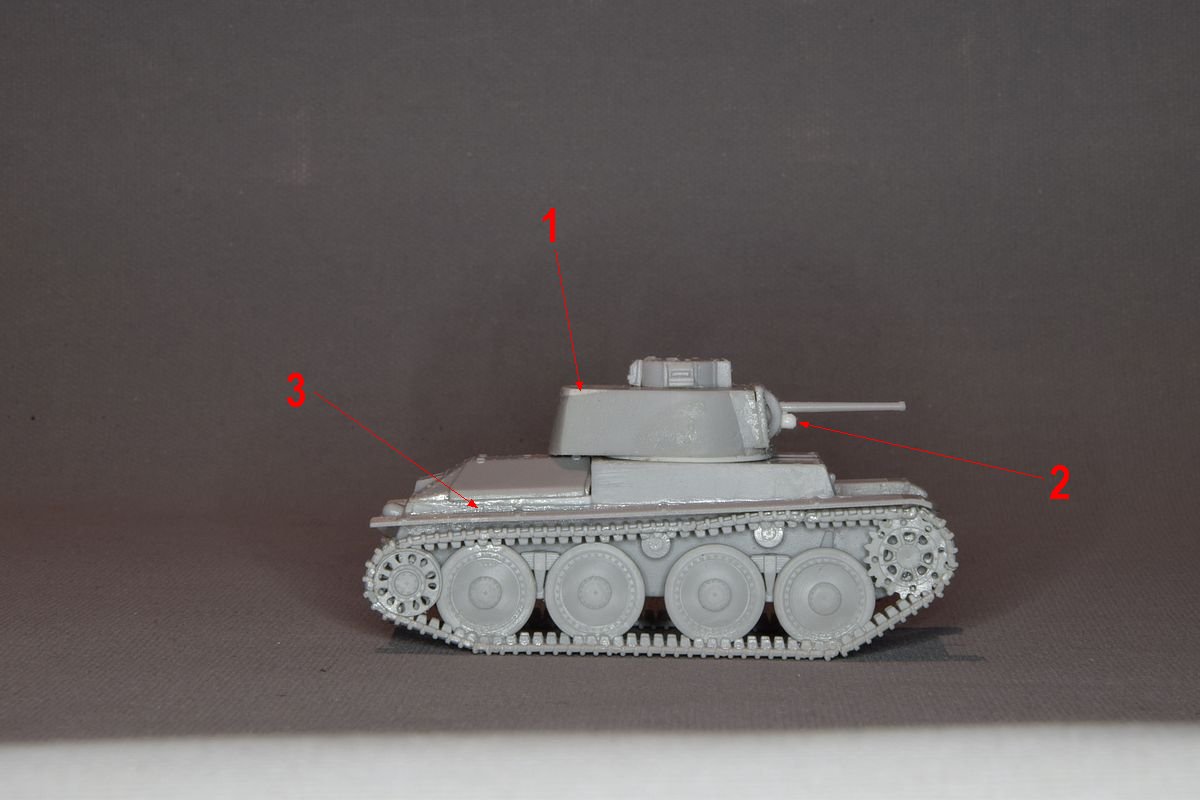
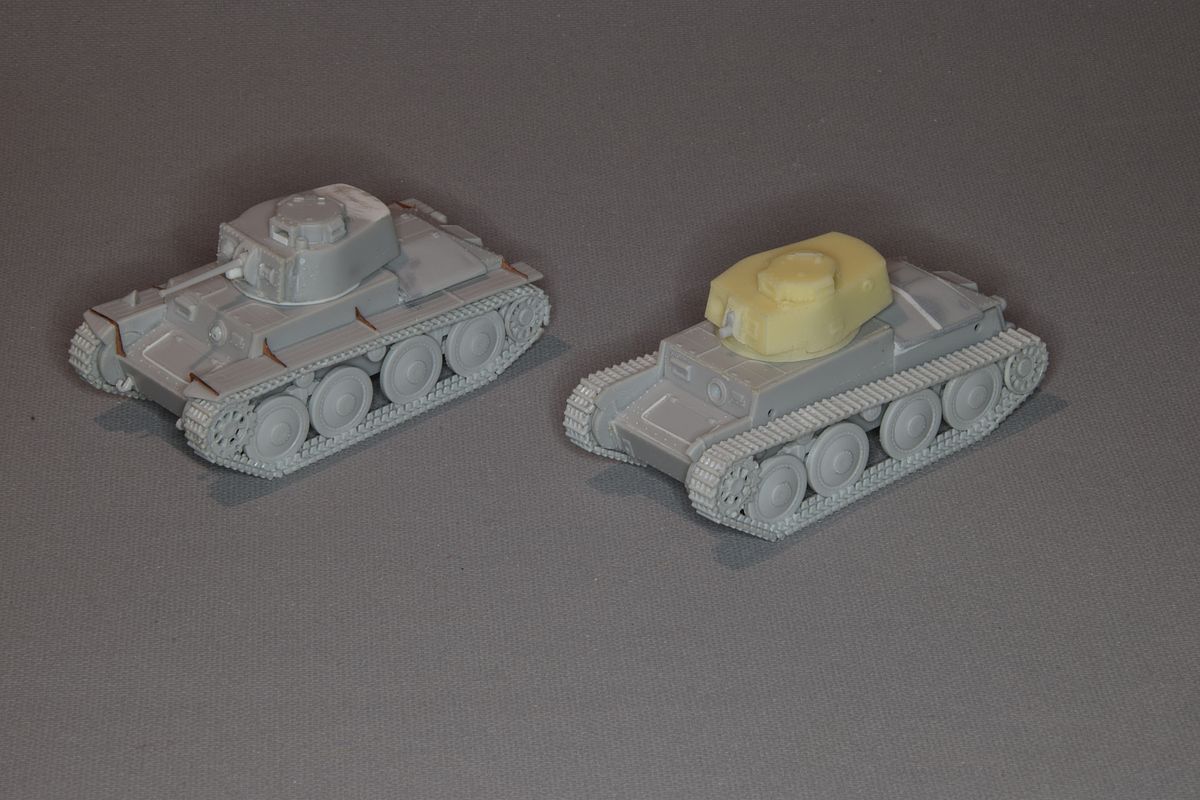
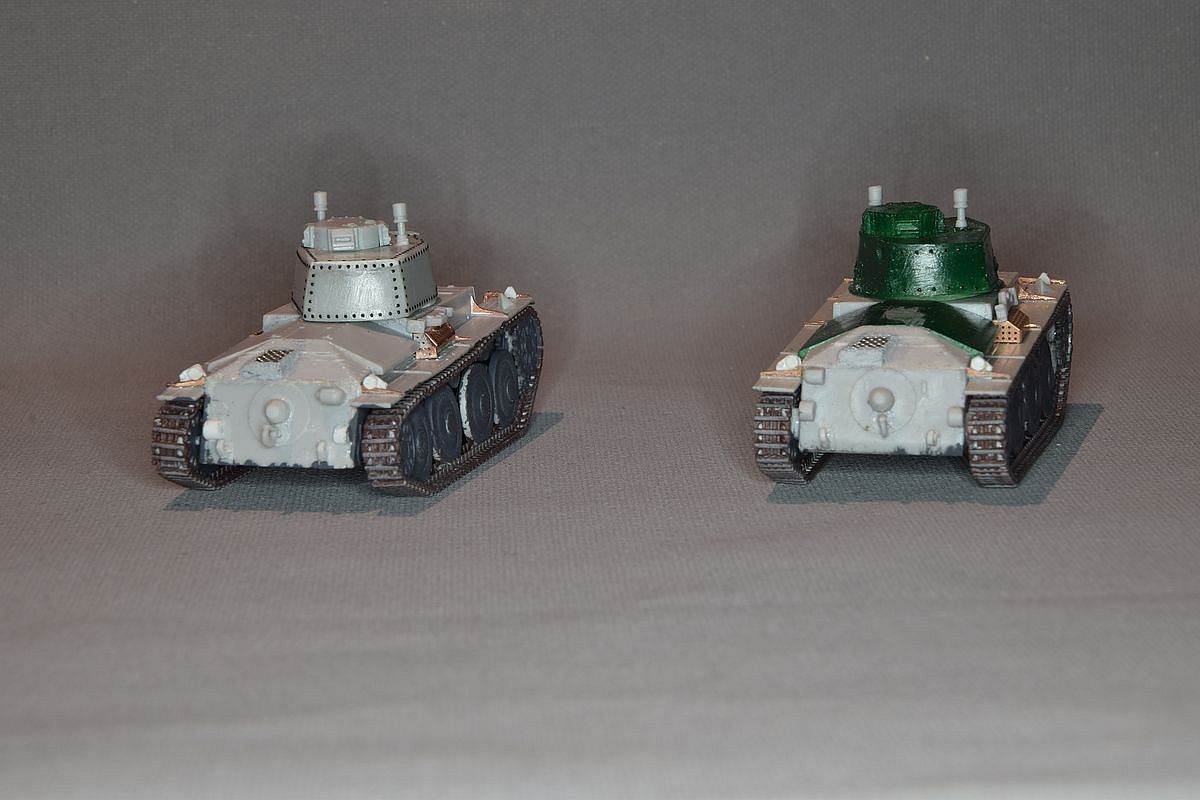
1. The standard Pz38 turret roof was raised at the rear to get a flat roof. 2. The gun was mounted upside-down and a longer "stump" was made under the barrel. I could have used the new gun in the kit but I want to keep the unused turret complete. 3. With wedges under the engine hatch, the fenders run parallel with the hatch. The left over SII turret might be used as a pill box build. While building this I have discovered some things about the kit that made me think that I was wrong in my assumption that a Strv m/41 SII couldn't be built from the kit. As a result I bought a second kit to see if it really is a SII that can be built from it. |
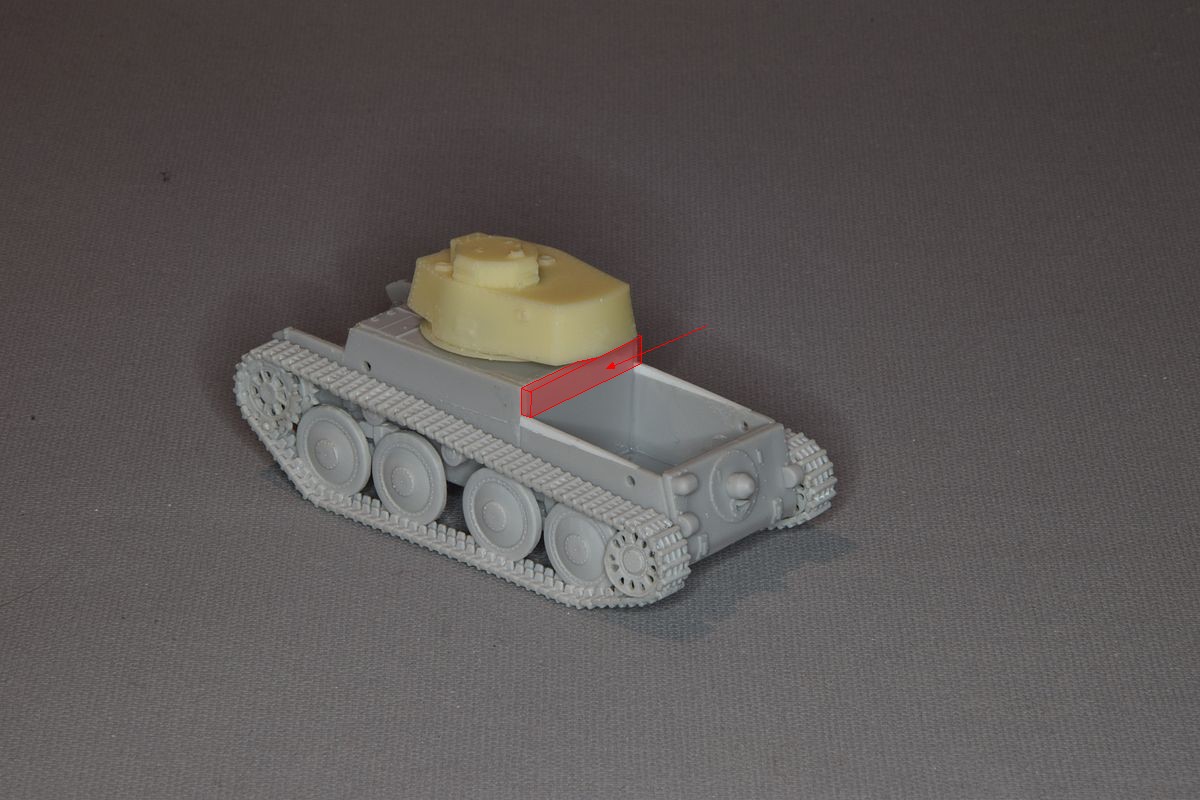
| While building the SI the first thing a noticed among the new parts in the kit was new springs for the rear pair of road wheels. I looked more closely and found that the attachment points had been altered so that the wheels would be mounted further back. As the hull still was the same, I thought that it was to get an illusion of it being longer with the larger distance between the second and third wheel. |
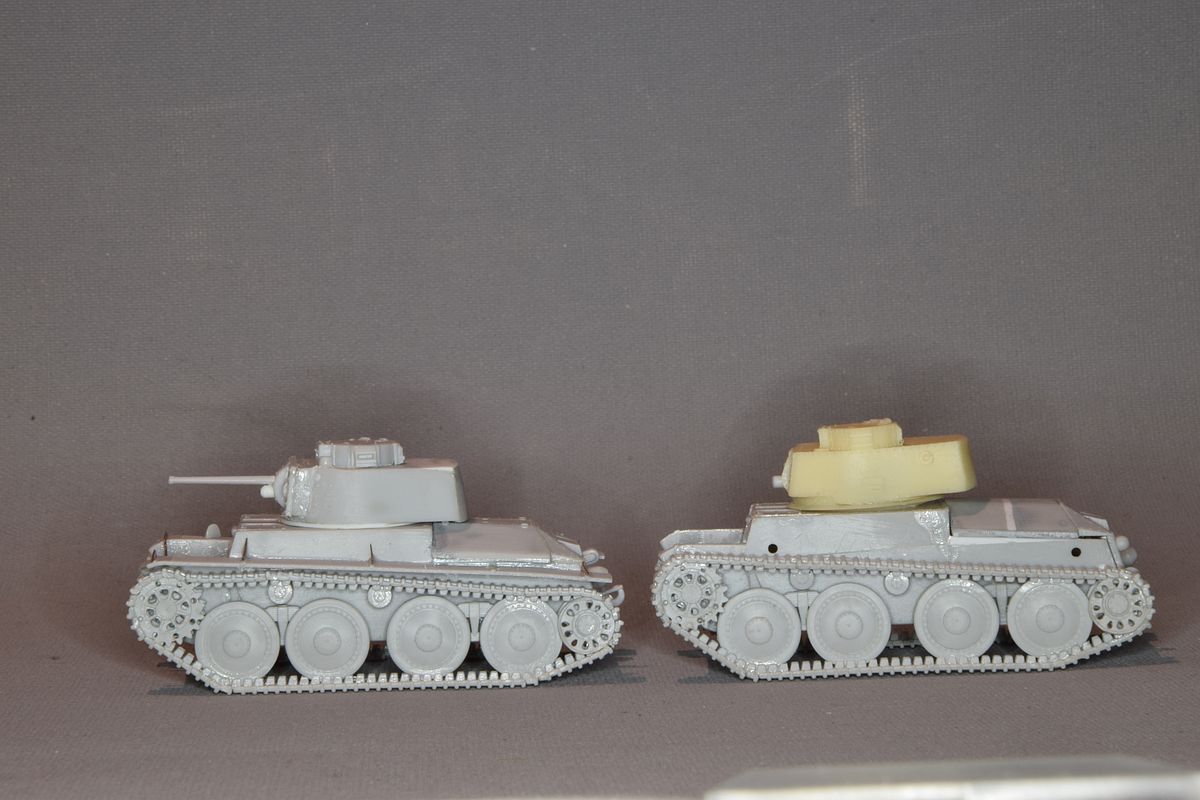
| When I started to build the tracks on the SI I found them to be too long, so I had a closer look at the instructions (I had ignored the different SII part of it) and found that I was supposed to cut off the idler wheel axles and add new ones behind the old ones. I found this strange as they would come very close to the end of the hull so I had a look at the rear wall that I couldn't use on a SI. What I found was that the new rear wall isn't placed between the hull sides as before, the new one is placed behind the sides adding the missing length of the hull. I find this a smart and easy solution. This was the point that made me buy the second kit and start on a SII. The gap between the second and third road wheel on the SII can be seen on this picture. |
| I added the same wedges to the hull as on my SI build, but there is one thing that I don't like of how UM made this kit. They didn�t make a longer engine deck. |
| Instead, they want you to add a piece to the rear, so the engine hatch is moved back. I decided to cut the engine hatch and add some plastic to make it longer instead. OK, I was wrong about the kit. UM has made (almost) all of the changes needed for the Strv m/41 SII but I don't understand why they didn't make a new engine deck. They could have done that in resin like the new turret. |
| Archer rivet decals was used on the SI turret. |
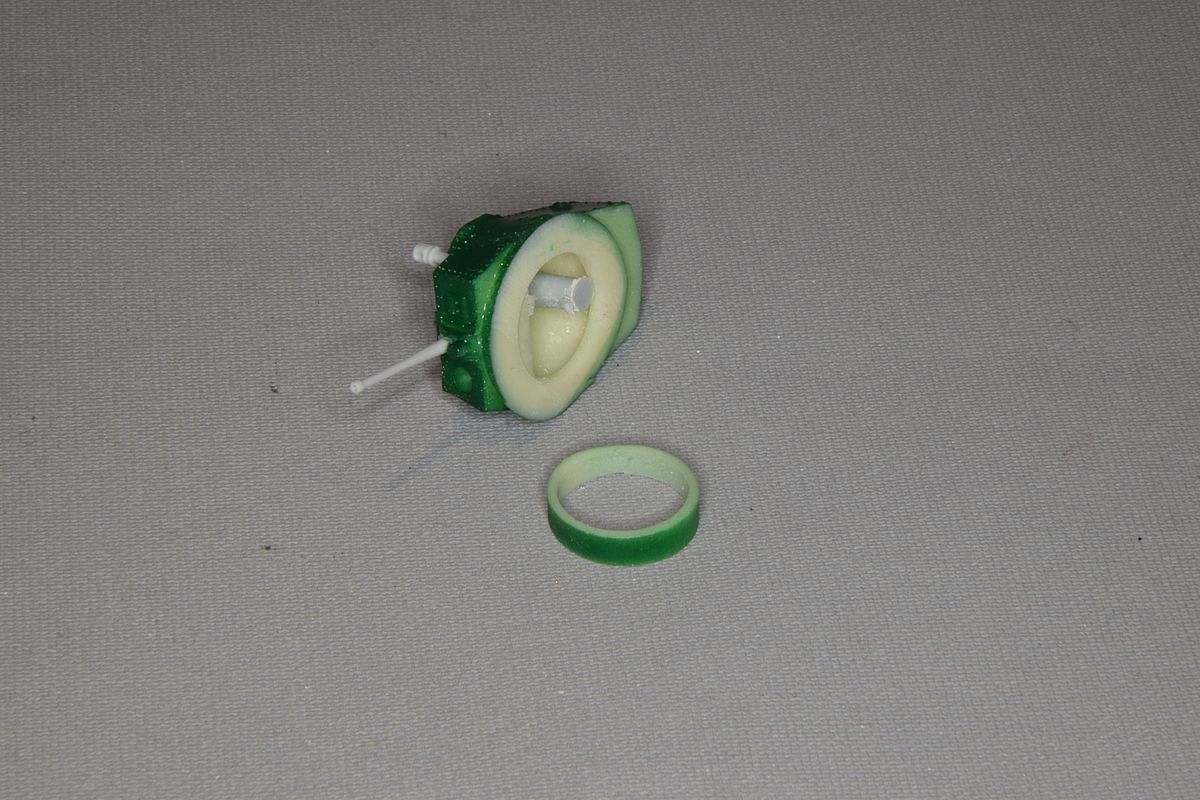
| Almost ready for paint. I need to add some lights and there should be something on the front. A small ring on the end of a rod. It is irritating, I have a feeling that I have seen something similar in some kit. |
| But the air intake in the rear still irritates me. I don't know if I should ignore it or add a larger piece of stainless mesh above it and reshape the walls. |
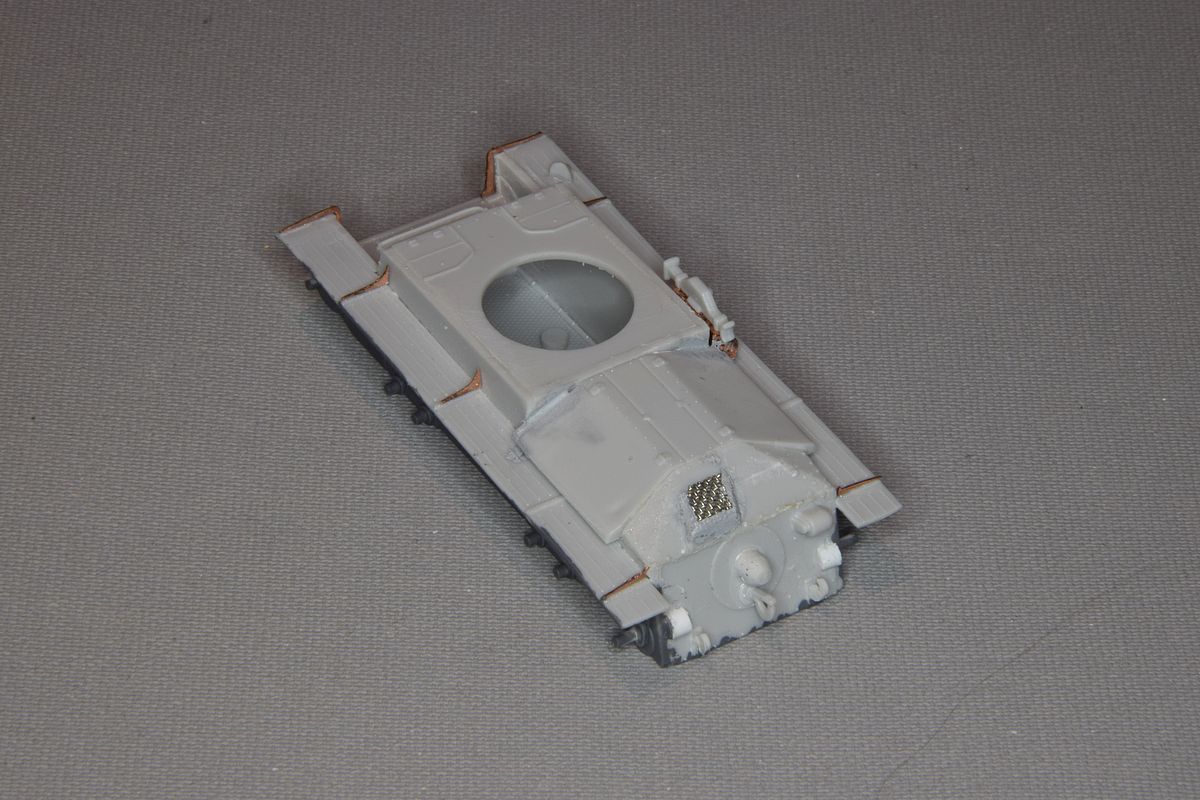
| In the end I redid the air intakes. It isn't good but perhaps a little better. |
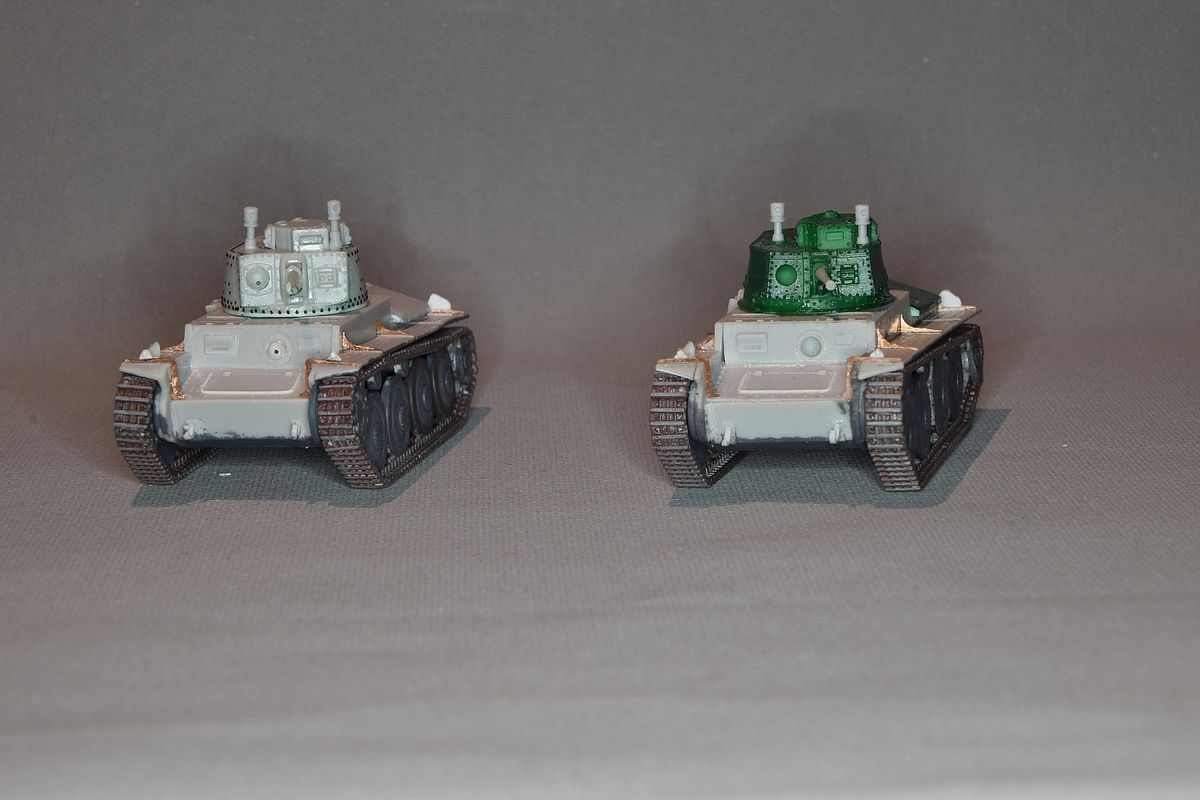
| I found that I couldn't get a good fit between the hull and the resin turret. I got a gap between them, and the turret was wobbly. I realised that the turret bottom wasn't flat, so I had to cut the round insert off and sand the turret flat before gluing the insert back. The green colour is because I needed a gloss surface for the rivet decals, so I grabbed the first gloss paint I found but it wasn't the smartest idea. It wasn't easy to see the black rivets on the dark green surface, so it was hard to see what I was doing. |
| At this point the build had been idle for a couple of month. |
| The last things that were needed were reflectors and rear lights. |
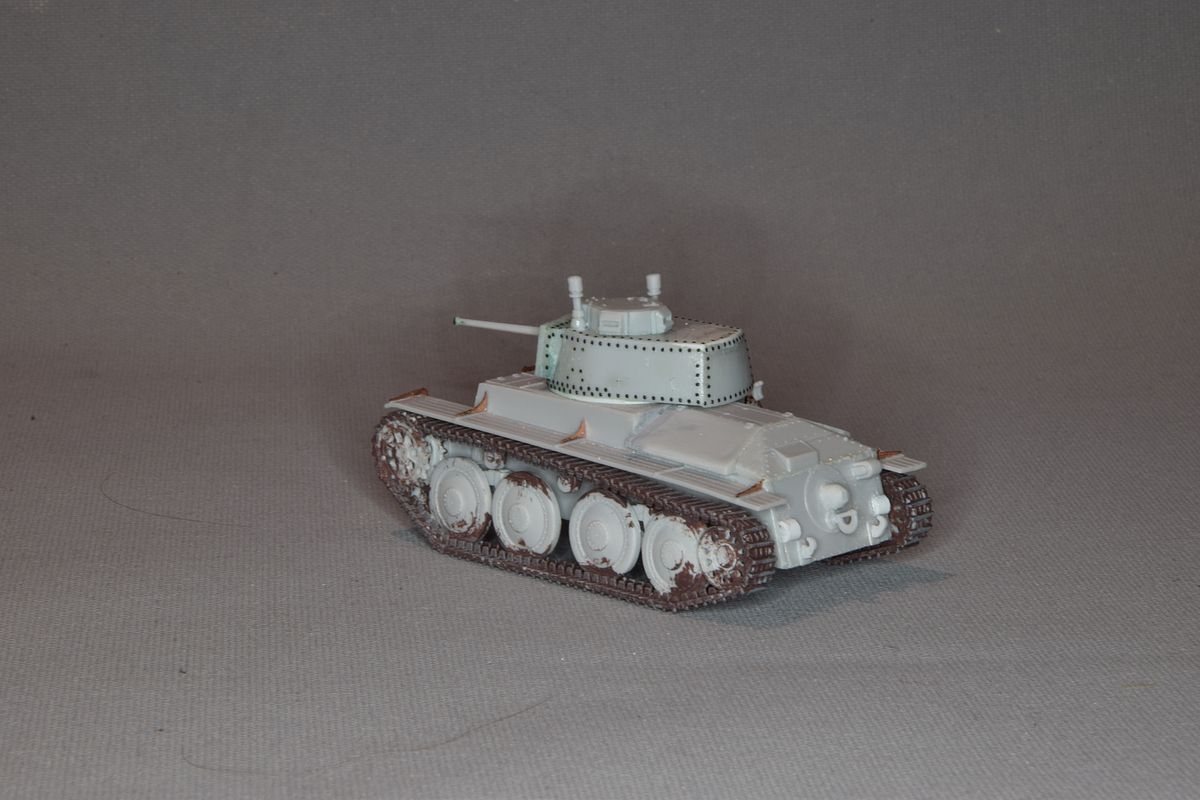
| I think that I have them ready for paint now. |

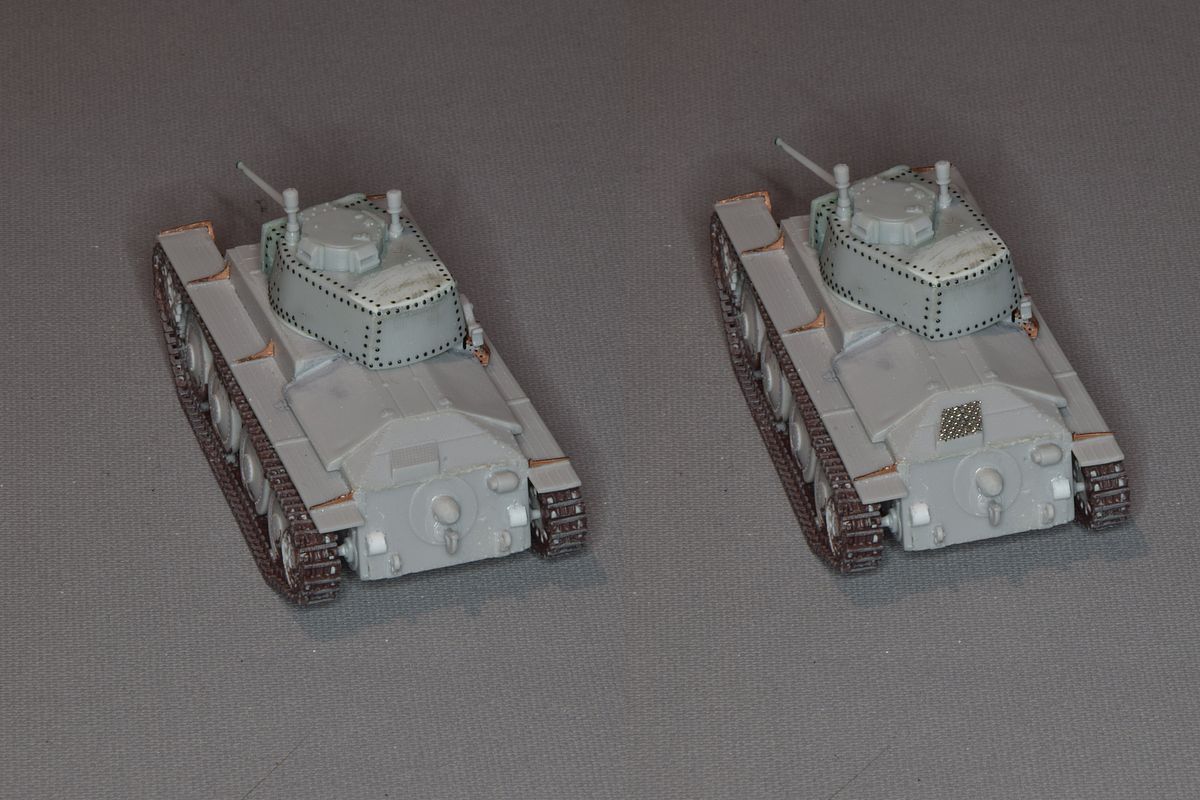
| At last I could lay the first coat of paint on them. |
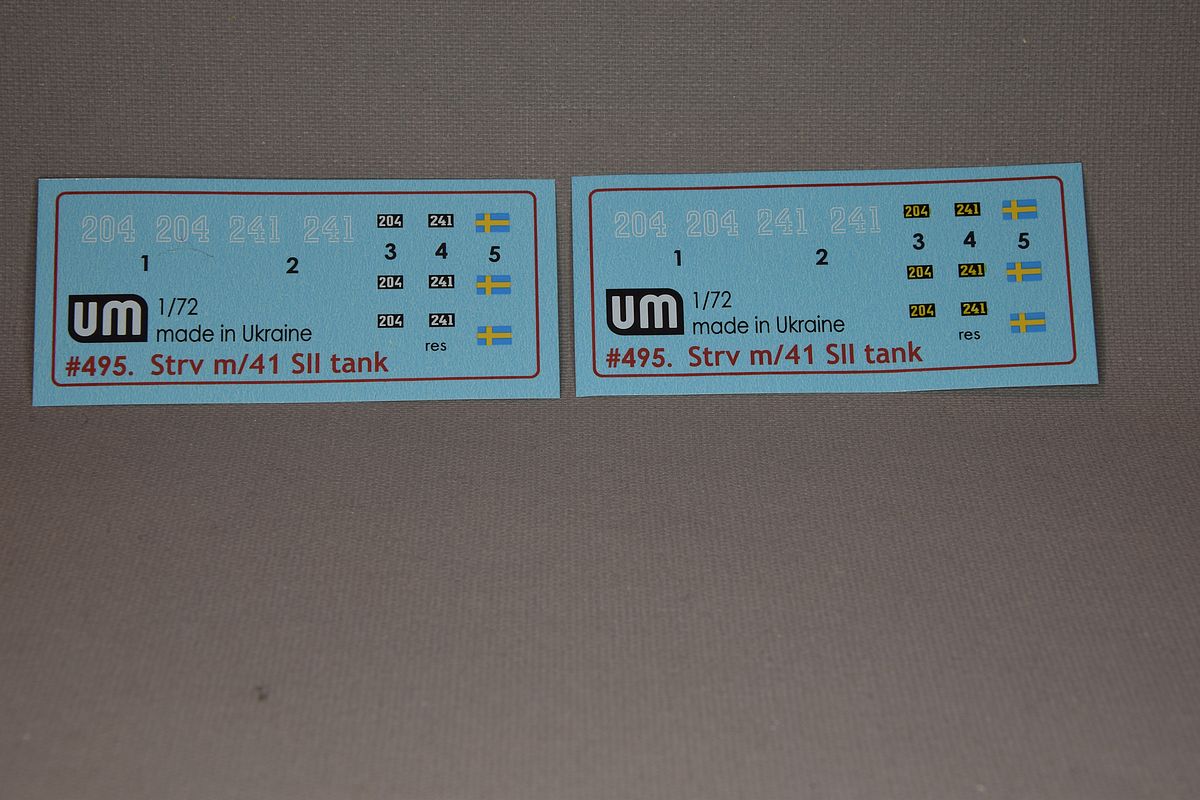
| When I started to investigate how to mark the SI kit, I noticed that the decals in the kit are wrong. They are not for the SII but for the SI and the small registration plate has got wrong colours. It should be yellow numbers on a black bottom, but UM made the letters white. It should not be a big problem as I could use aftermarket decals instead, but I decided to make an experiment. I painted the numbers with Tamiya clear yellow. I thought that this would not be visible on the black background, so I brushed the whole number plate yellow. |
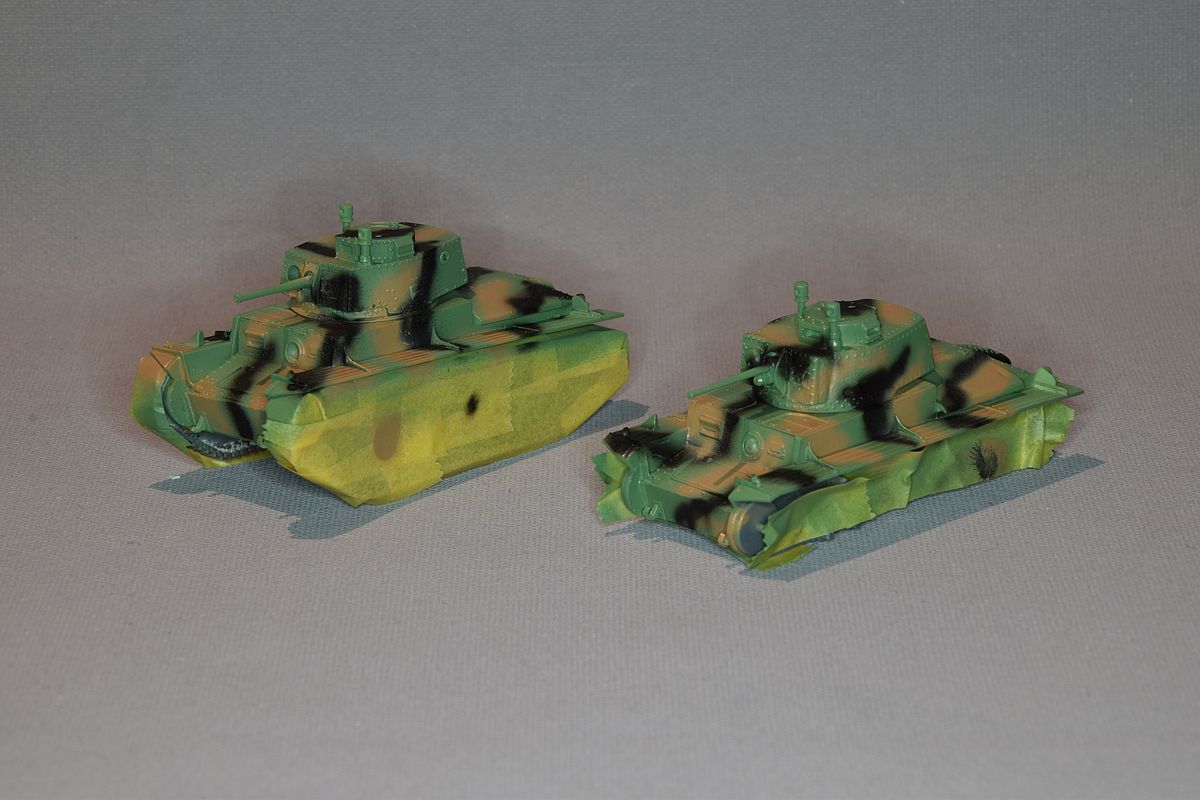
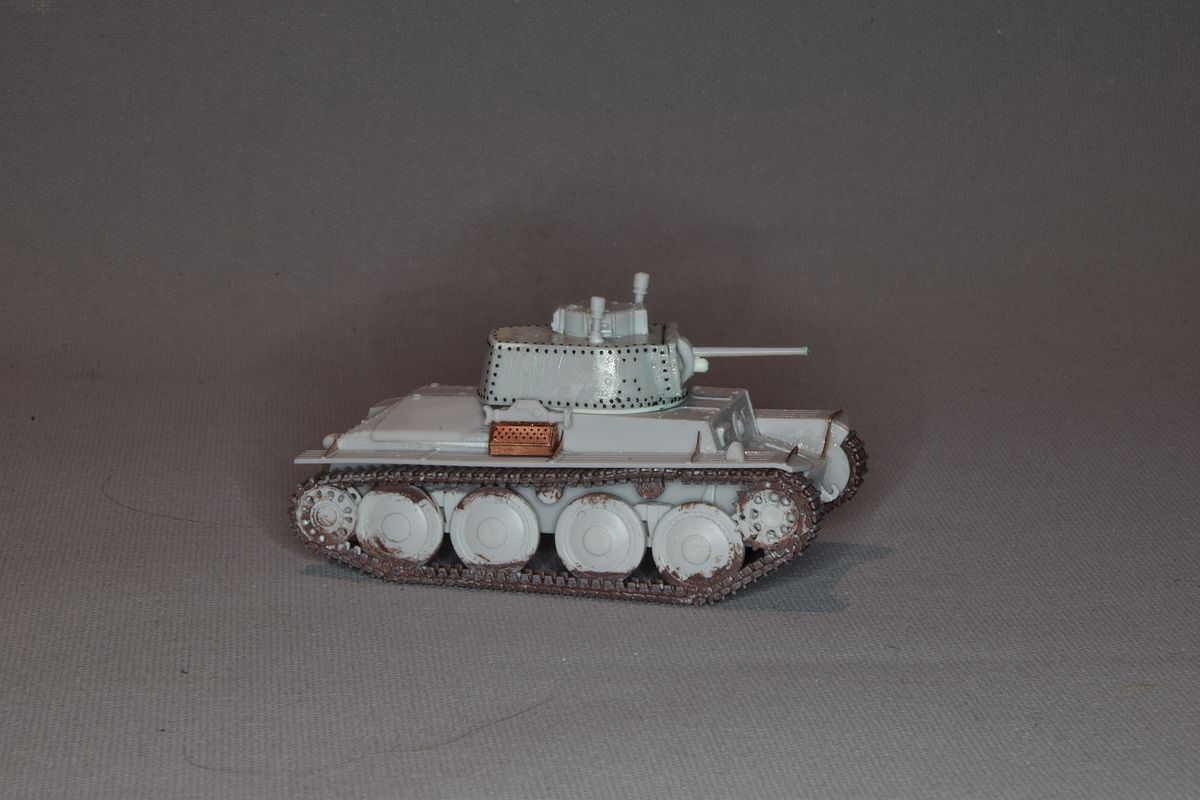
| With the other camouflage colours on, it was time to add the decals. |
|
The SI variants were numbered 199-31 and the SII variants were numbered 80001-80104. This meant that I could use the kit decals on the SI tank and cut and mix the decals for most of the SII markings. The small yellow numbers on the hull had to be added by using individual numbers though. For once I was lucky. I had painted the camouflage randomly on freehand and managed to put black on the right places for the numbers both in the front and at the rear. I only needed to broaden the black a little bit where the numbers should go. |


| Stockholm February 14, 2022 |  |
No updates |
----------------------------------------------------.::.
vehicles .::. civilian aircrafts .::. military aircrafts .::.
miscellaneous .::. home .::.------------------------------------------------------ |