
|
-------------------------------------------------------.::. chibi models .::. military vehicles .::. automobiles .::. aircrafts .::.
miscellaneous .::.---------------------------------------------- |
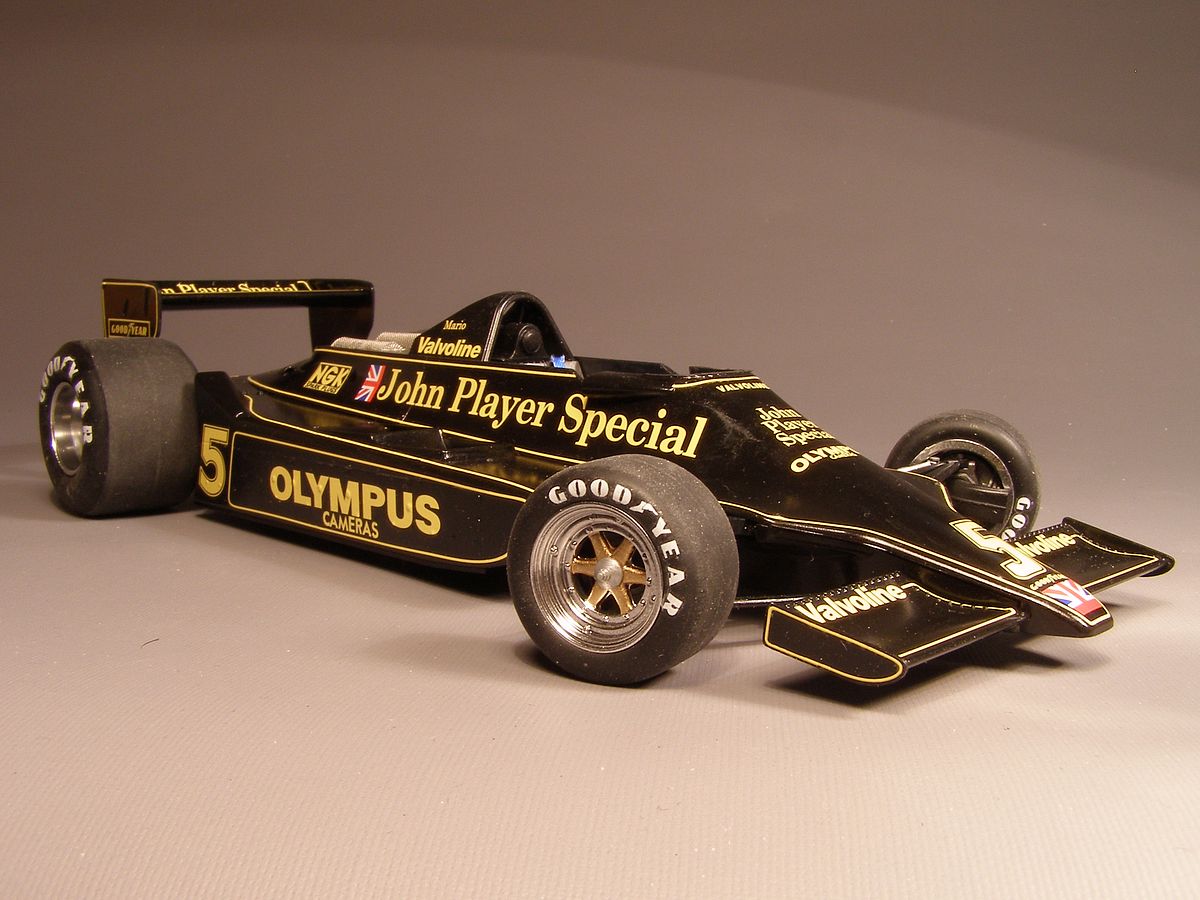
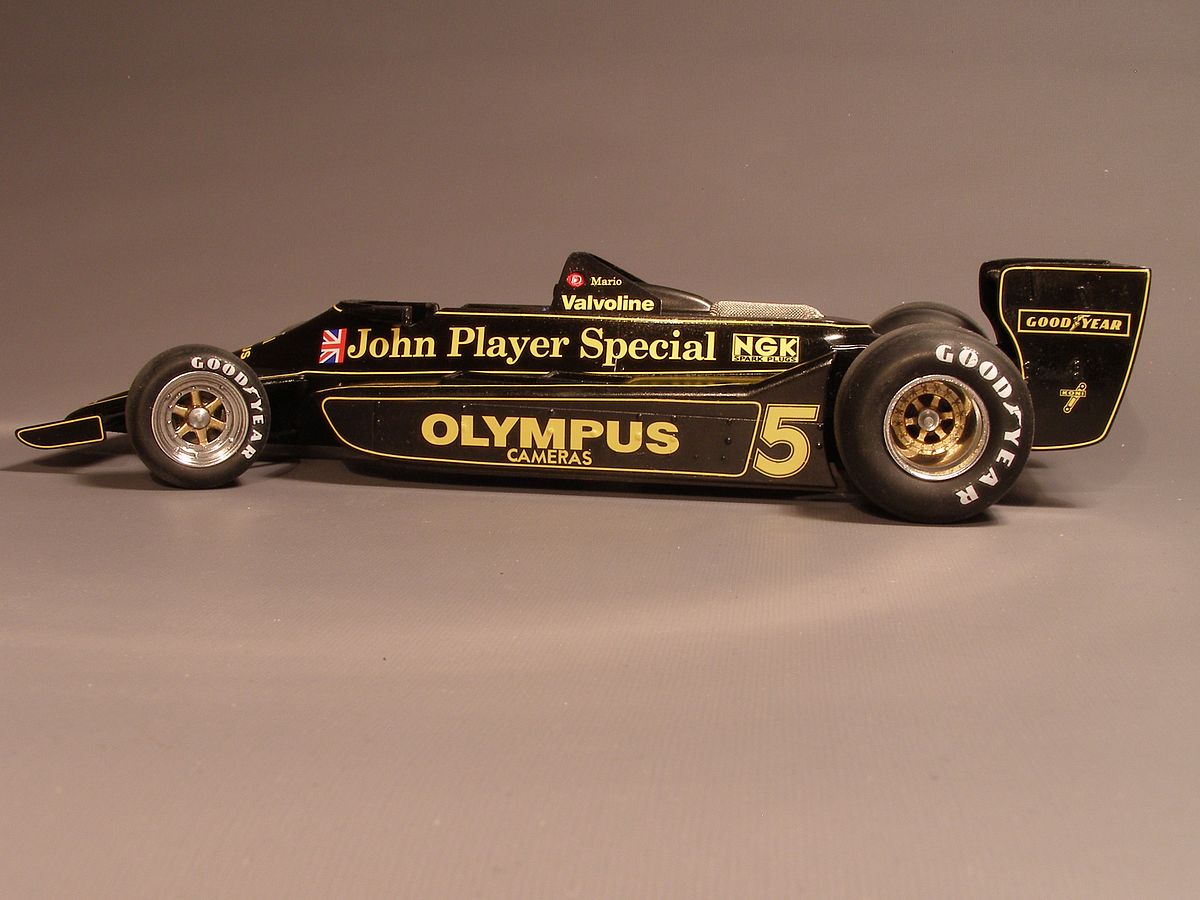
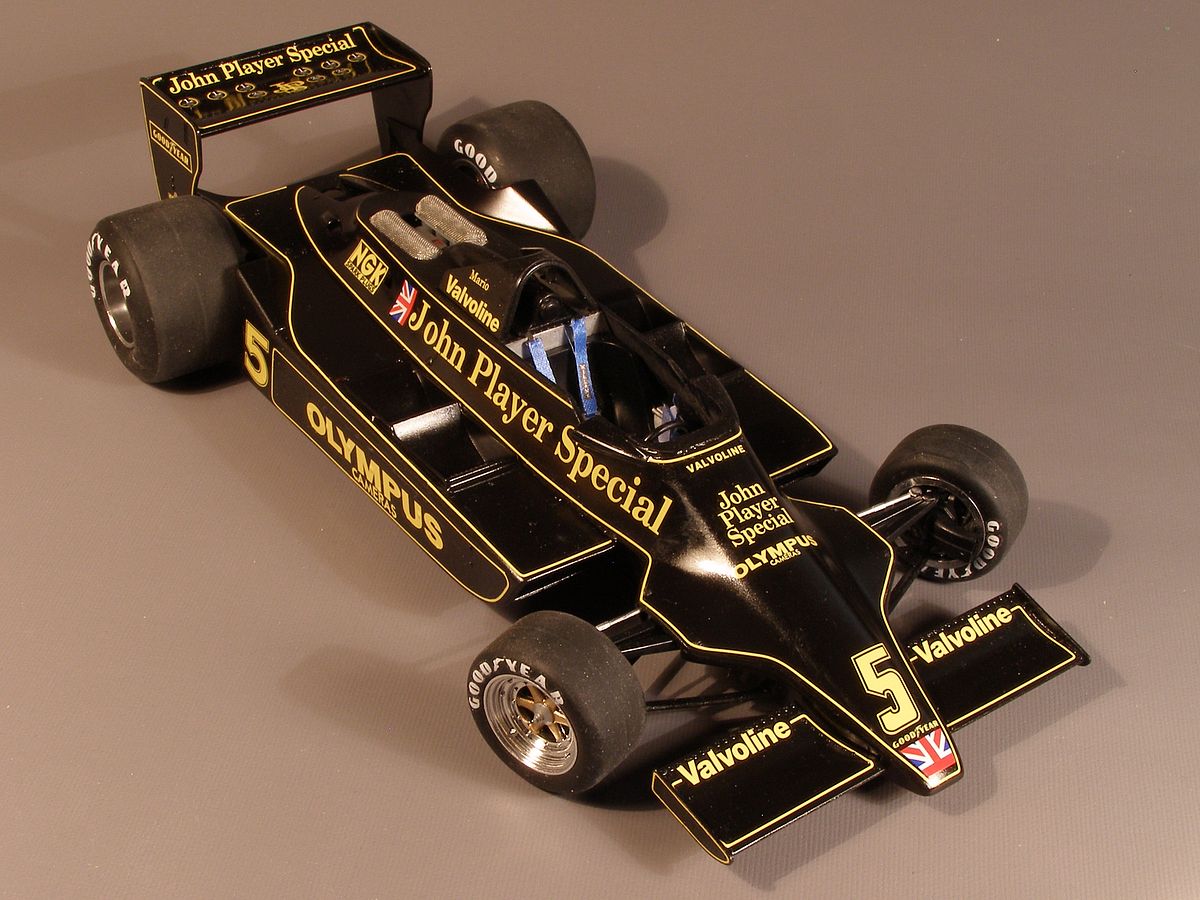
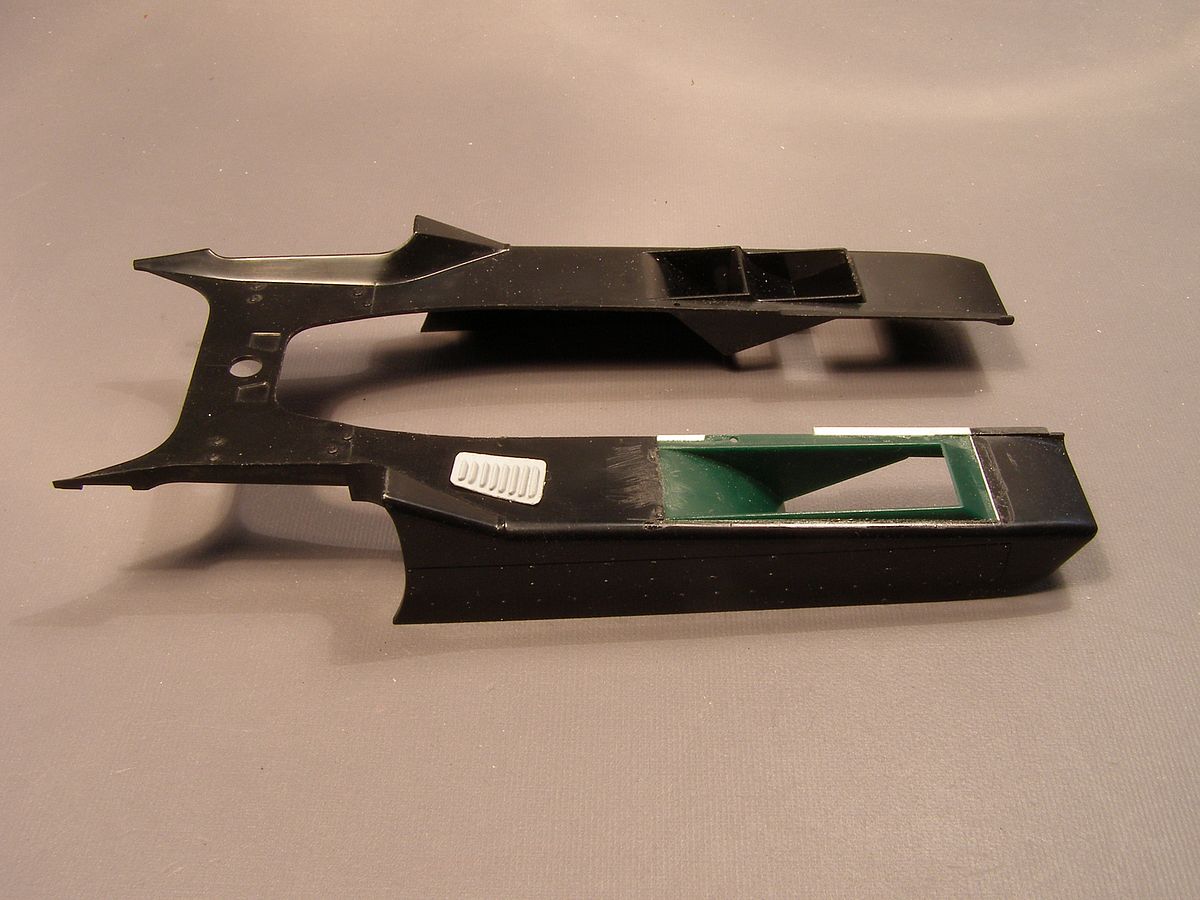
The Hasegawa Lotus don't pose any real problems except that one can only build Ronnie Peterson's car from it. If one wants Mario's car one should get the Tamiya kit. It is the front wing end plates that I am talking about. They have different shapes. The air outlets in the left side pod was changed from the German GP and forward. The Hasegawa kit has the late outlet while the Tamiya kit has both types.
|
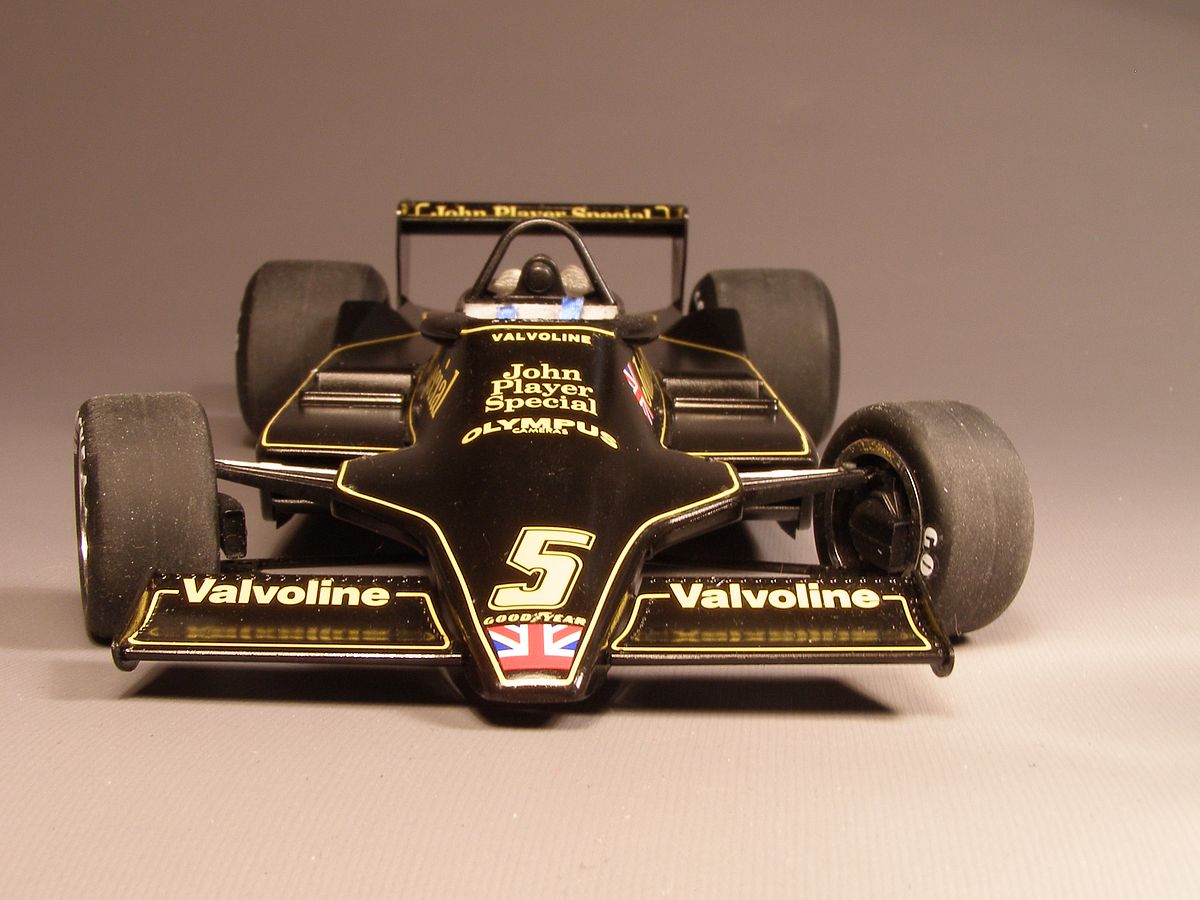
| I swapped the end plates from the two cars as I was going to build Mario's car from the Austrian GP. The Tamiya end plates had to be modified little and I have bought Tabu design decals for both cars so when I also had to swap the decals for the end plates it was no problem since they are the same colour. |
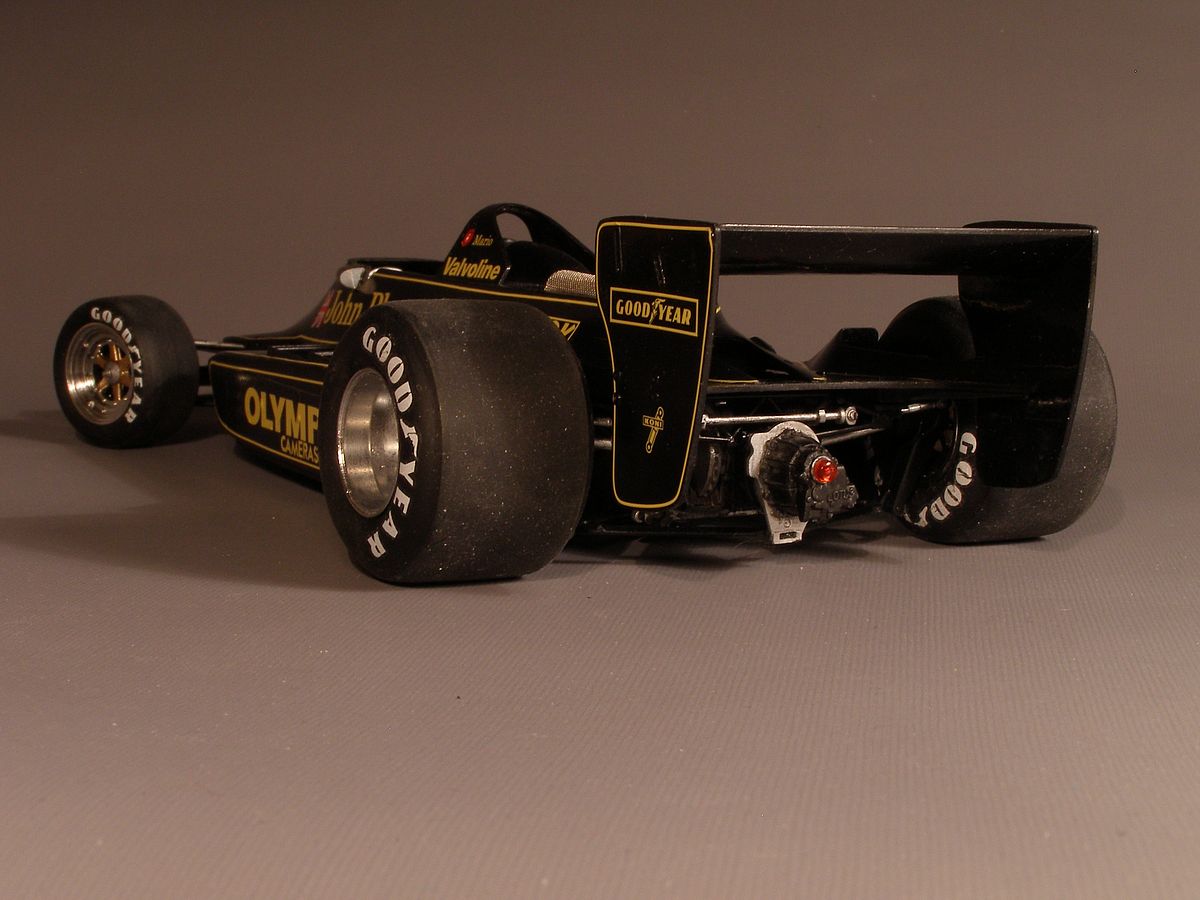
| I had bought the accessory set from Hasegawa for this kit, but I didn't use much of the etch parts. I didn't see any reason adding something that wouldn't be seen when I can't glue these invisible parts with my ordinary glue. Super glue is crap and epoxy glue are messy. |
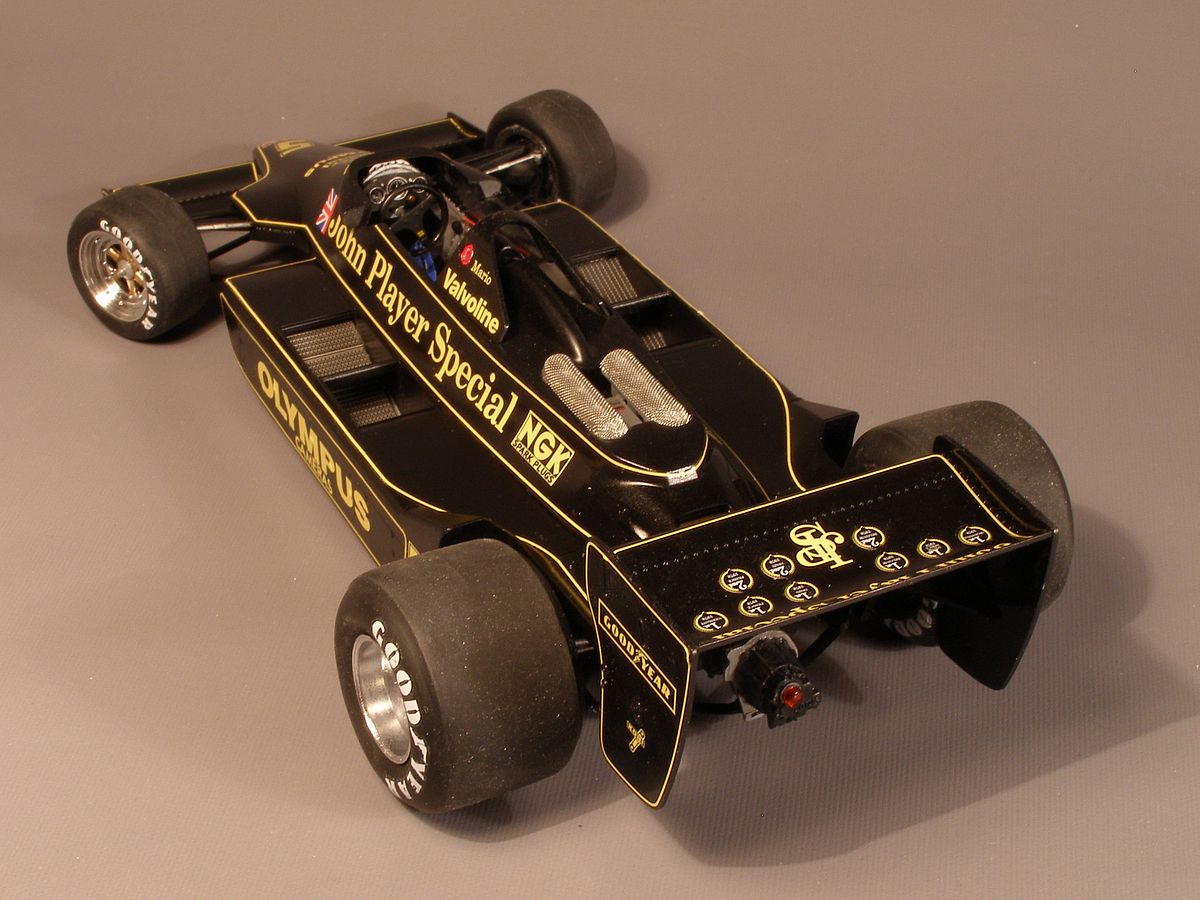

| But I used the seat belt. It makes a difference in the final result even though it isn't the most enjoyable thing to build. The etched radiator parts and the metal mesh for the air trumpets was also used. The Tabu decals are very nice to work with but the instructions weren’t to impressive. Without photos it would have been impossible to get it right. |
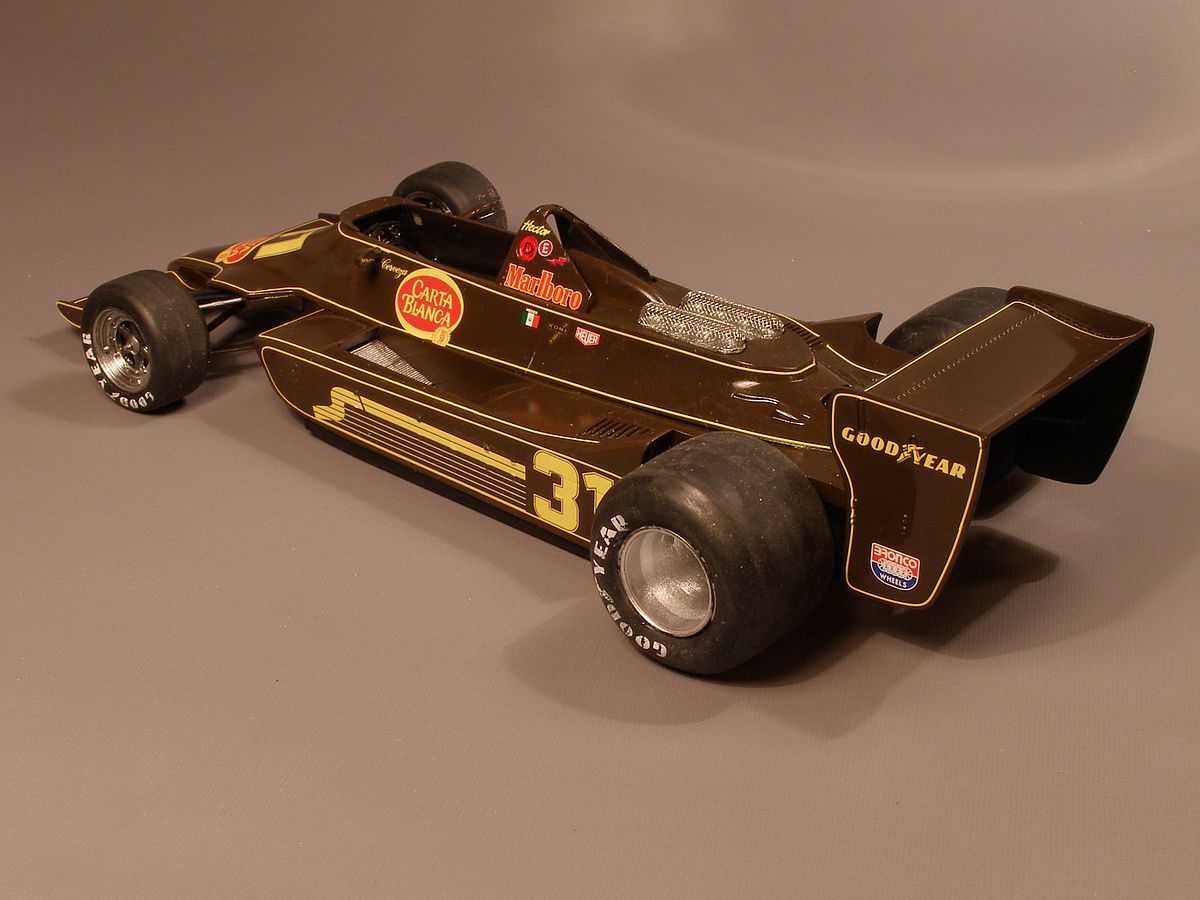
It is funny that my first Lotus 79 built would be Rebaque's. I had absolutely no plan to build it when the kits were released. But here it is. Things doesn't always end up according to plans. The original plan for this JPS-Lotus from Hasegawa was to convert it in to a very similar looking Tyrrell but when that plan failed I was stuck with an extra Lotus. The Lotus 79 run in the black and gold livery in the 1978 season and became green next year. Tamiya released the green car so that option was already covered but Hector Rebaque also used this car during 1979 and Tabu had the decals for it so I decided to build it.
|
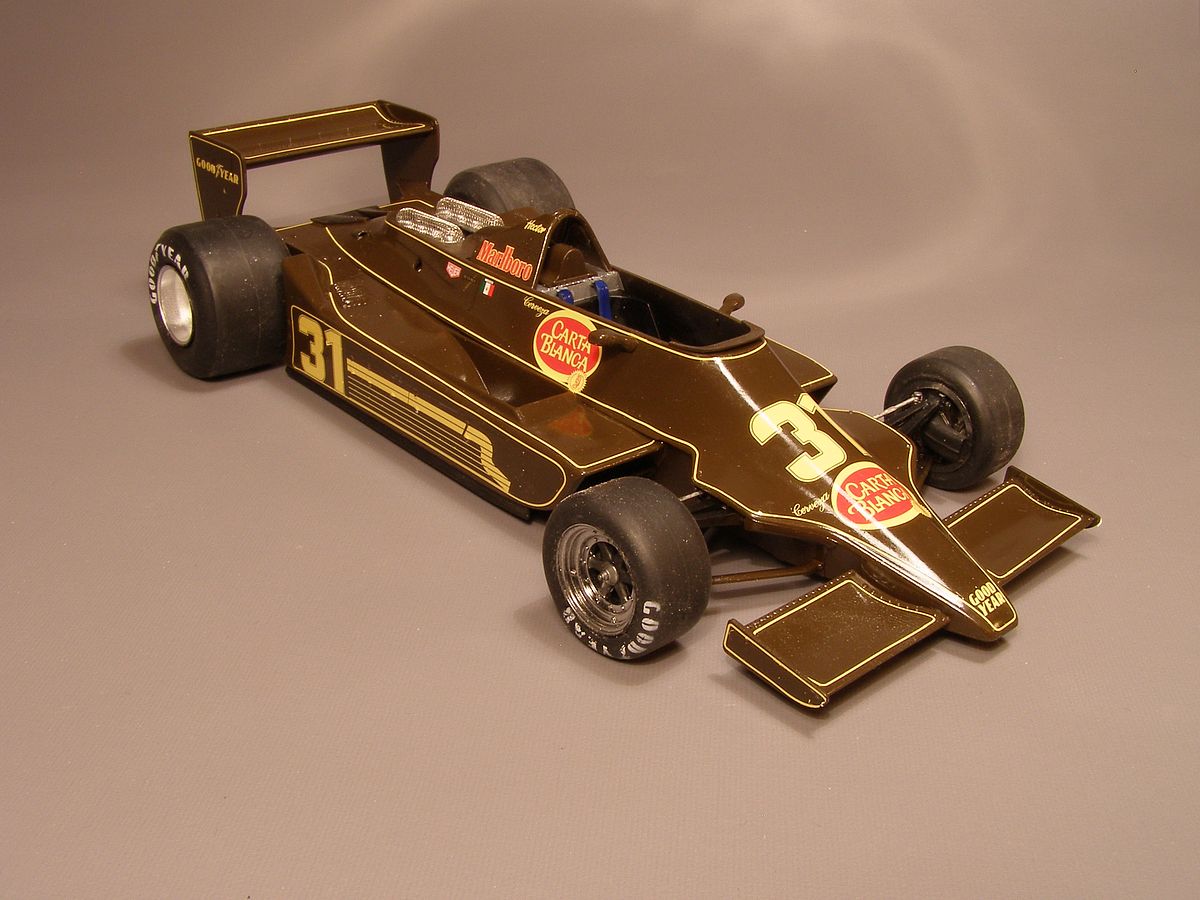
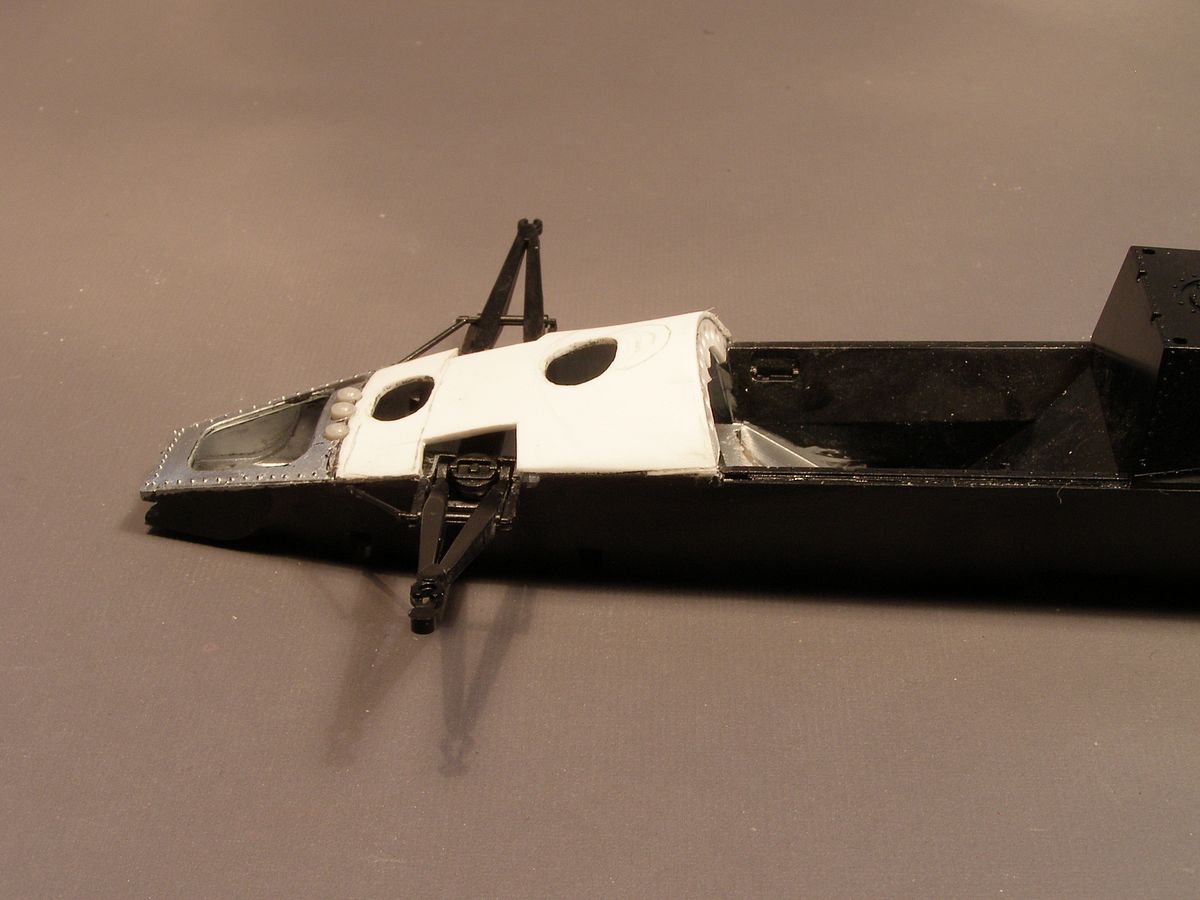
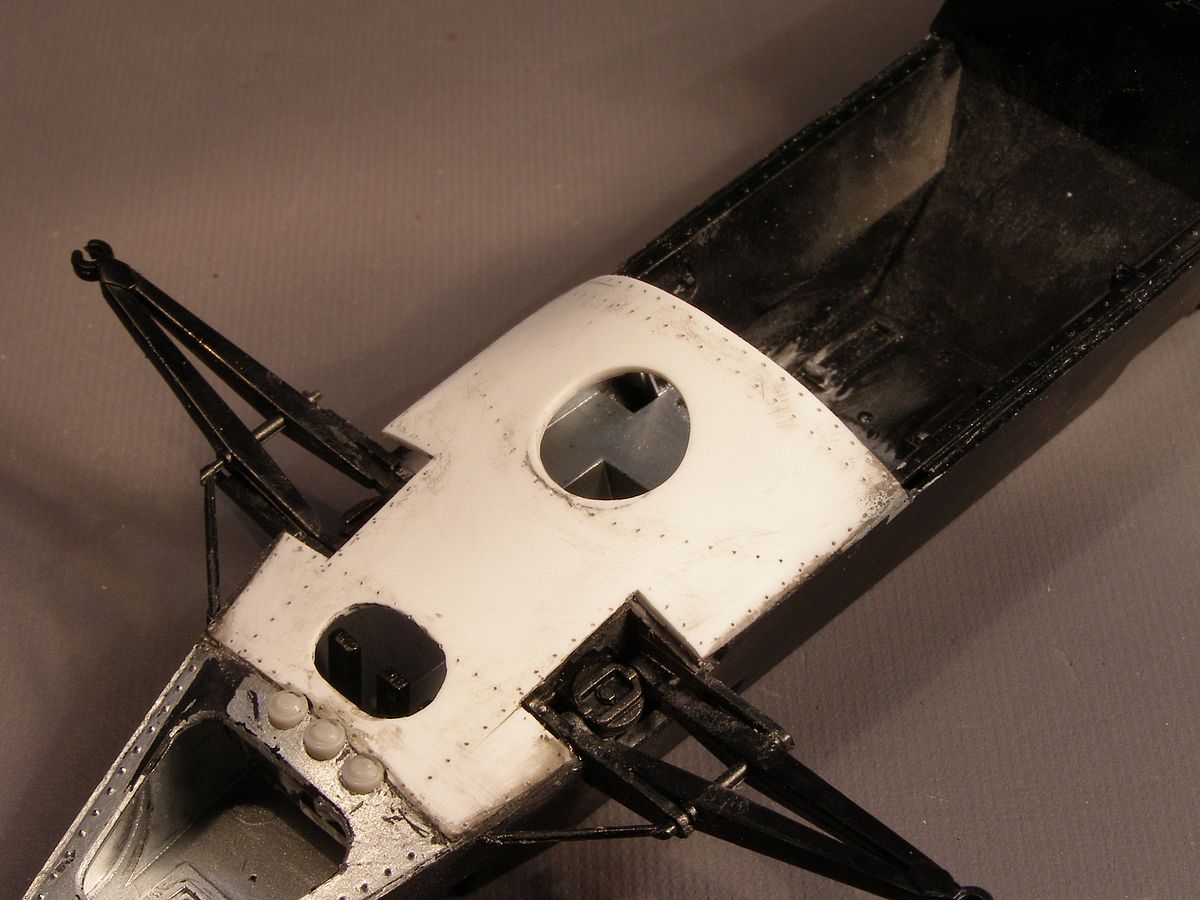
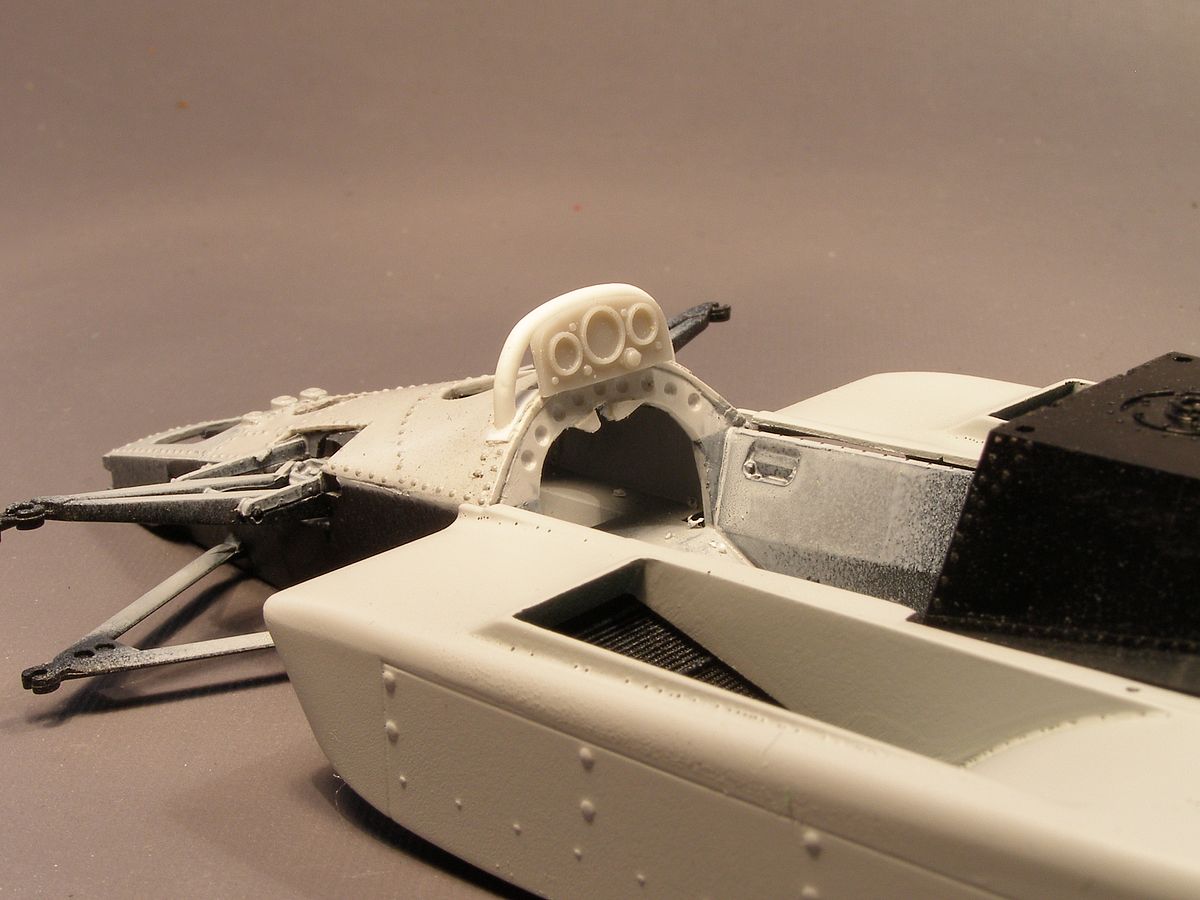
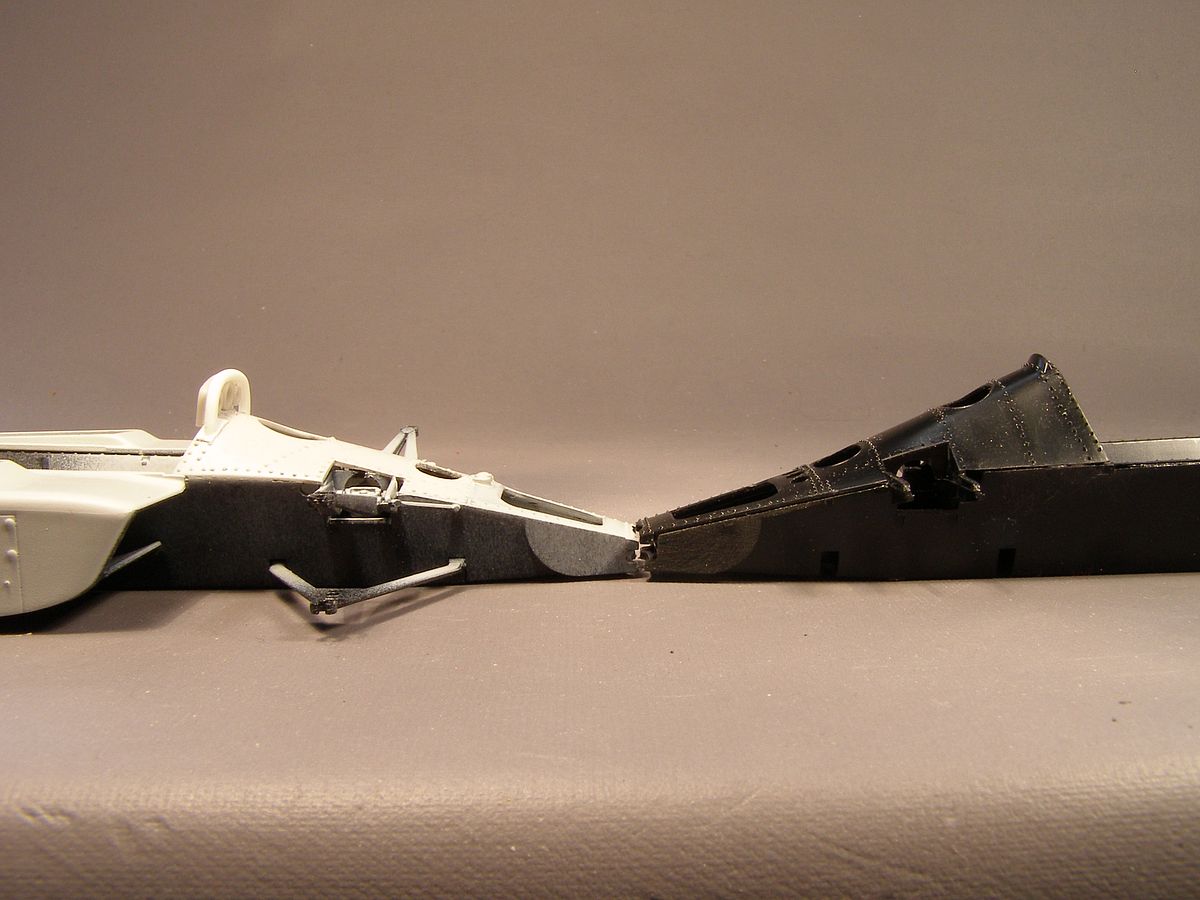
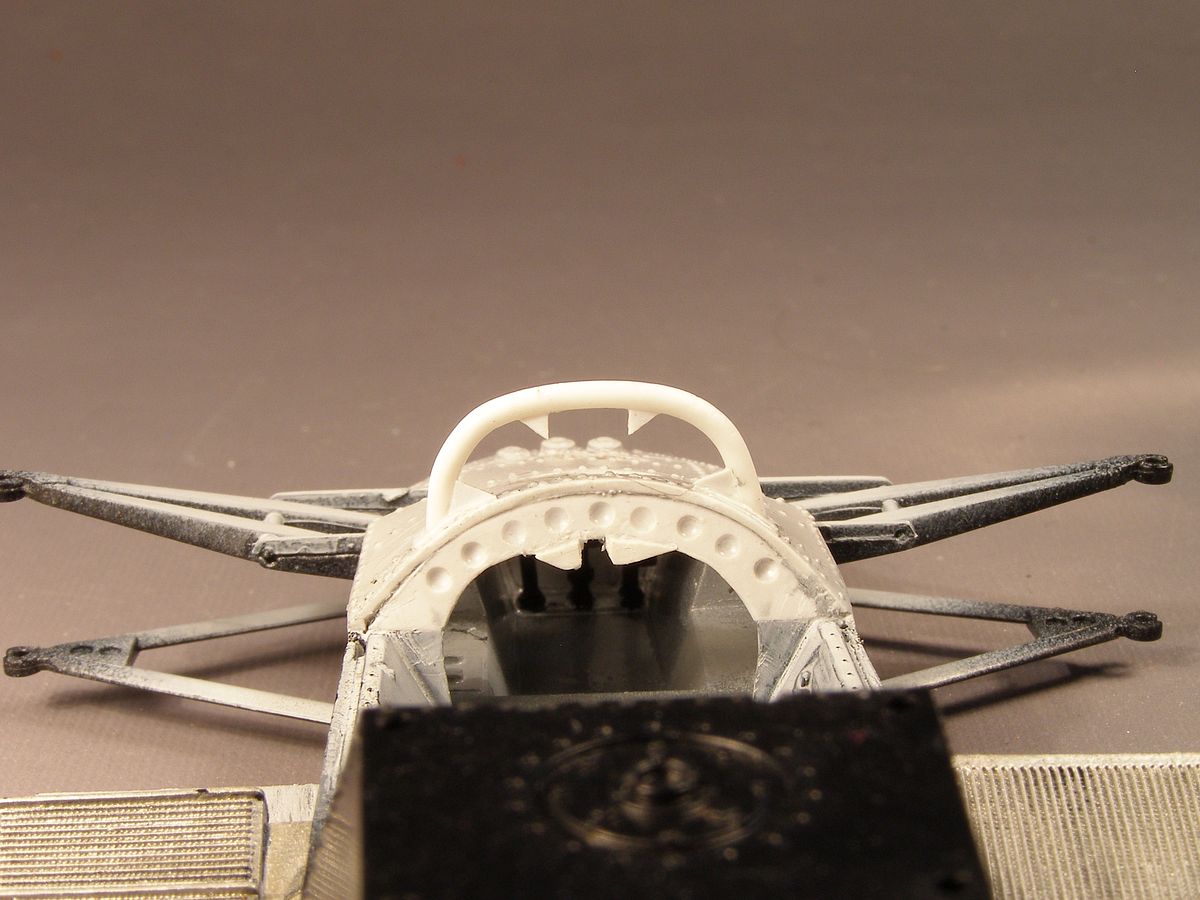
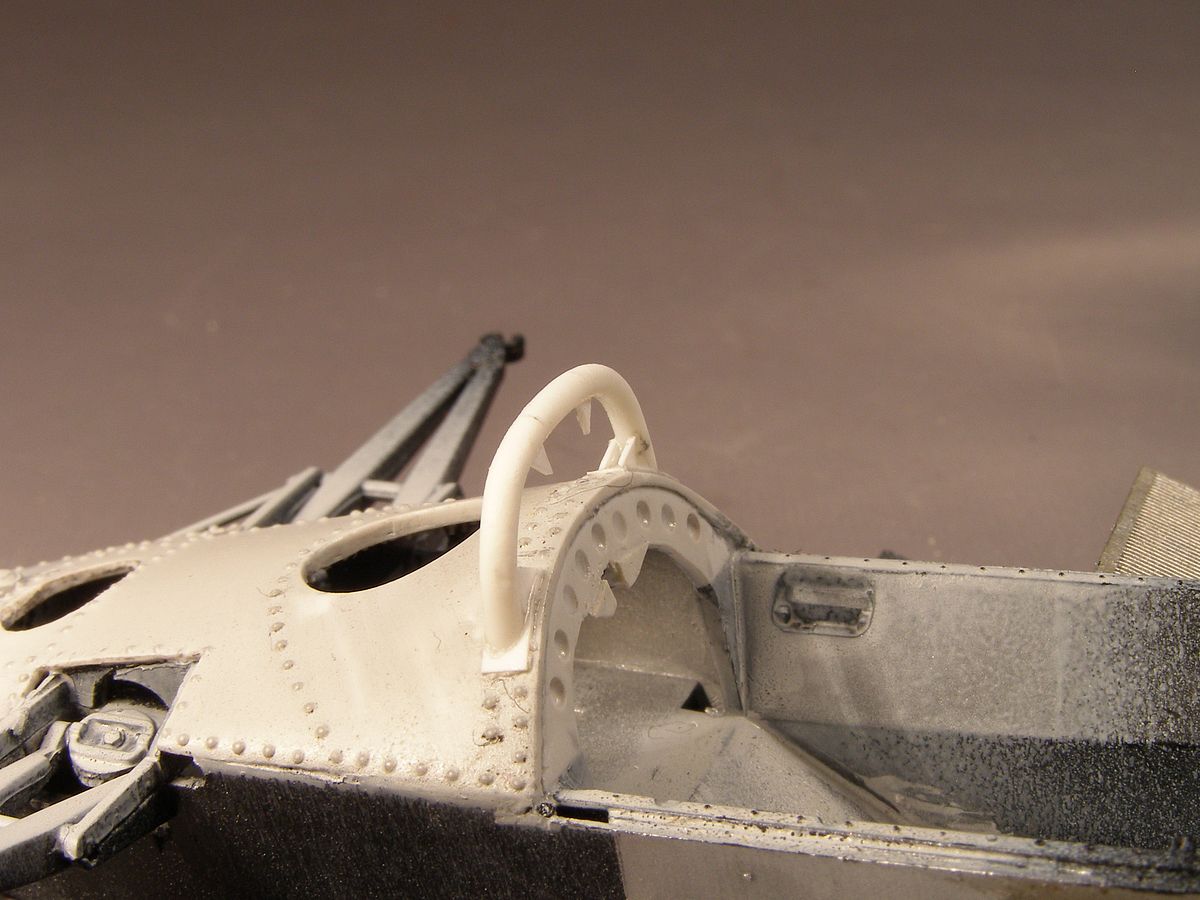
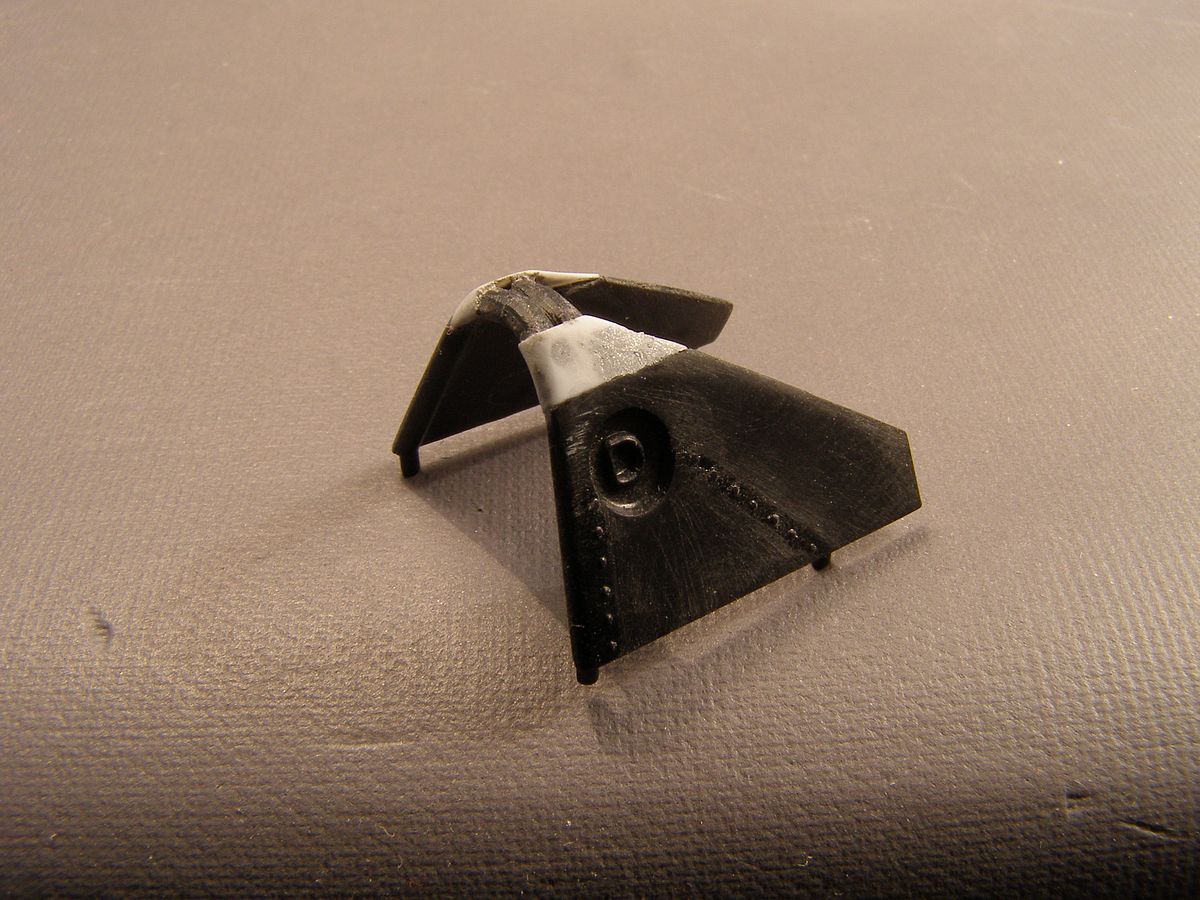
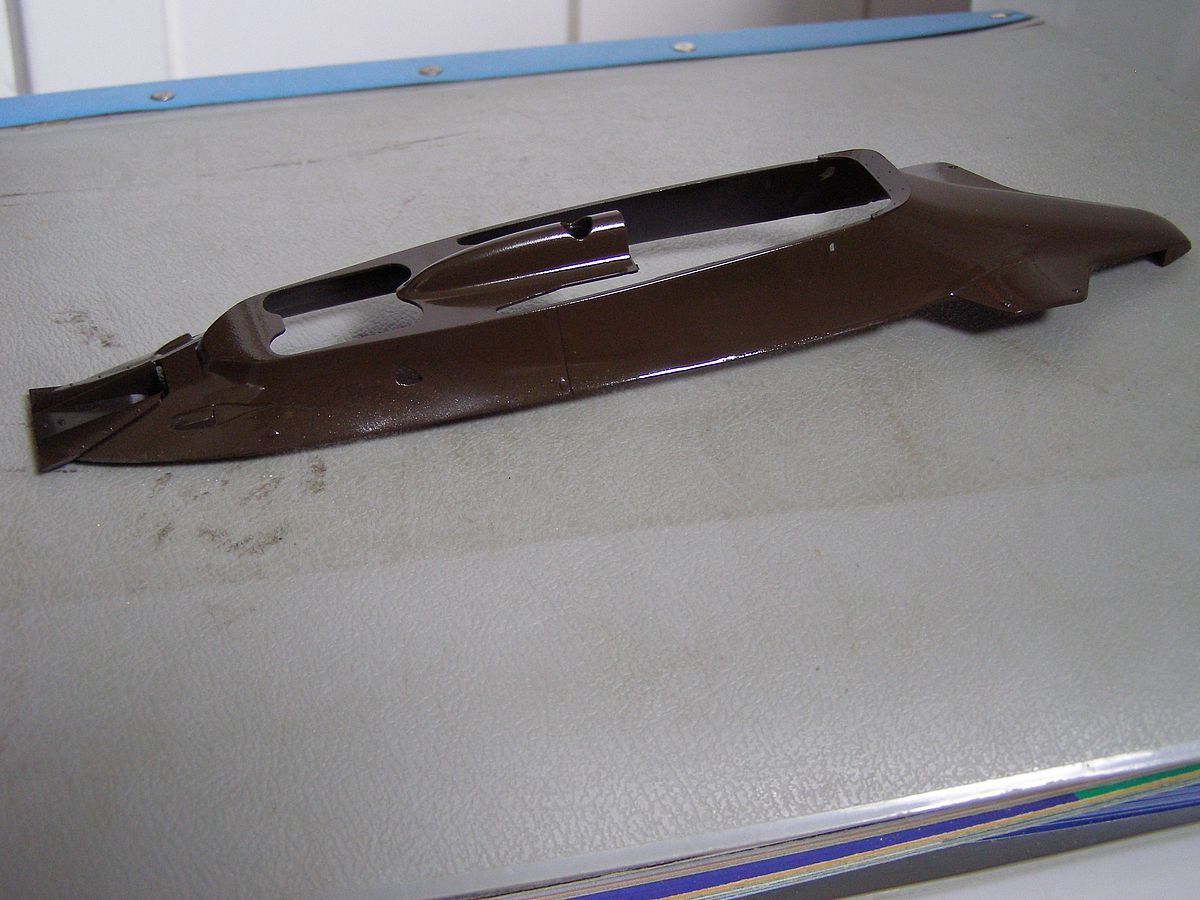
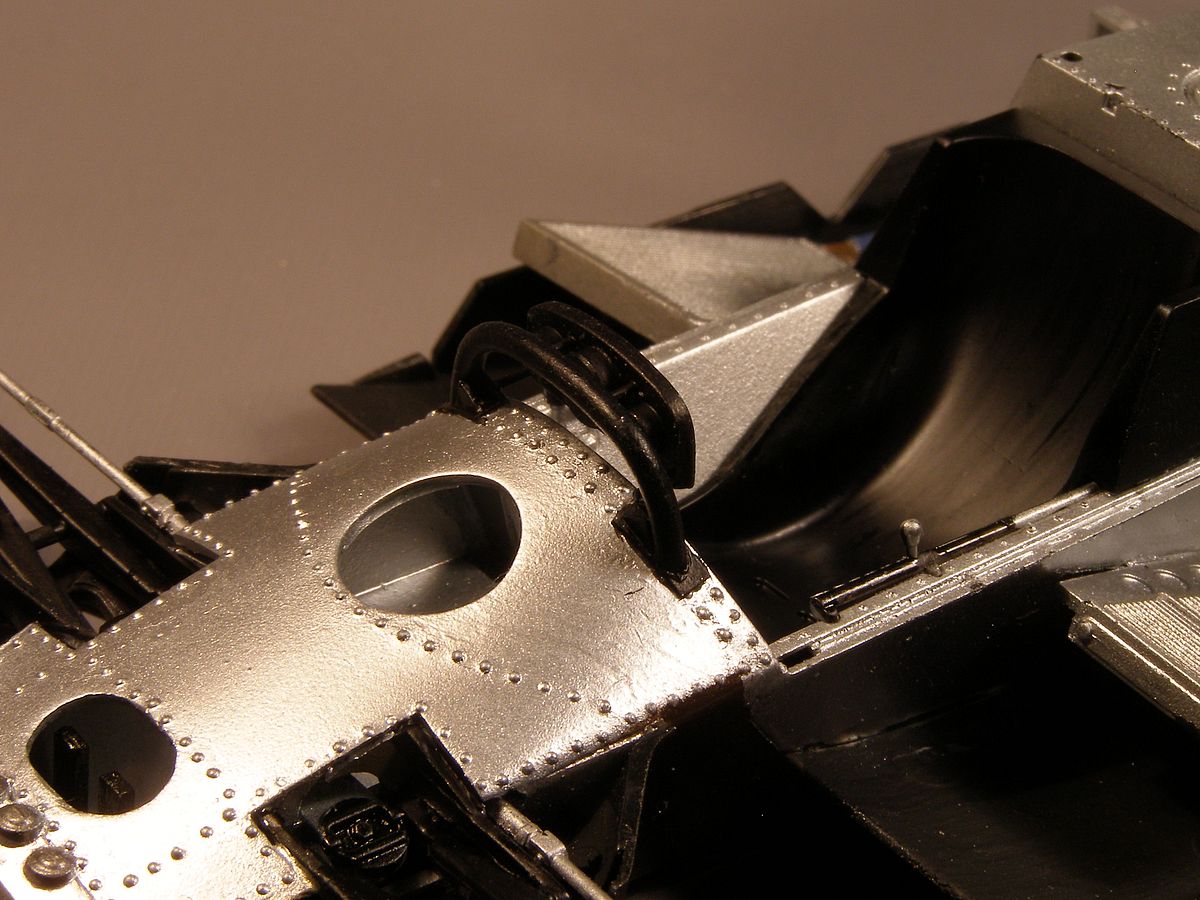
| Rebaque drove the prototype car 79/1 and in the first races in 1979 it looked very much as it did the previous year so all that is needed is a new paint job to get a reasonable model of it. There is one rather large difference between the prototype and the other cars, but it is almost hidden under the bodywork. The "front scuttle area" was lower on the 79/1.Instead it had a front roll bar. The later cars had this area raised and the front roll bar was not needed. Well as I said the bodywork in the kit was right for an early 1979 car but later some modifications were made. It got the same radiator vents as the factory cars as well as new side mirrors. It also got a set of louvers on the top of the side pods. I have been wondering about the front scuttle and how much of it that would be visible, so I had to bring out the Hasegawa kit for a test. I made a new bulkhead of paper and put it on the original and it seems that it is rather visible. |
| I always have problems building straight out of the box. I'm not a super detailing person, but I always seem to find a version that can't be built from the box. So now I have started on the Rebaque 79/1. |
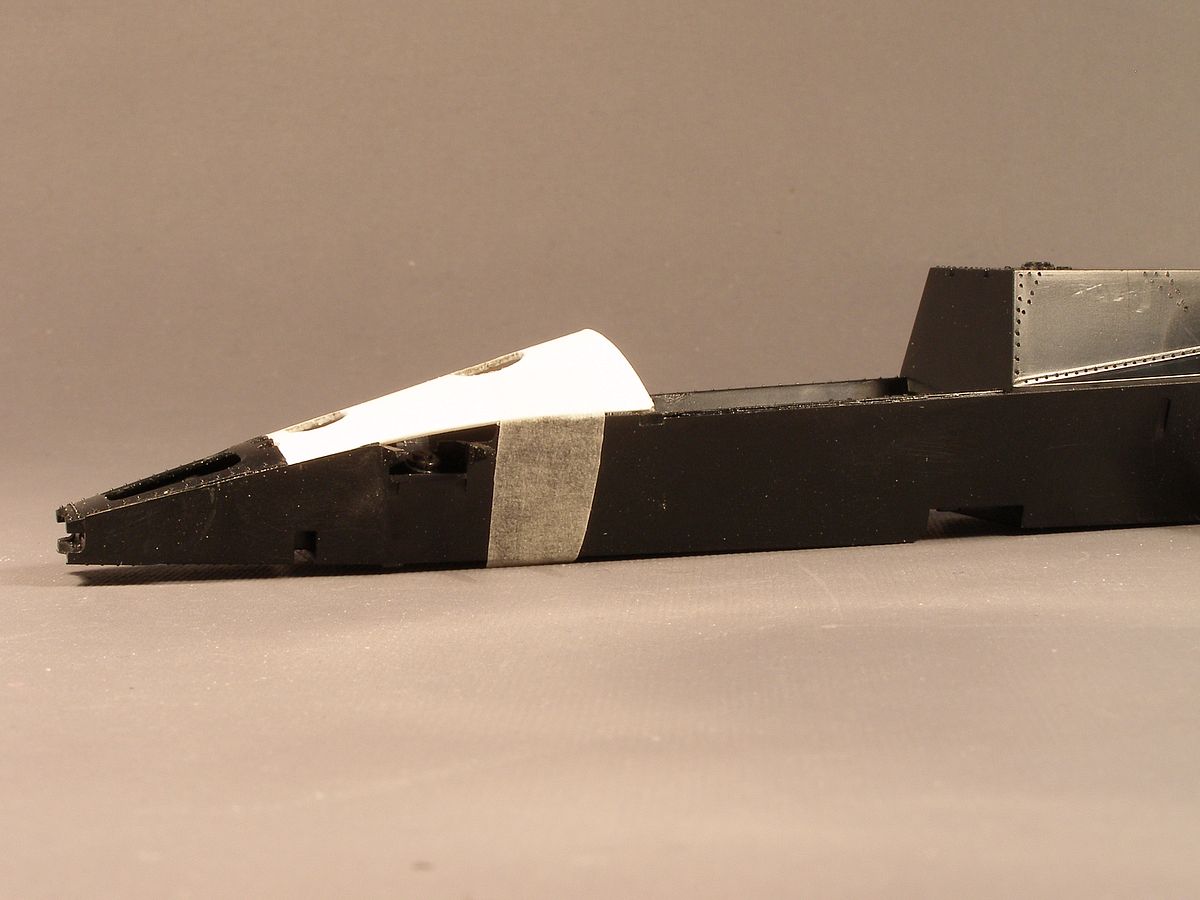
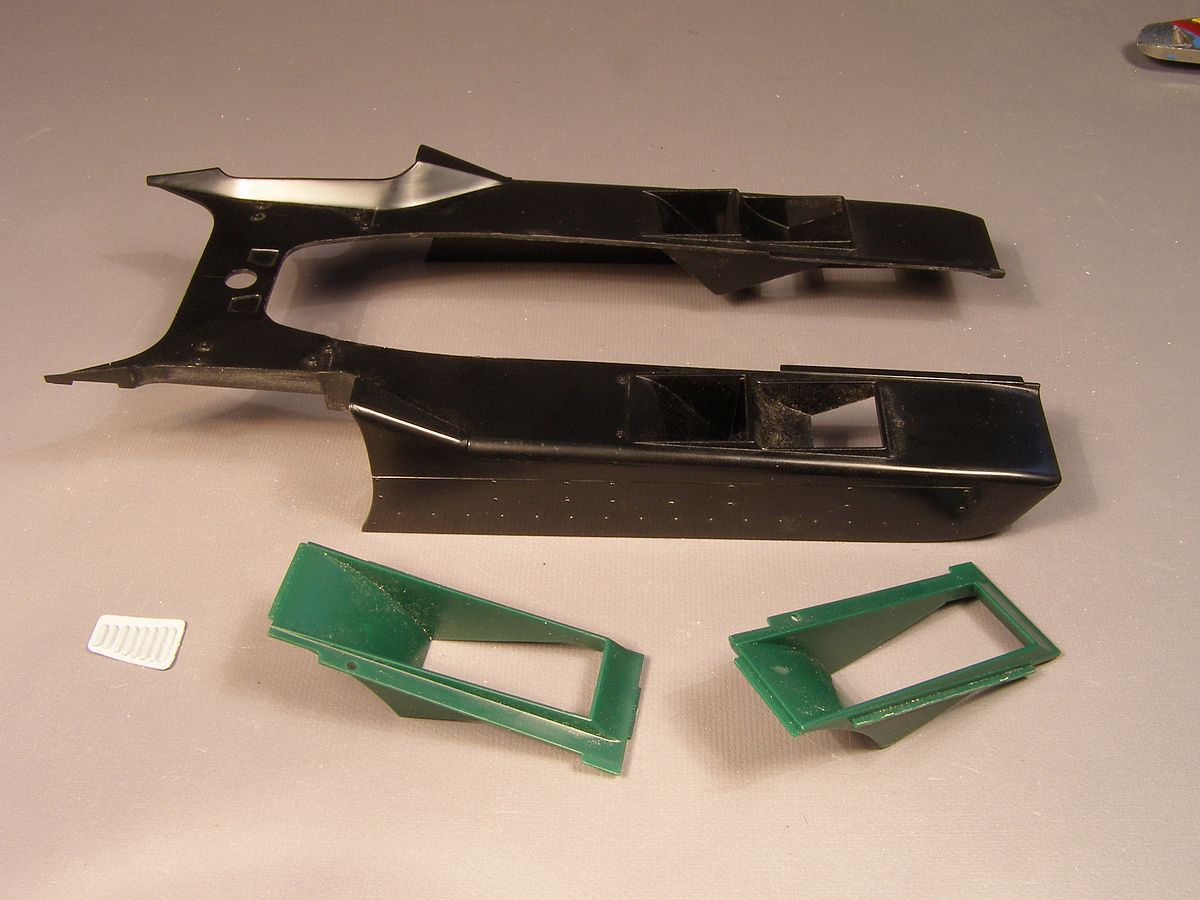
| I made new bulkhead using the lower part from the kit. Then the problem started. Trying to make the top plate was a bit tricky. I decided to use the front part of the one in the kit. |
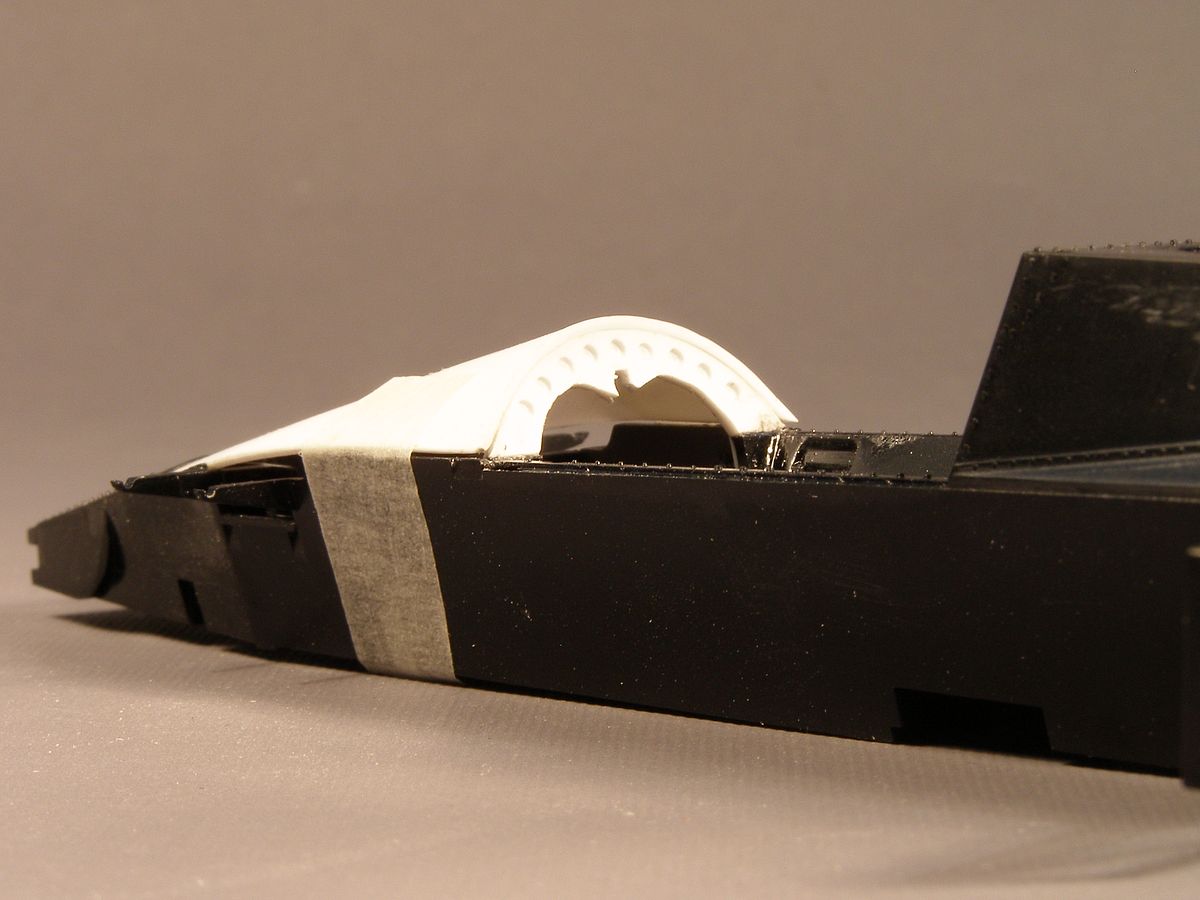
| It is mounted with tape for the photo session. I have to add the parts inside and paint before I can glue it on, Then I have to find a way to add the rivets to it. |

| It wasn't easy to make a paper template, so the plastic didn't fit exactly so there is a small piece that need to be filled. |
| But I did a mistake using the Hasegawa part as a template for the two large holes. The one at the top should be closer to the bulkhead on the 79/1. It irritates me, so I will fix it even though I don't think it will show with the body in place. |
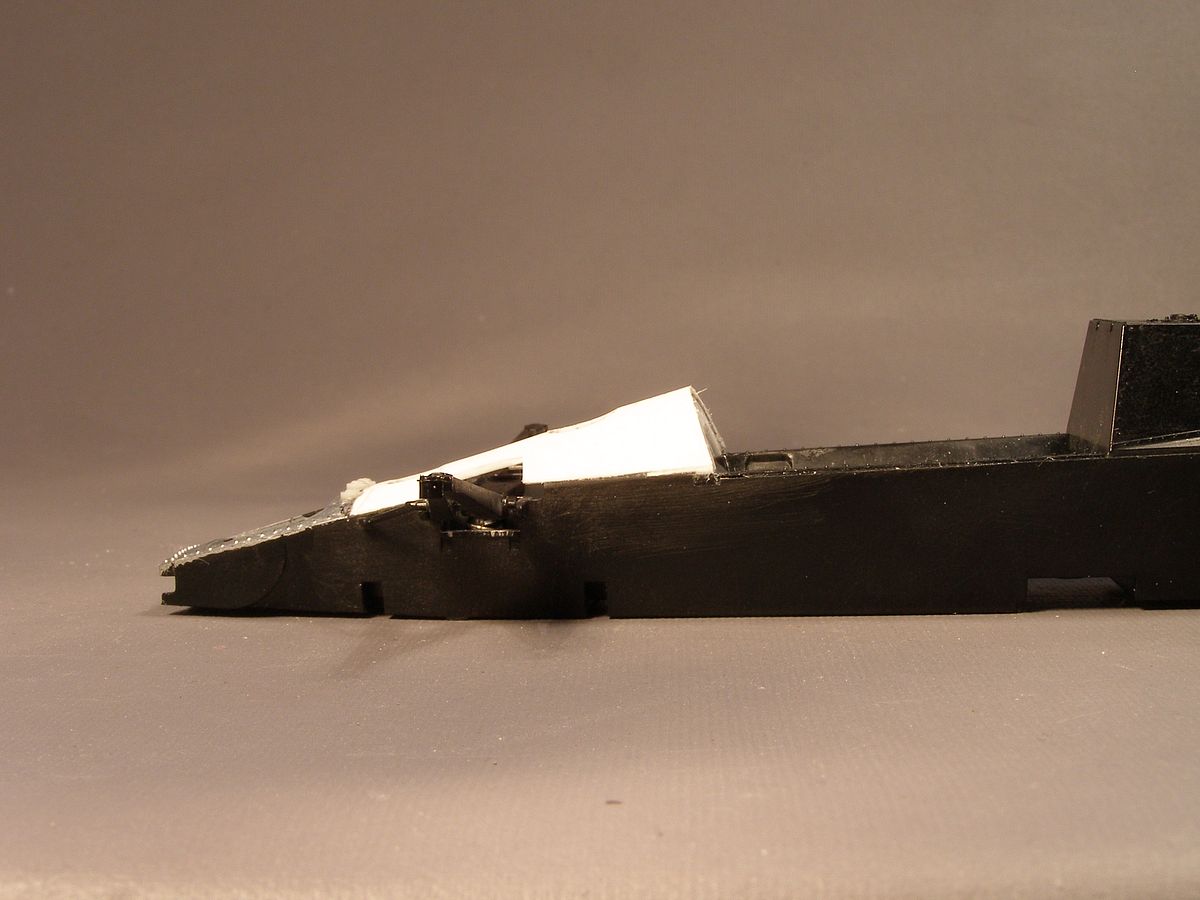
| It has a different side profile compared to the other four 79's. |
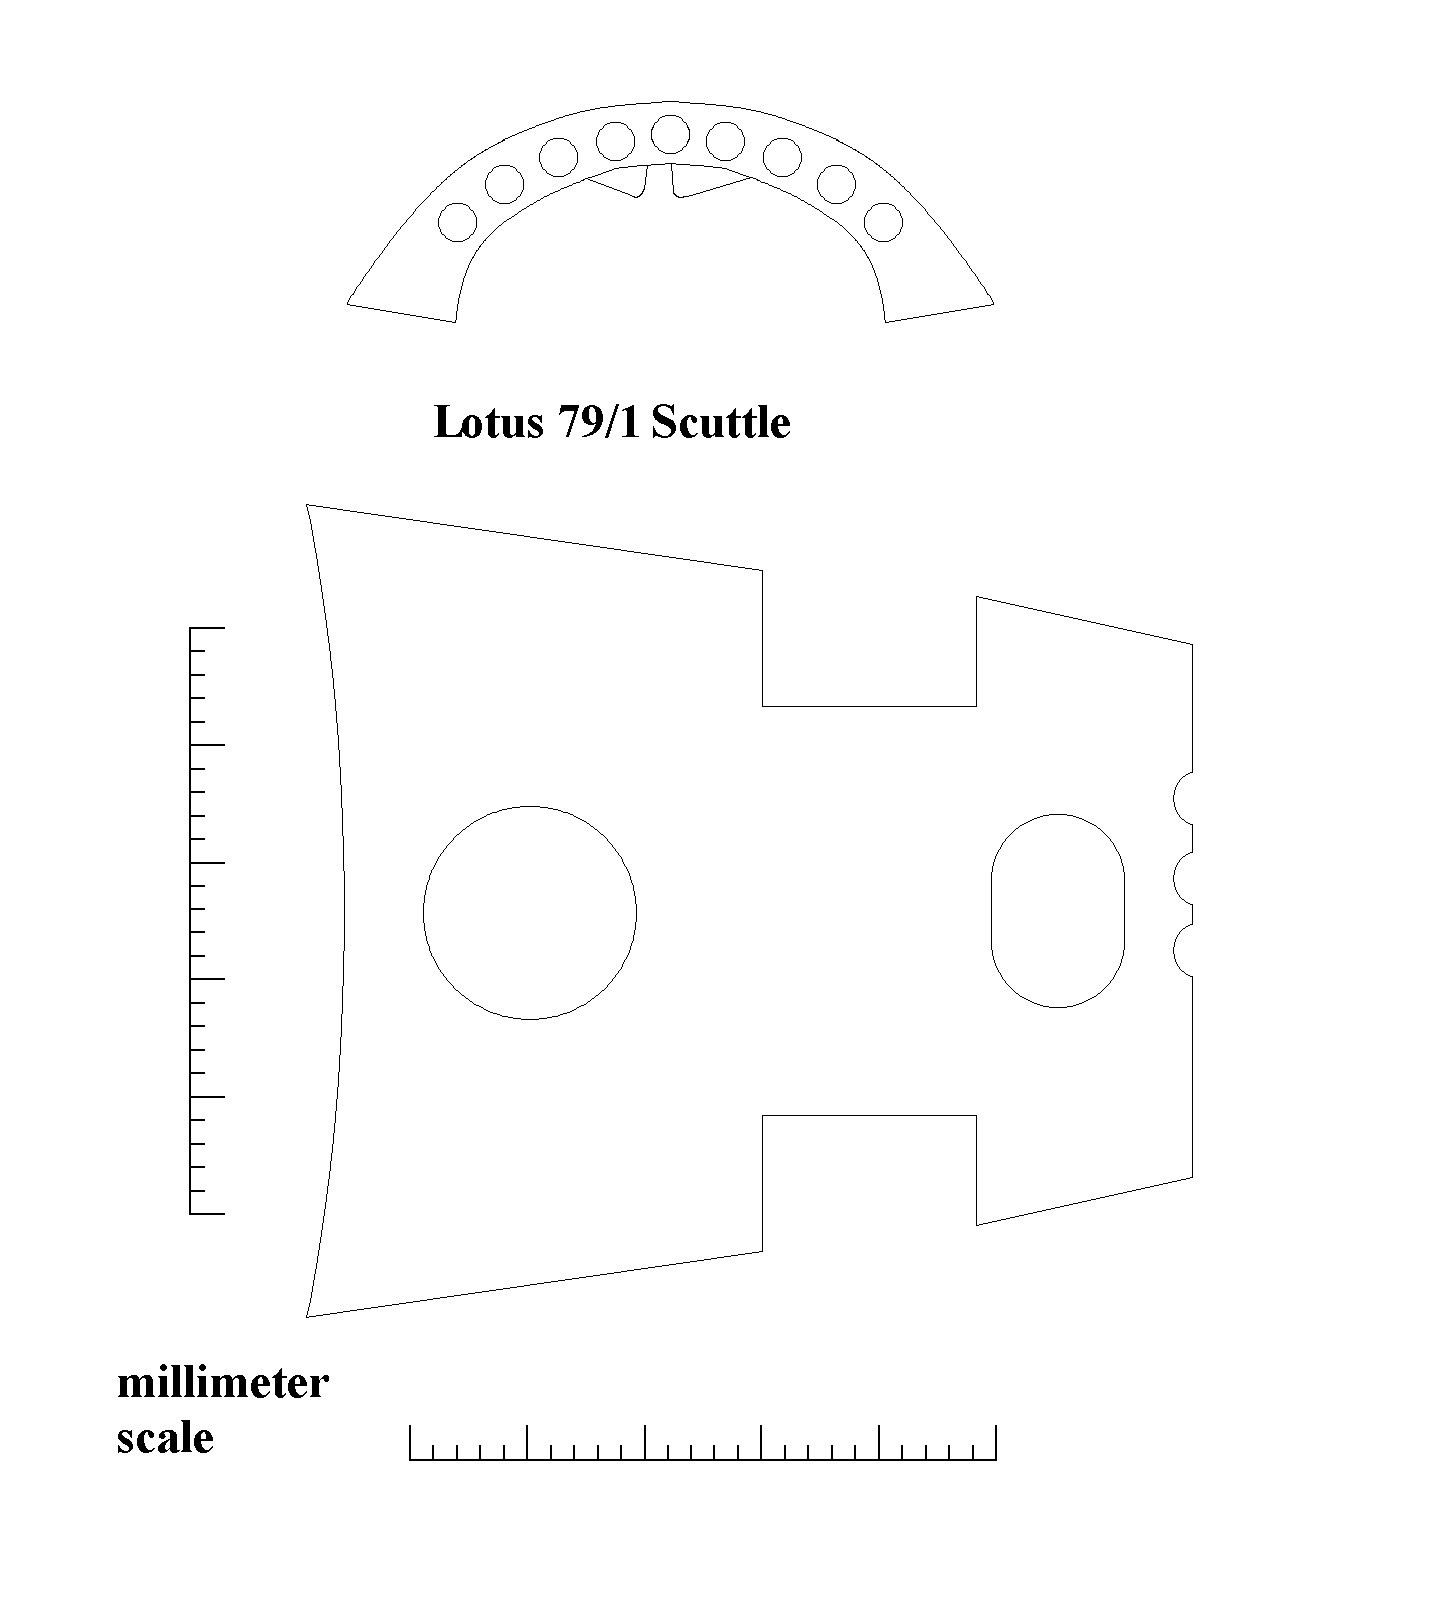
| Here is the template I drew. I altered it, so it fits better now but it probably needs some tweaking. If anyone find it useful feel free to use it. It is made for the Hasegawa kit. (I know I should perhaps have used the green Tamiya kit instead, but I already had the Hasegawa kit). |
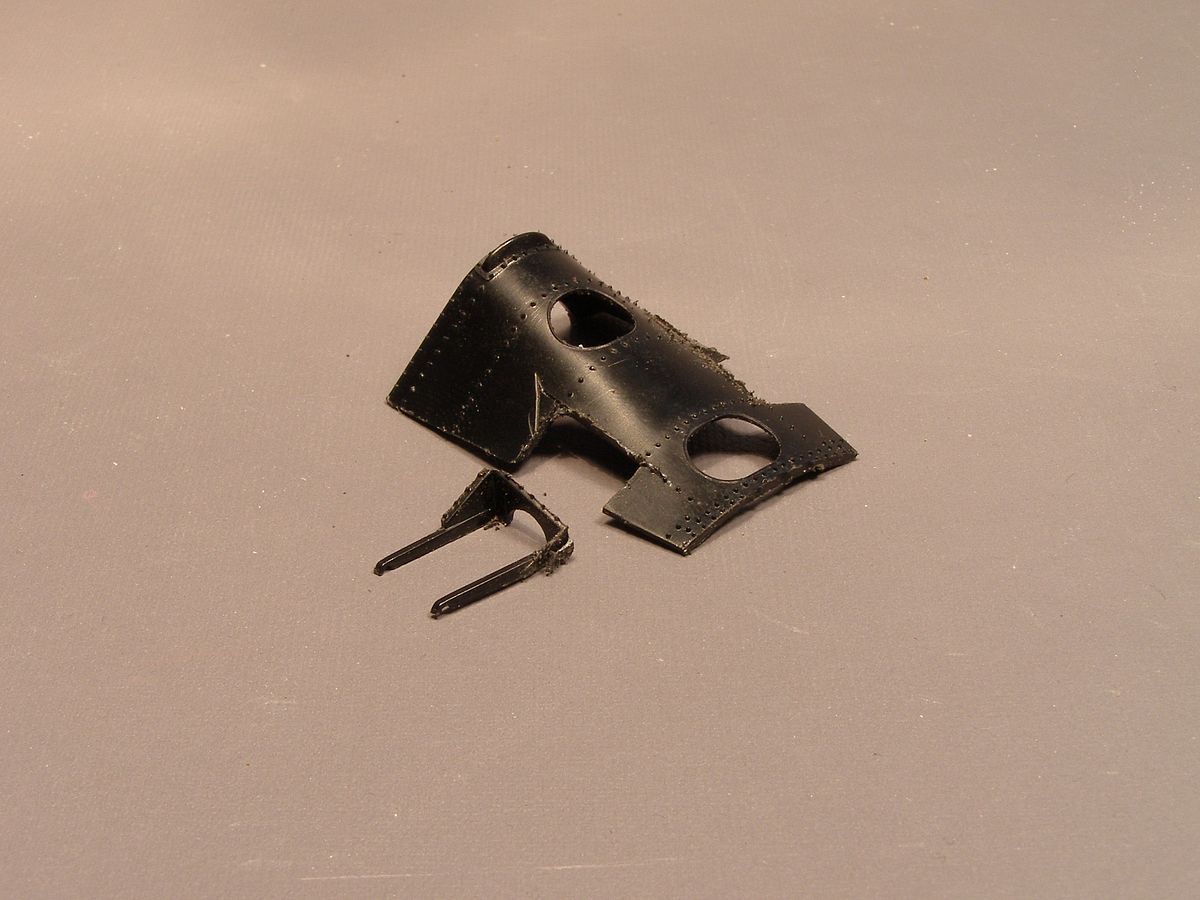
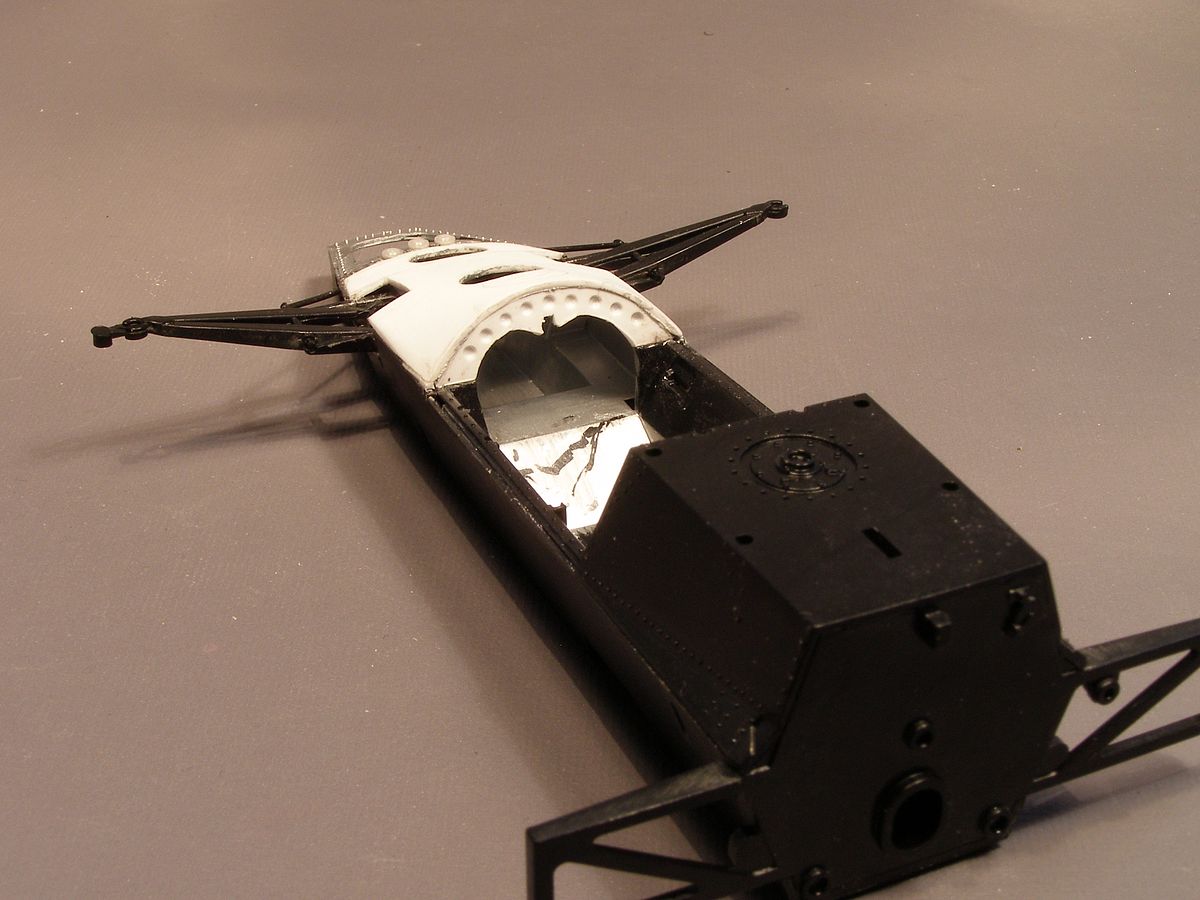
| Now I reached a point of no return. The work done this far could be reversed to original without too much job. It is time to bring the feared saw out and go to work on the original scuttle part. |
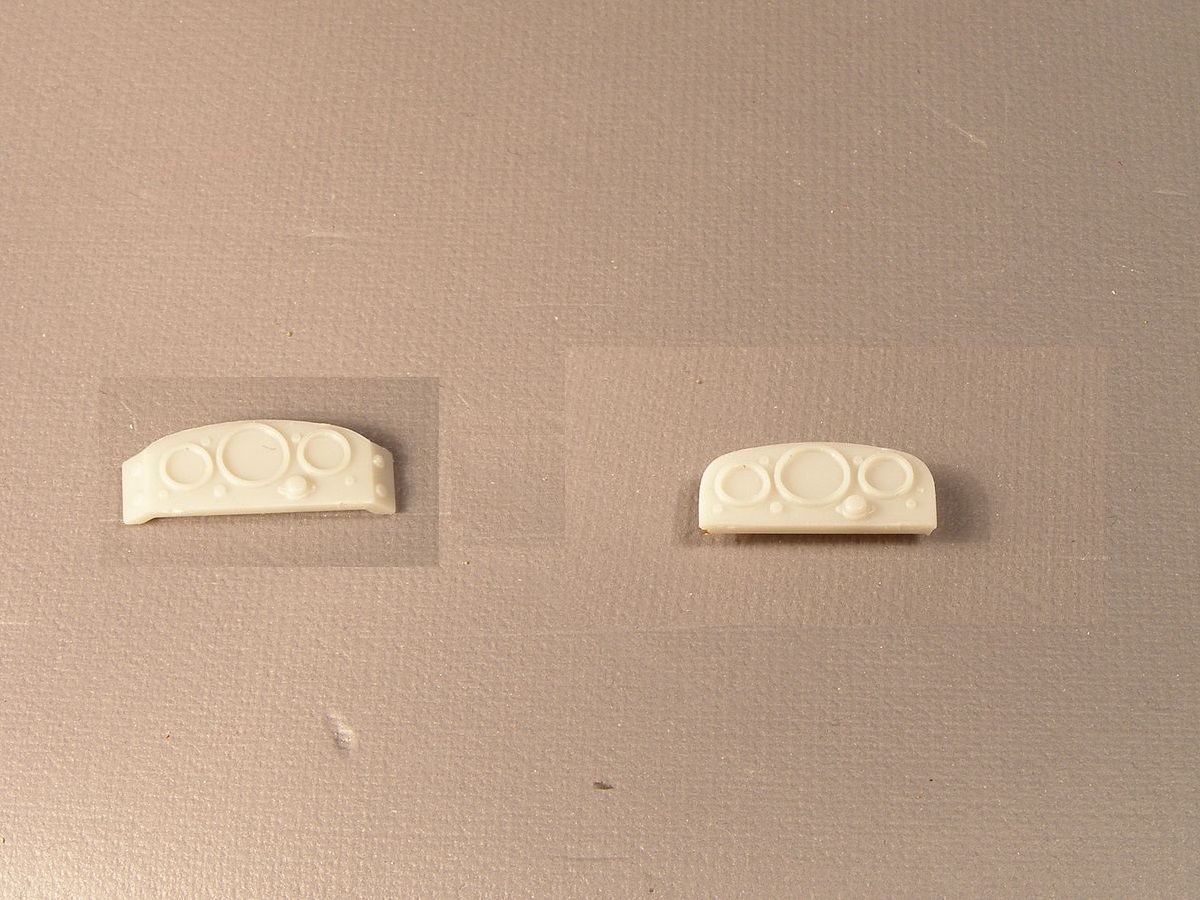
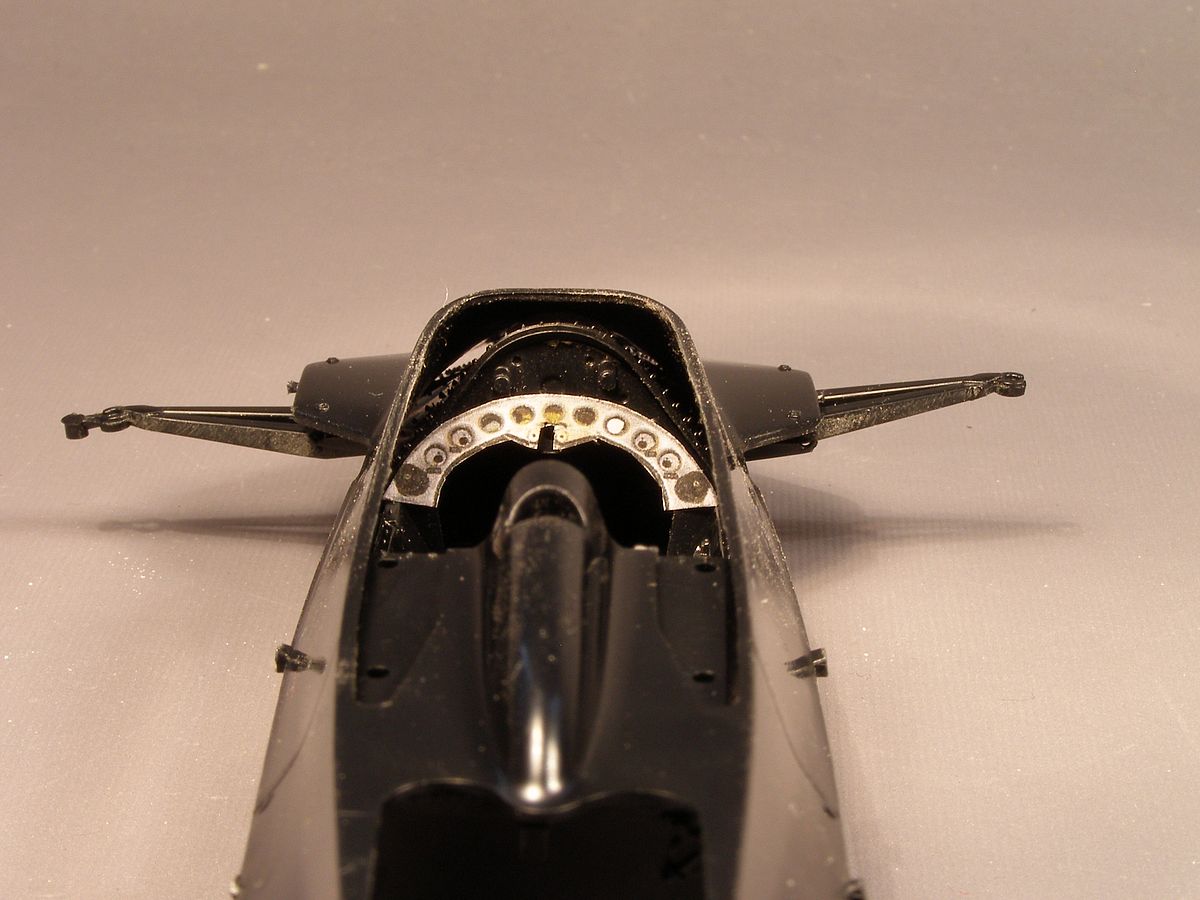
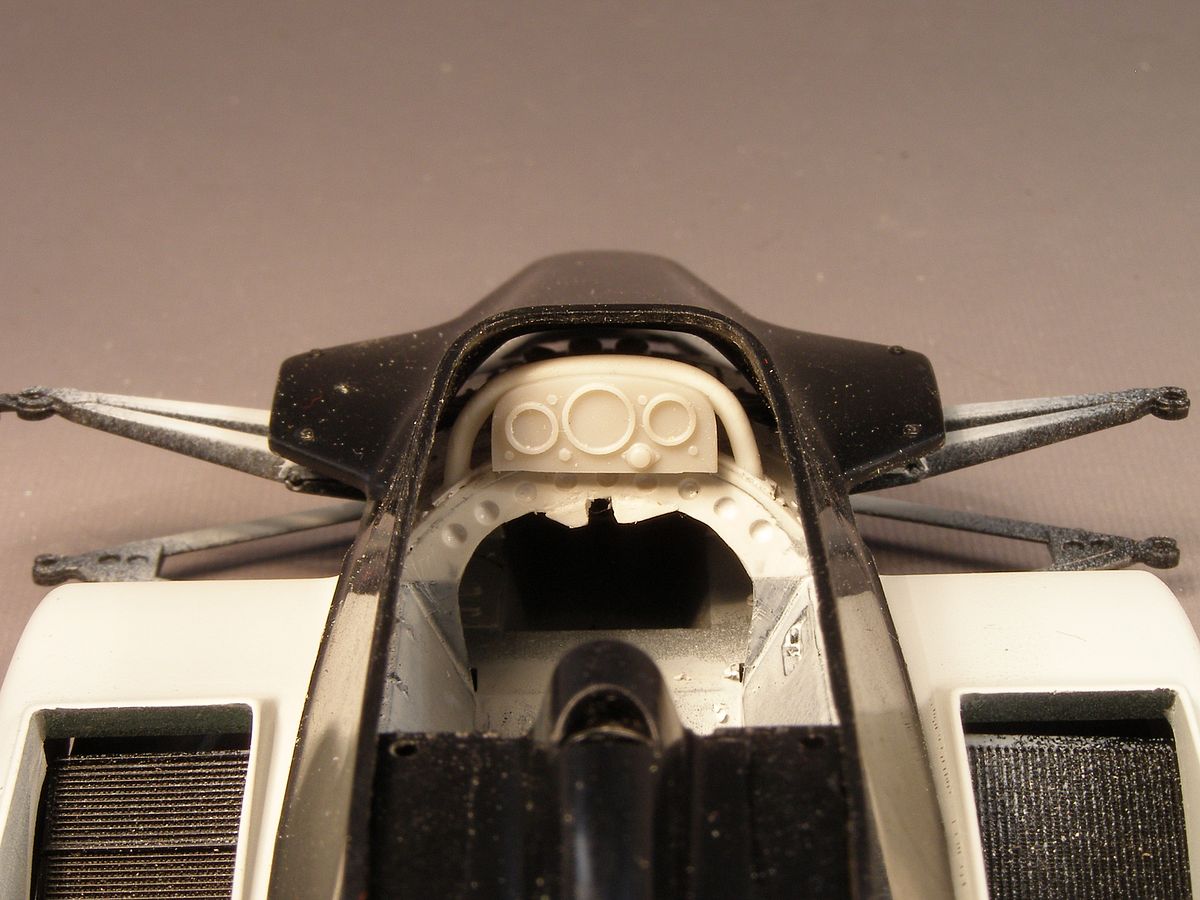
| The instrument panel has been reworked |
| and the hole I made at the wrong position has been filled. |
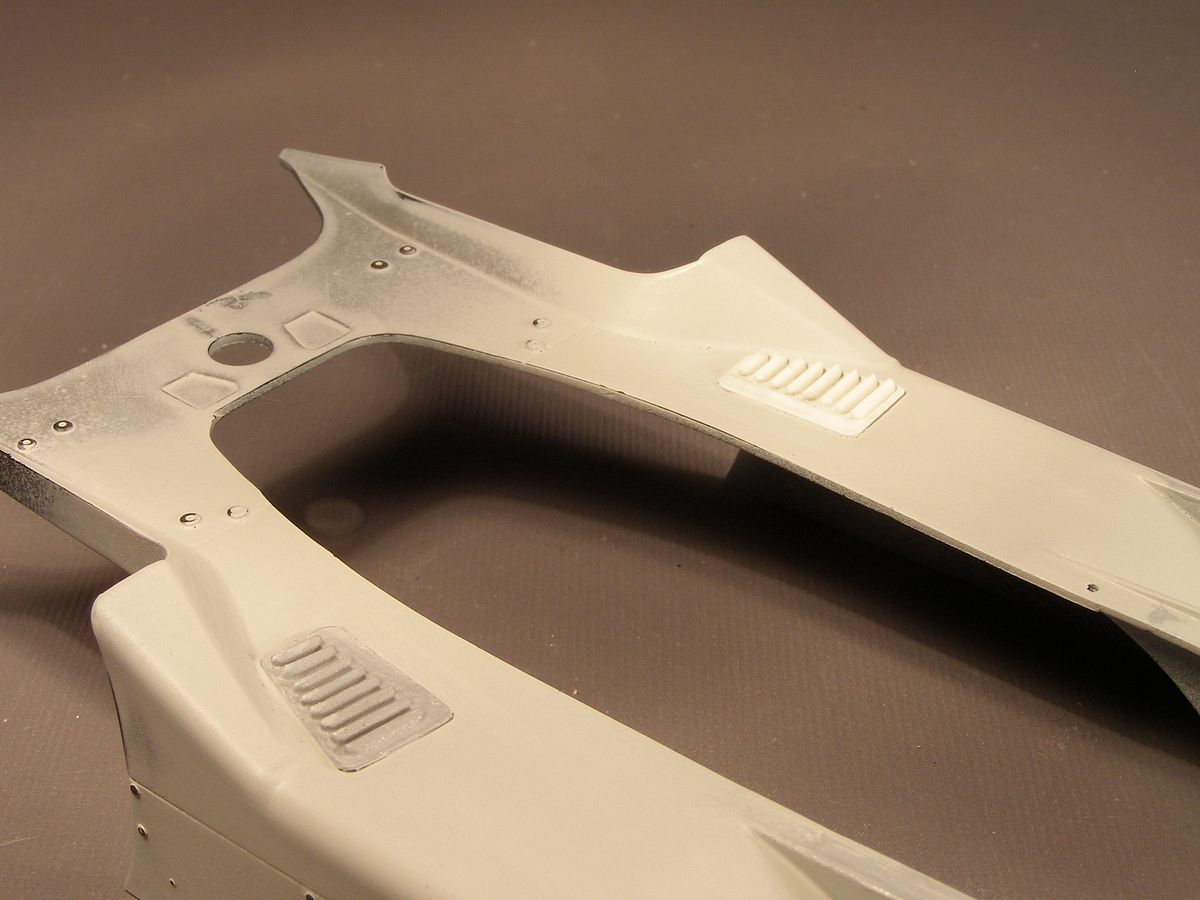
| I´ve also started to experiment with louvres. For a late season car, I have to add this. A new hole is next on the agenda. |
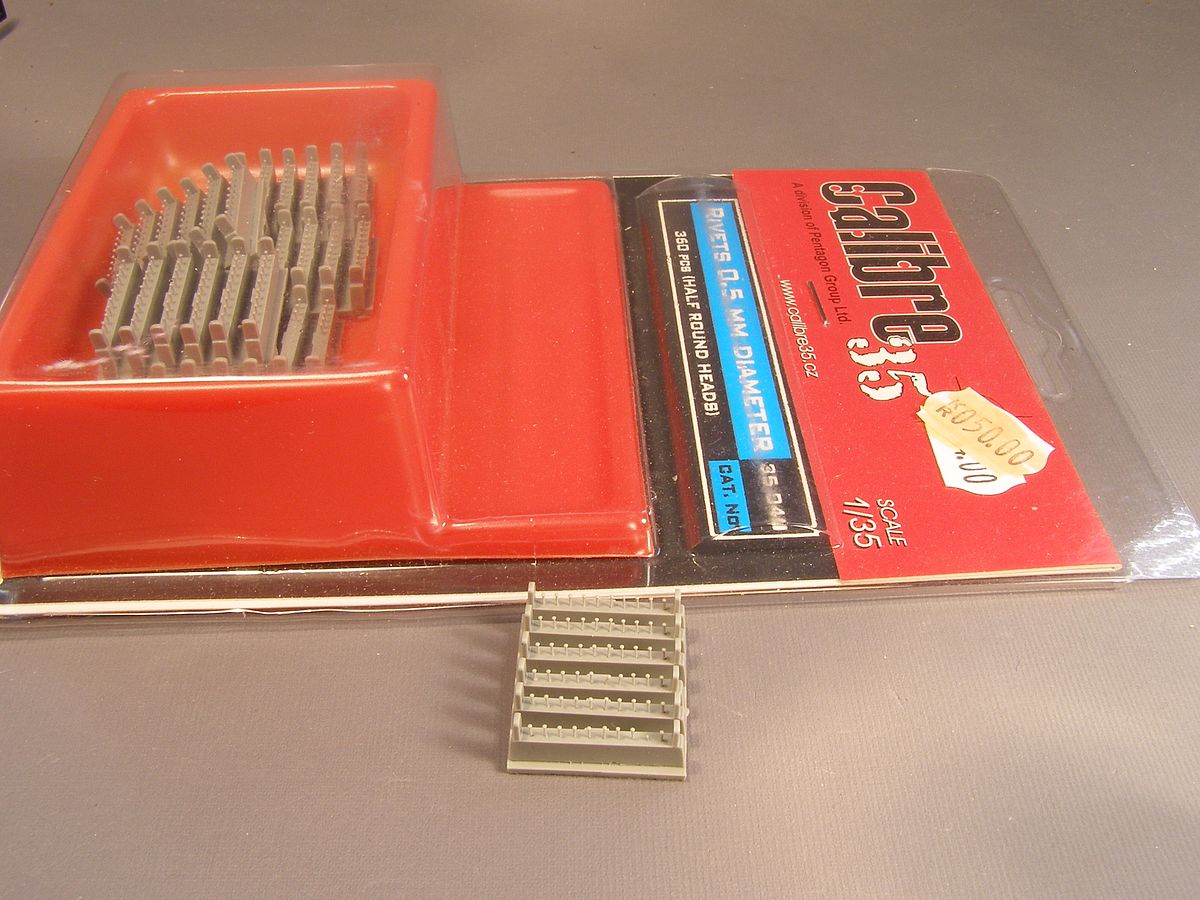
| I bought a set of resin rivets for another project, but it turned out that the size is right for this project. |
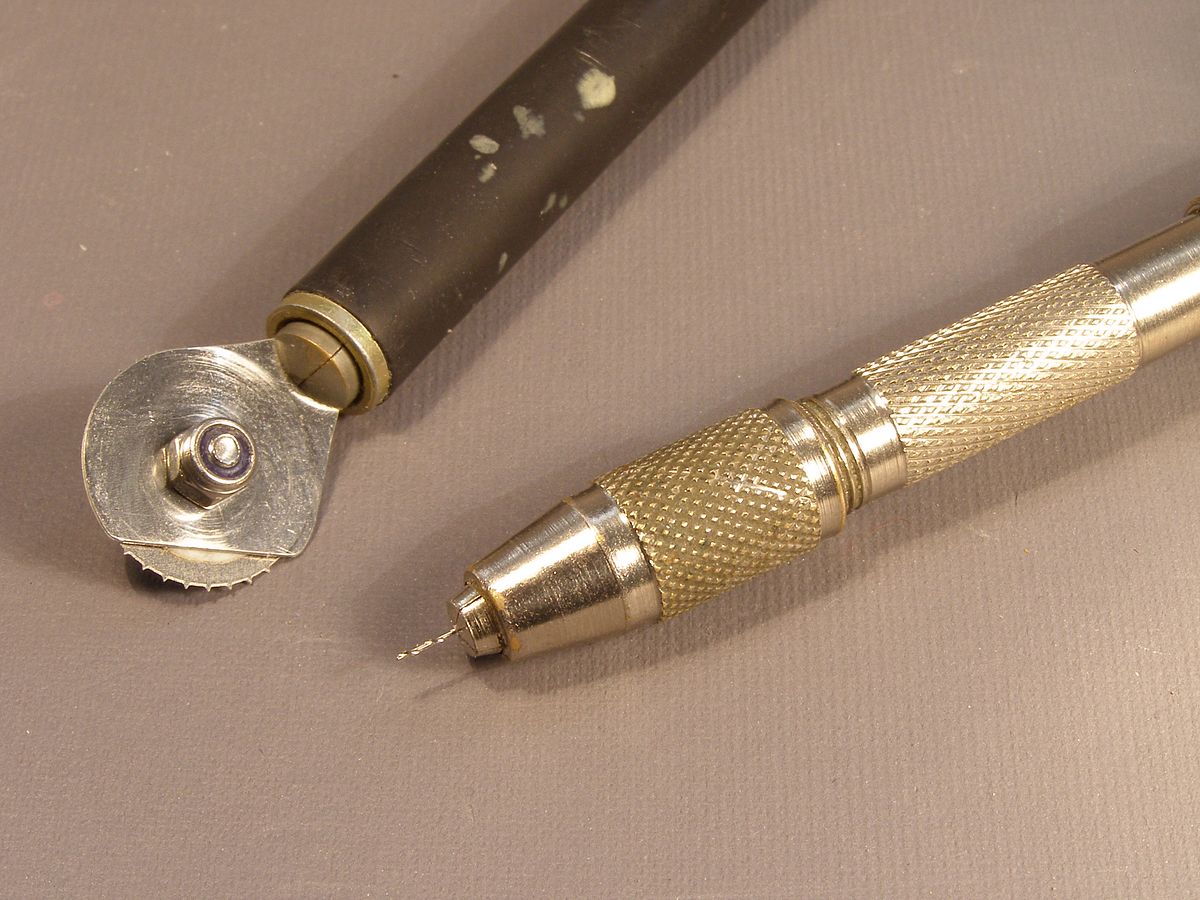
| So, bring out the rivet tool that I use for aircraft building and the pin wise with a 0,3 mm drill. |
| After the use of the riveting tool and a black wash to highlight the work I have a set of recessed rivet marks that I can use to help drilling holes for the rivets. Fun work isn't it? Well making the holes isn't too bad. Getting the rivets in them is a completely different thing. |
| 75 rivets done and several more to go. |
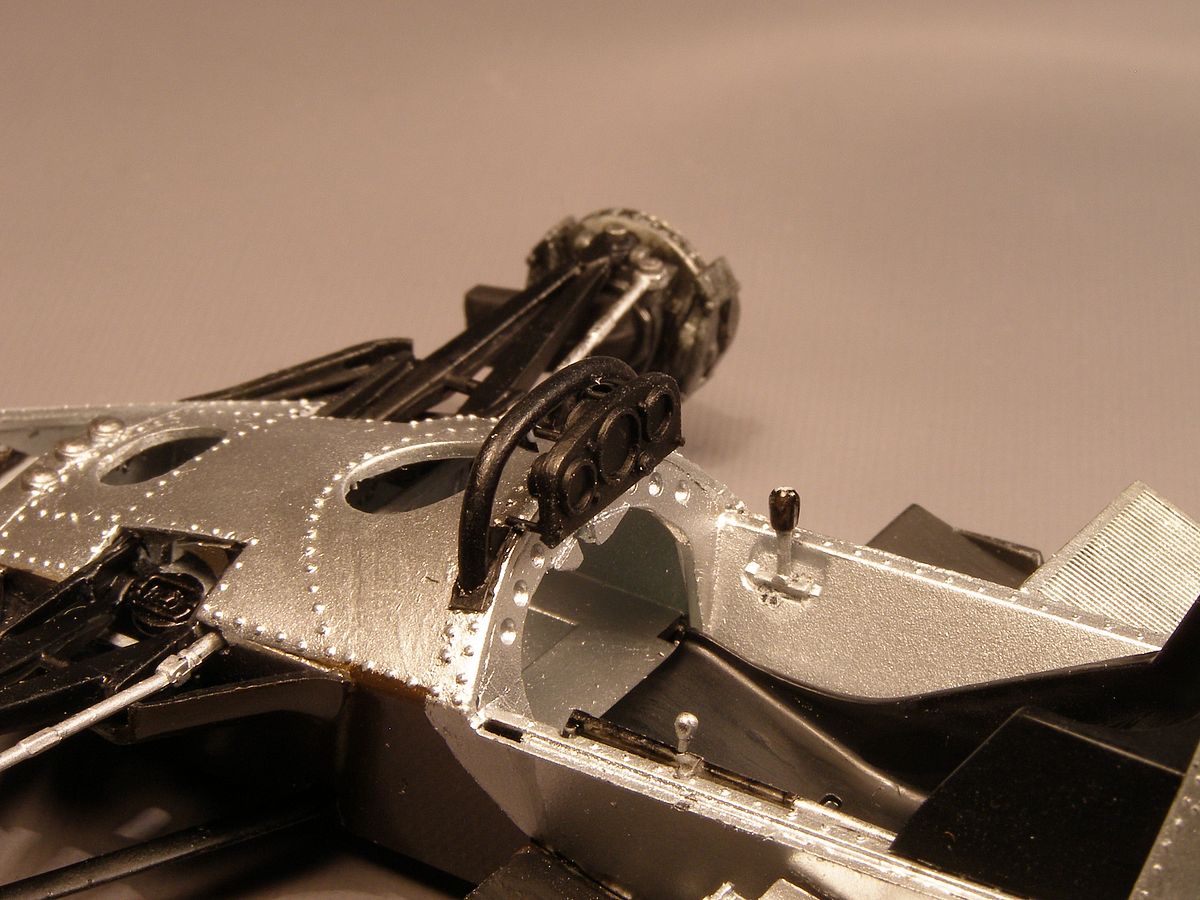
| As I've decided on the late version I am bringing together the parts I will need. The air outlets from the Tamiya 1979 Martini version will be used and the mirrors from the same kit to. |
| Bring out the saw again, it isn't much of a conversion really. Just to remove and replace. Some plastic strips are added to restore the original shape. Now back to the rivet while the glue is setting. |
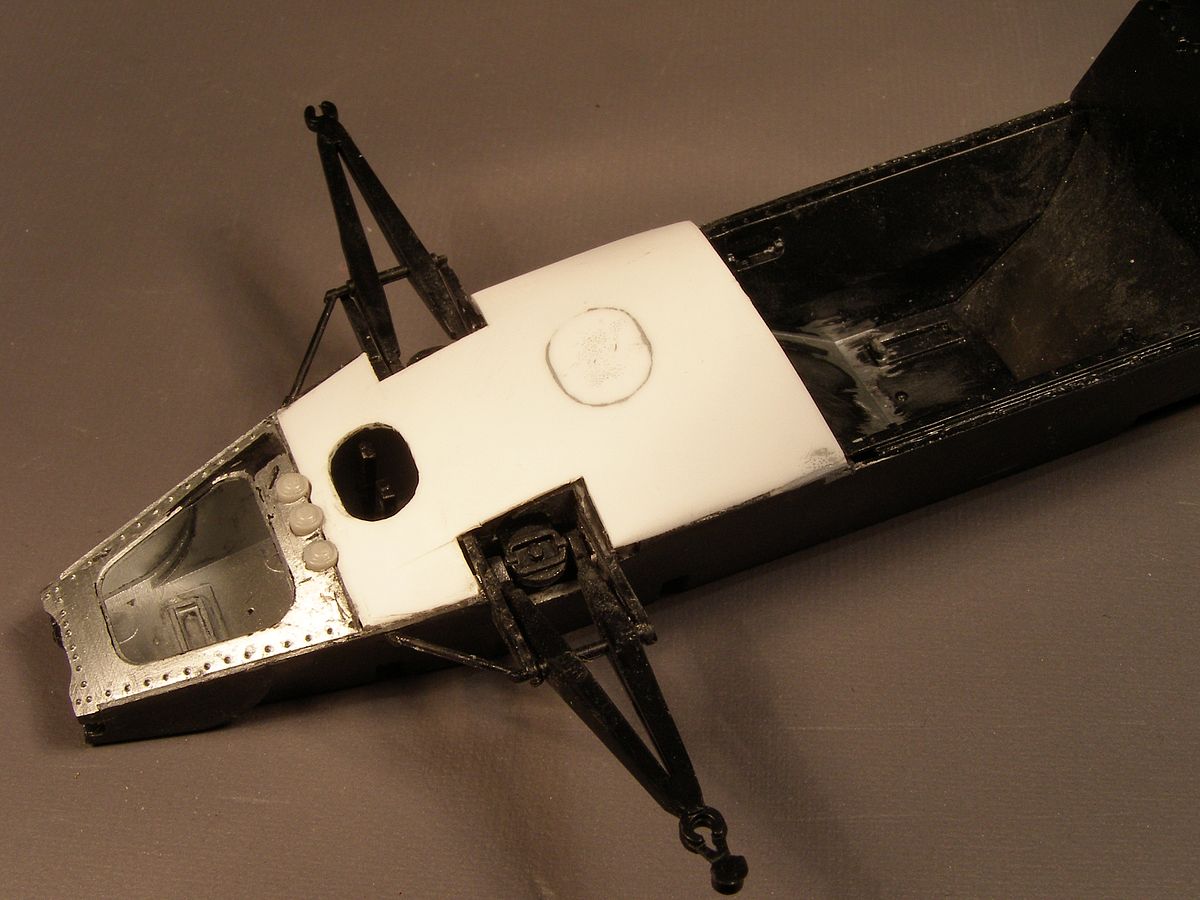
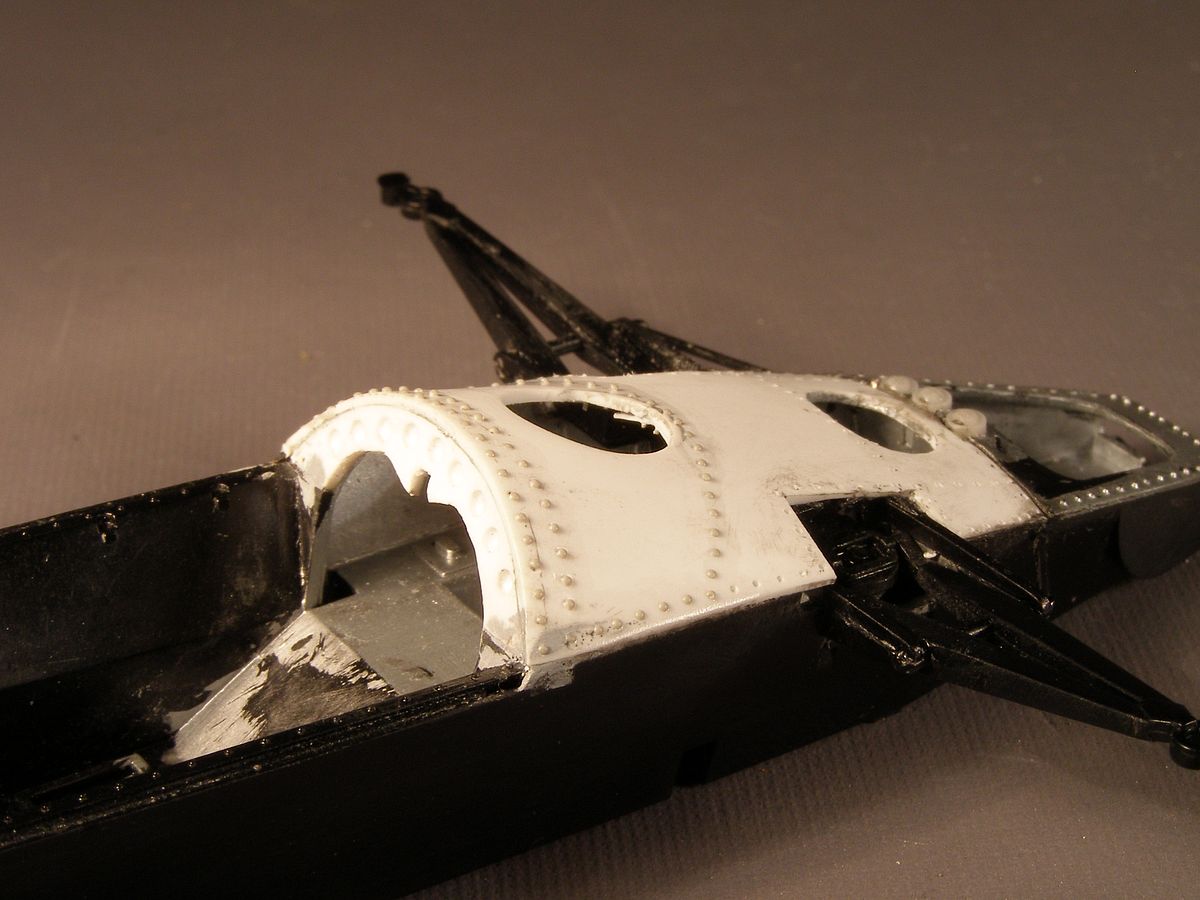
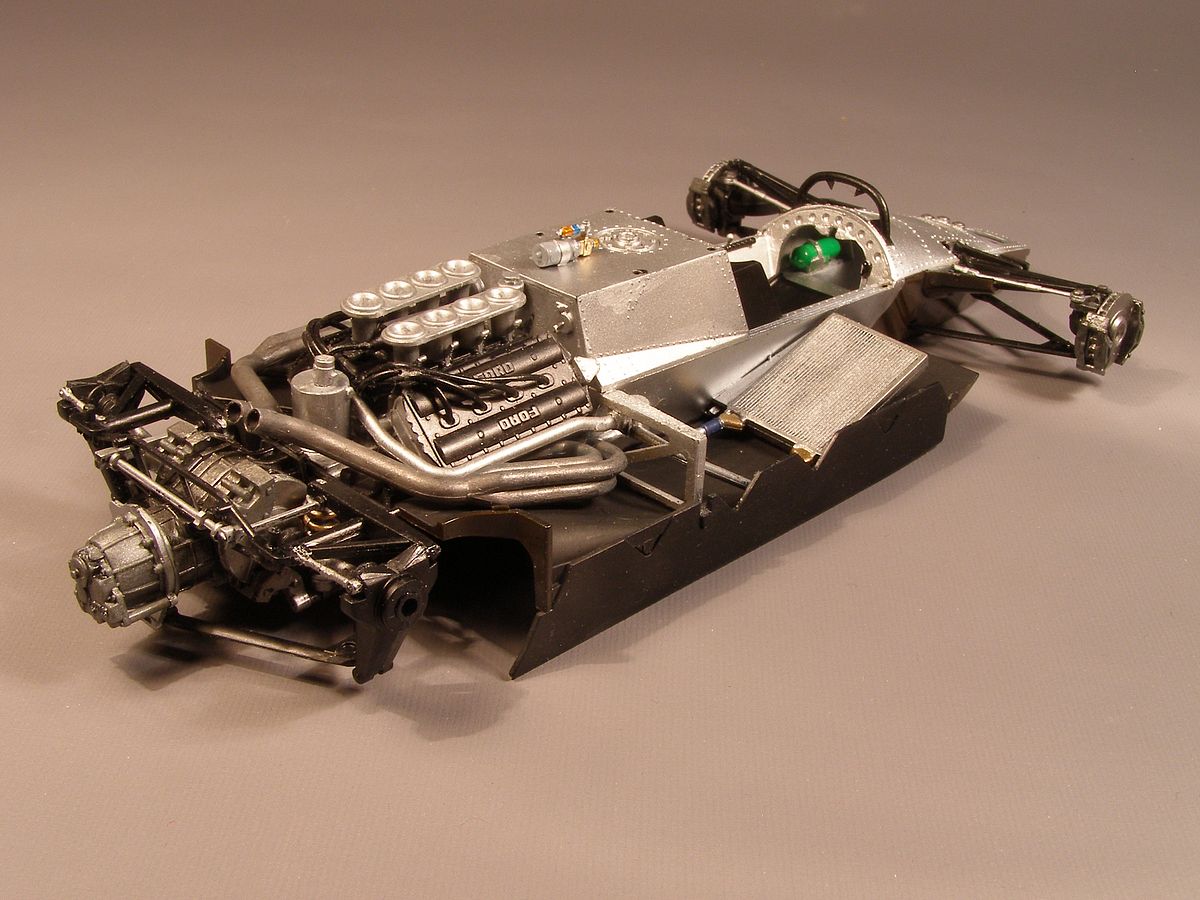
| A step closer to finish the front. With the new outlets in the side pods I had to move the radiators forward or there would have been a gap at the front. |
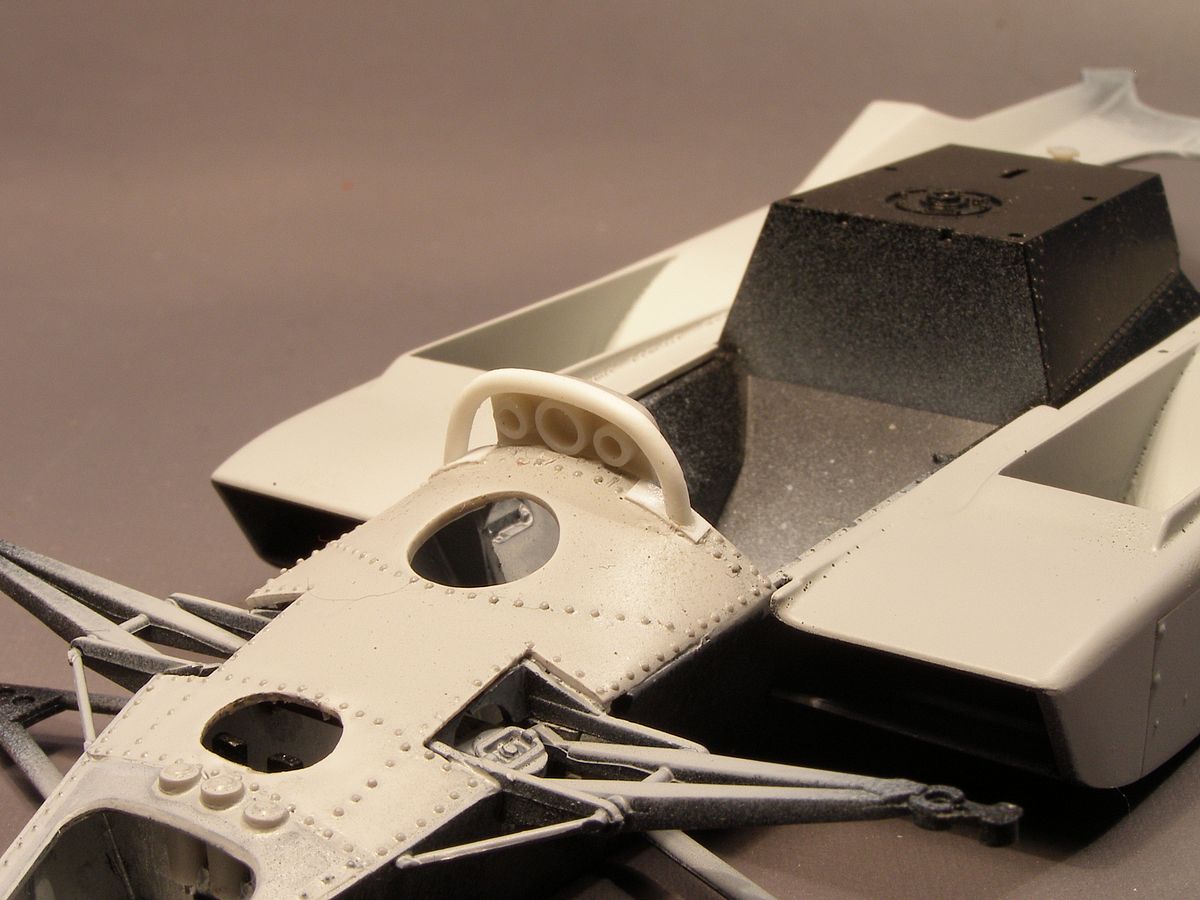
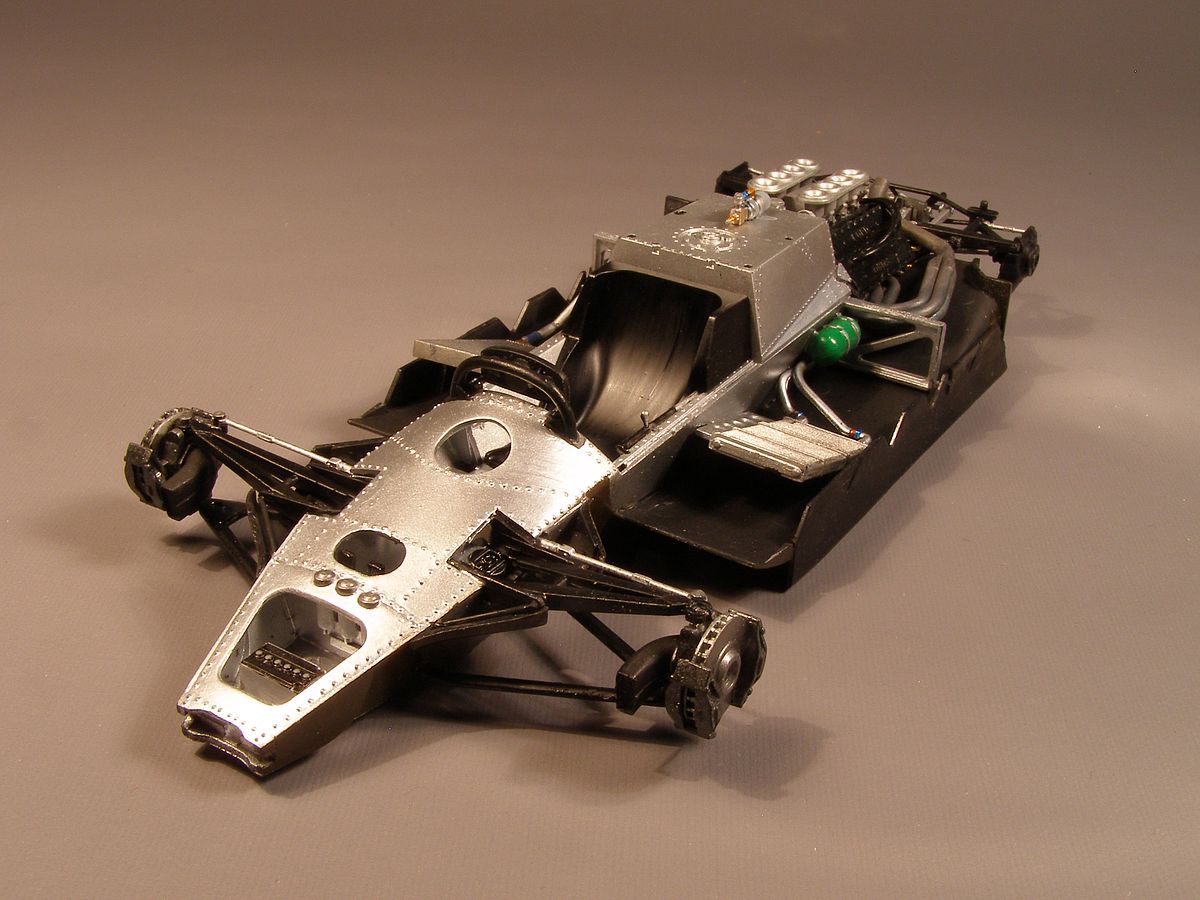
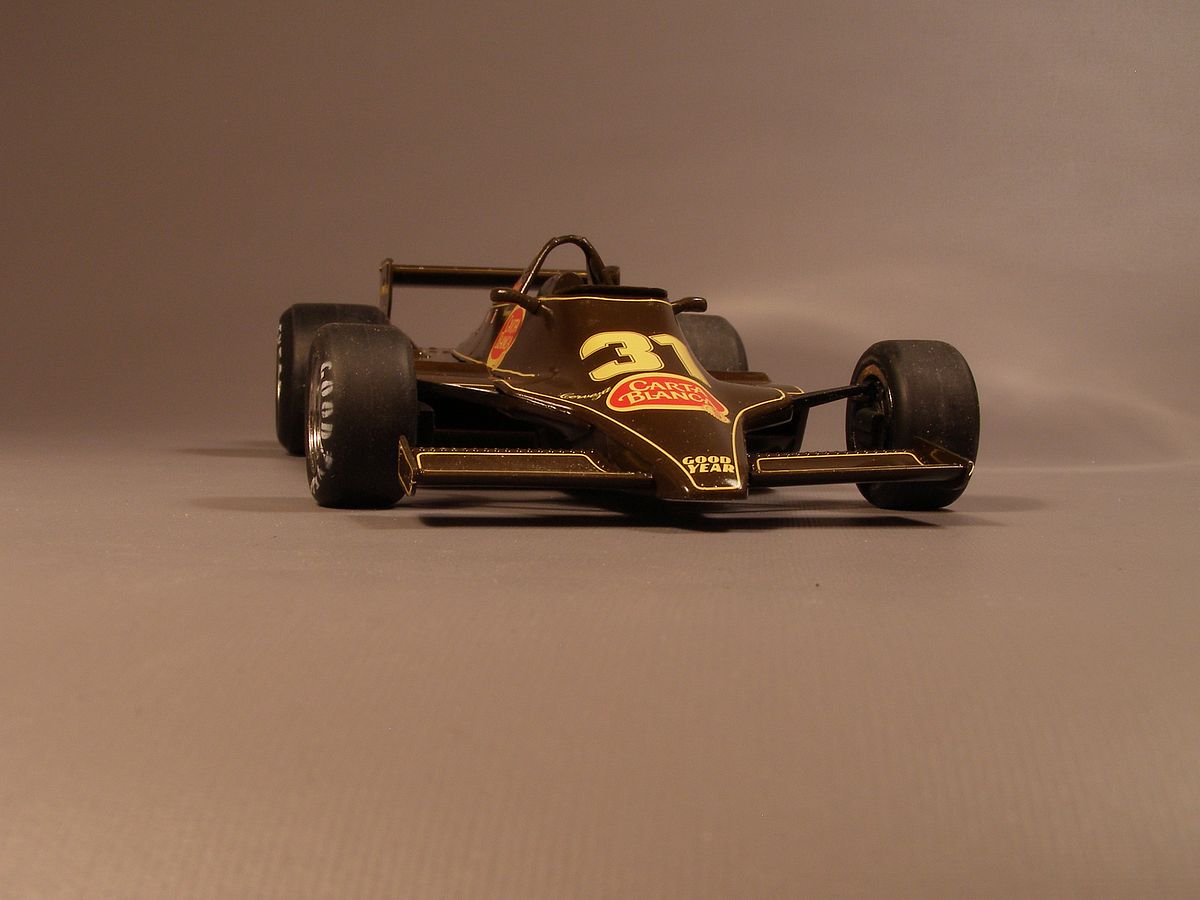
| The front roll bar is in place. There are details to add. |
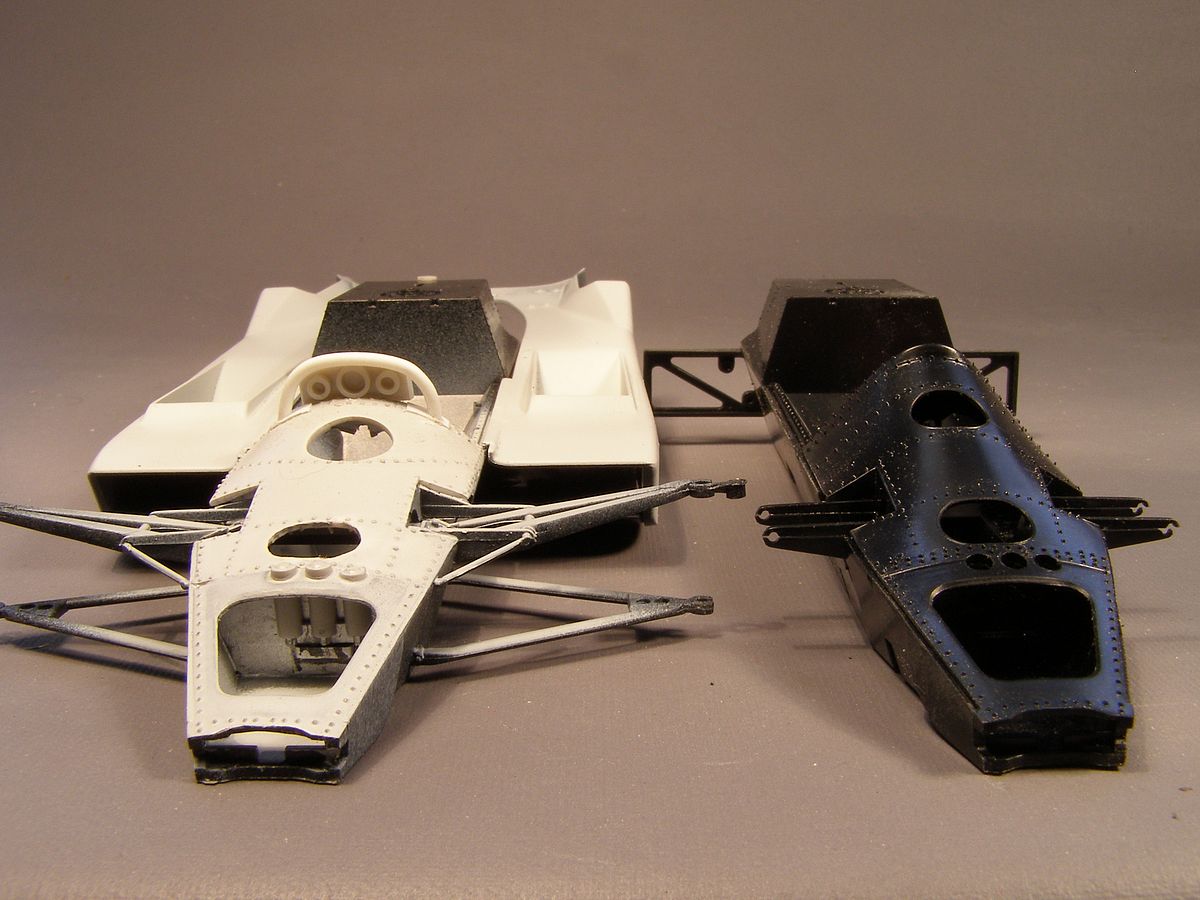
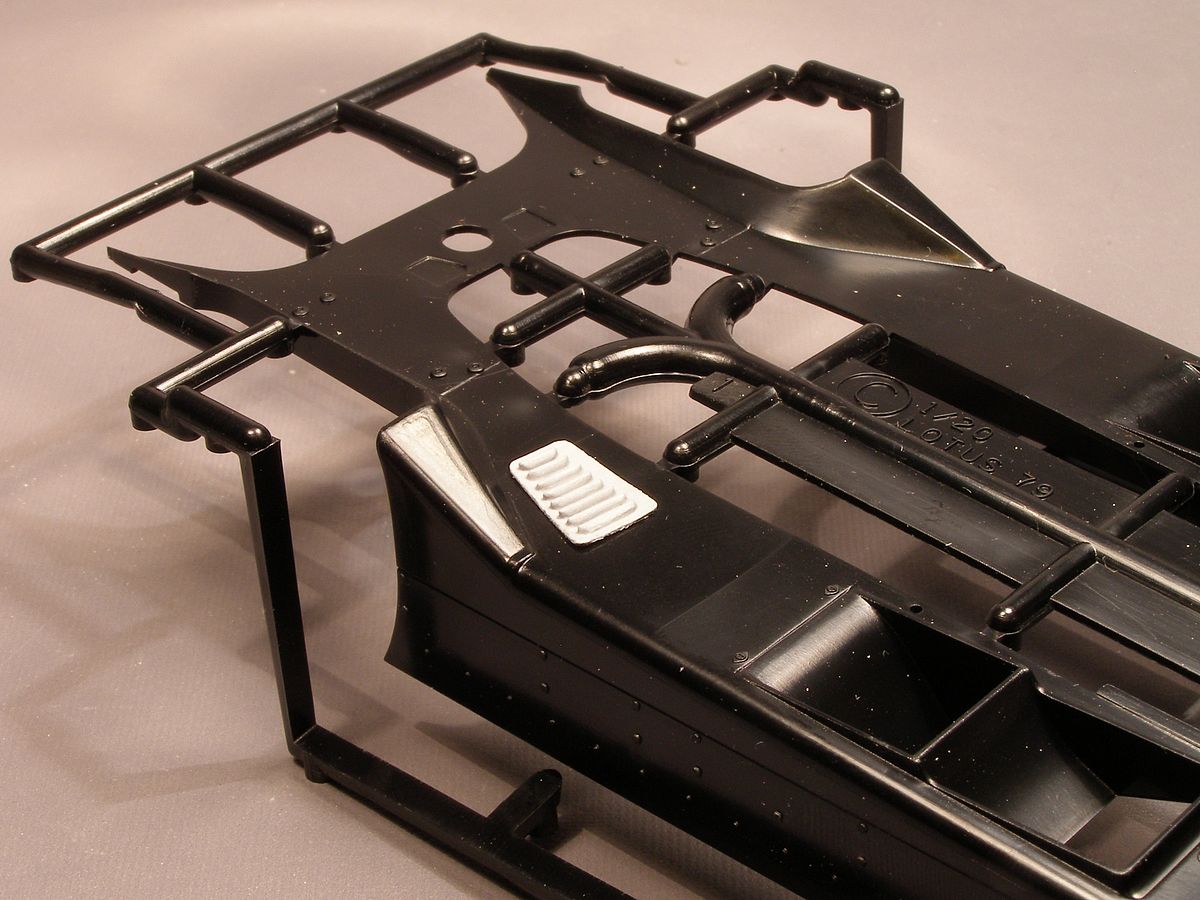
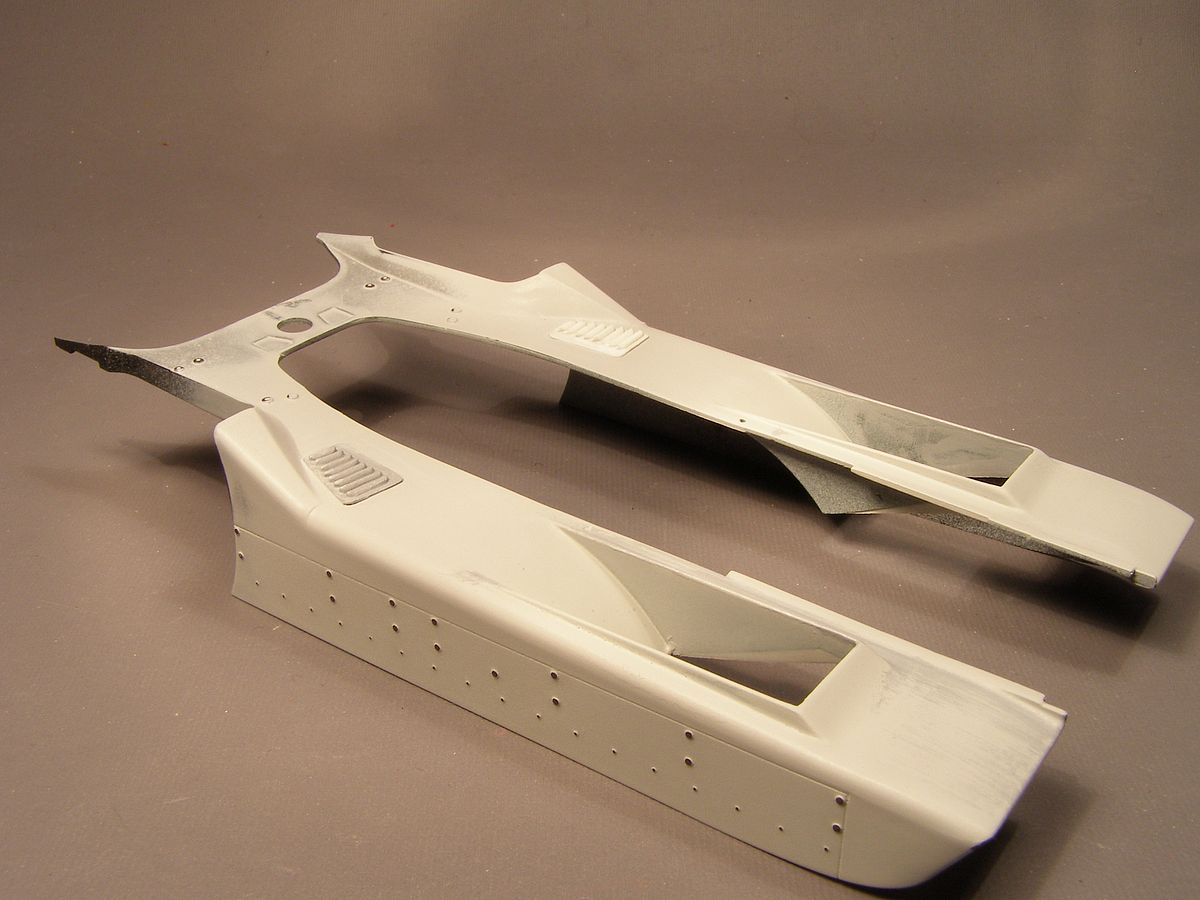
| Compared to the original kit. |
| Back to the original question: How much of this will be visible on a "fully dressed" car? Some are visible. The holes and rivets are probably unnecessary job. But I know it is there If I would build the original prototype version I'll think that I skip some of the work that will be invisible. |
| I take small steps forward. I made a second set of louvres and glued them in place. |
| Small details are added to the front roll bar. It might be a little bit too wide. |
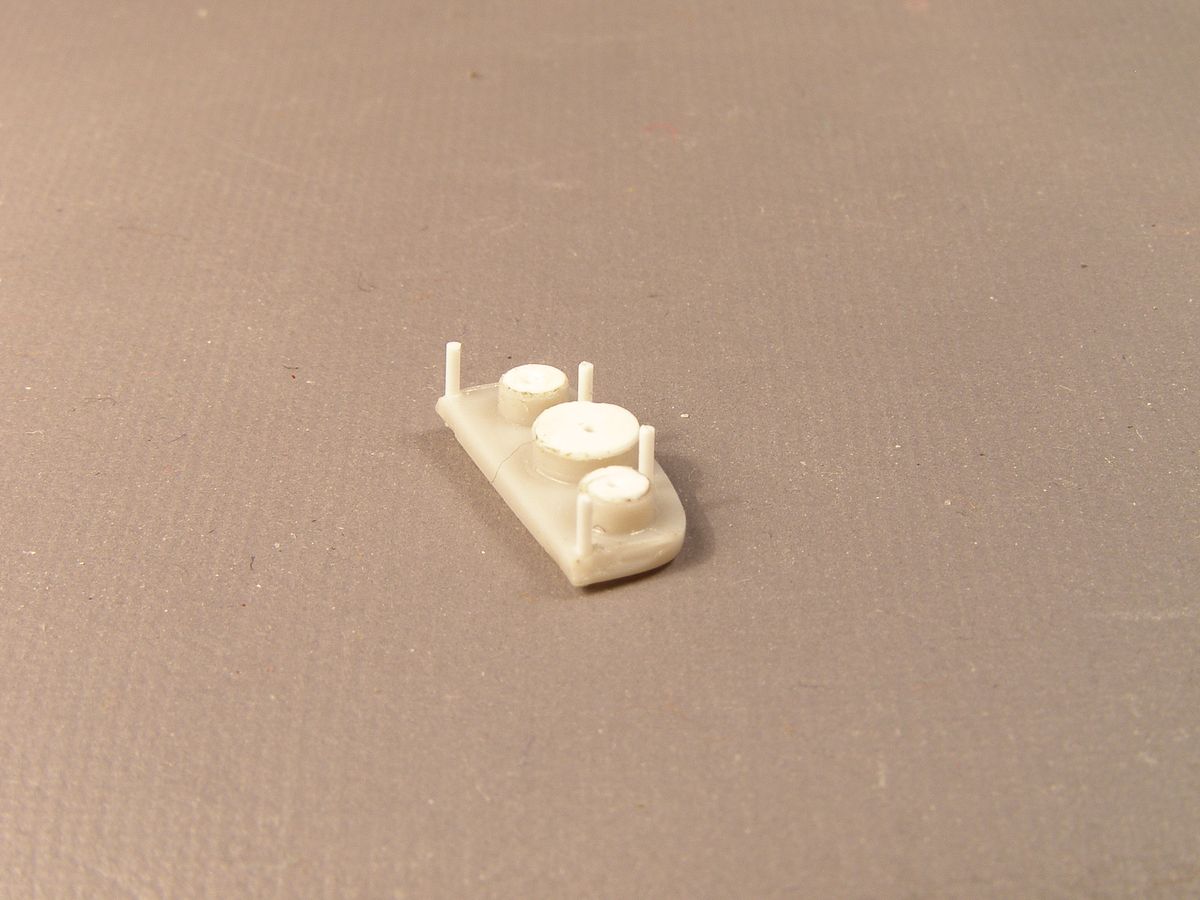
| The instrument panel is ready for paint. |
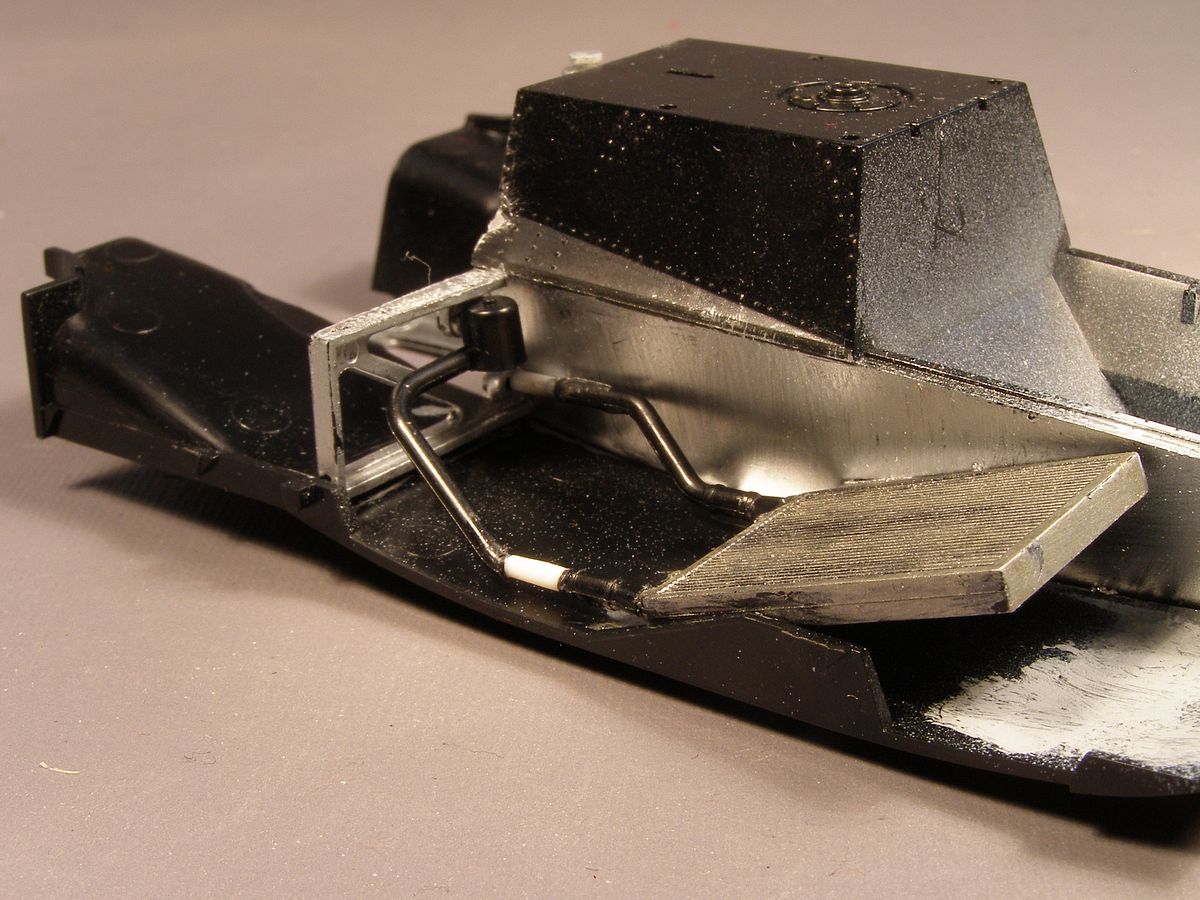
| Moving the radiators forward meant that the pipes had to be extended about 4 mm. |
| I decided to convert the roll bar. For a Belgium GP car the two bars should be visible at the top so that meant more work. |
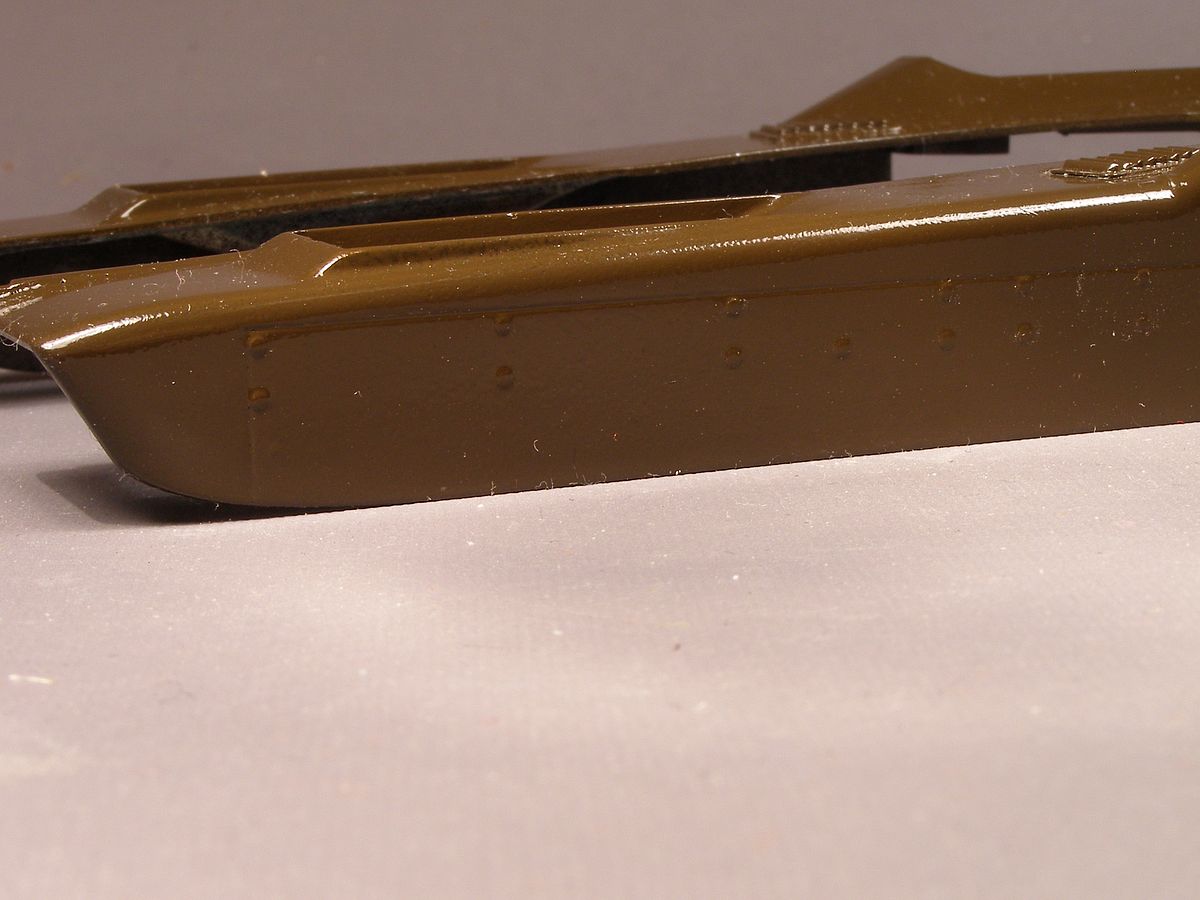
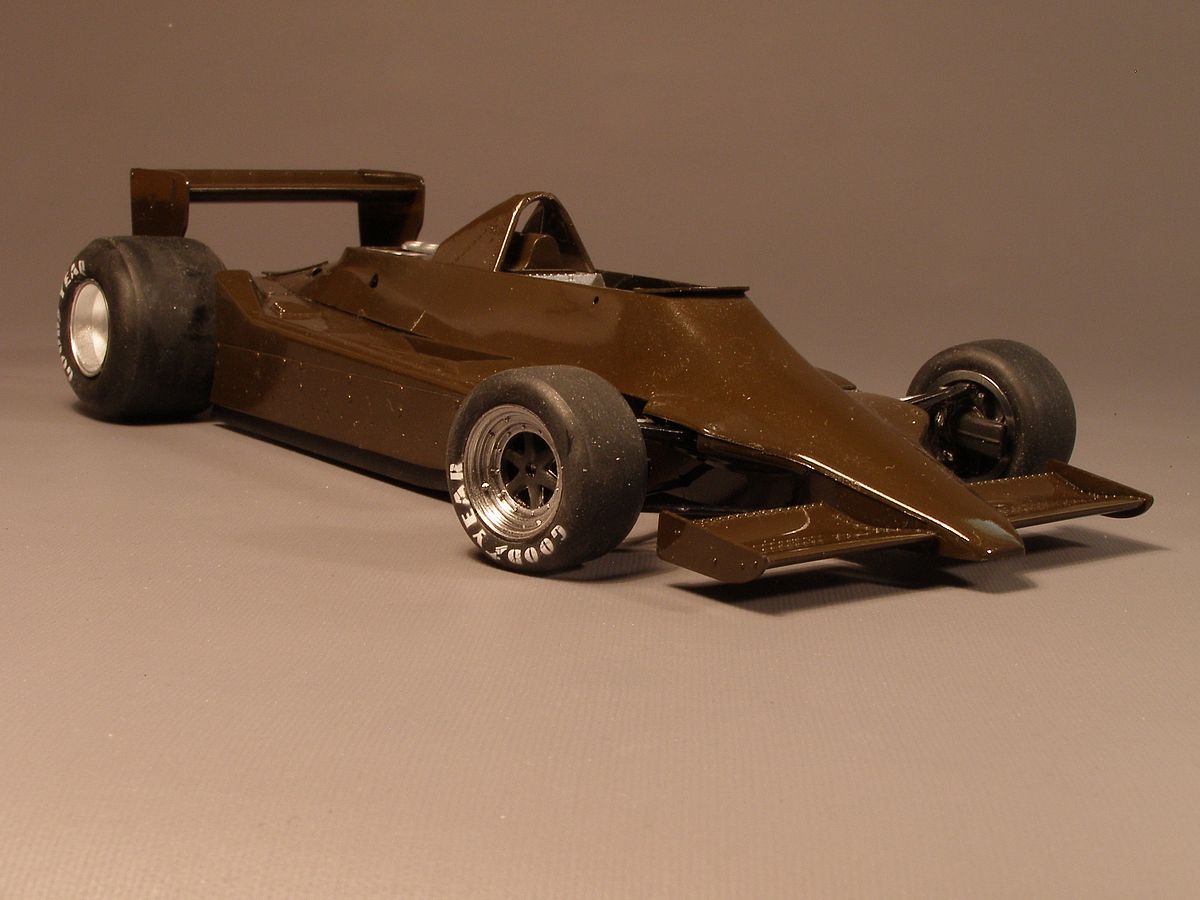
| I had to start painting the body. I decided to use Humbrol enamel paint. As the converted piece now was grey I decided to use black as a primer. The Tamiya spray was almost empty, so I used another black can I had available. Well the result came out uneven, so I tried to sand it down before adding the brown. I got an orange peel surface on the converted piece, so I added more thinner to the paint. The rest of the body parts became OK. I tried to polish down the orange peel but when I put on a second coat of paint something went very wrong. Part of the surface started to look like a tree dimensional map of a mountain ridge. With all the filler and paint coats the details was getting fuzzy so I decided to try to remove the paint and start all over. |
| Well, the brown paint came off, but the black primer stuck so I got tired of it all and decided to sand it down and add the missing details instead of trying to sand around the "rivets". I then re-scribed the panel lines and added the "rivets" with the help of a punch and die set. |
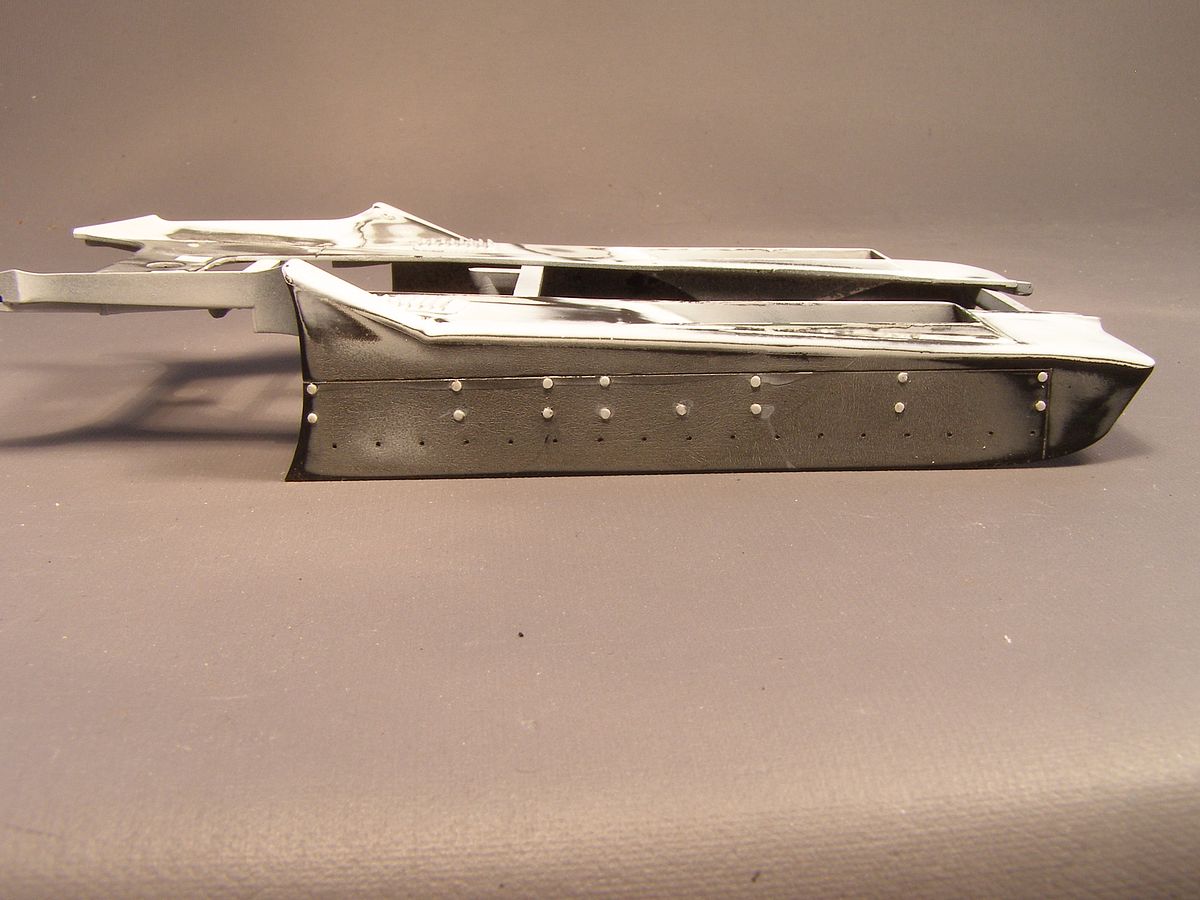
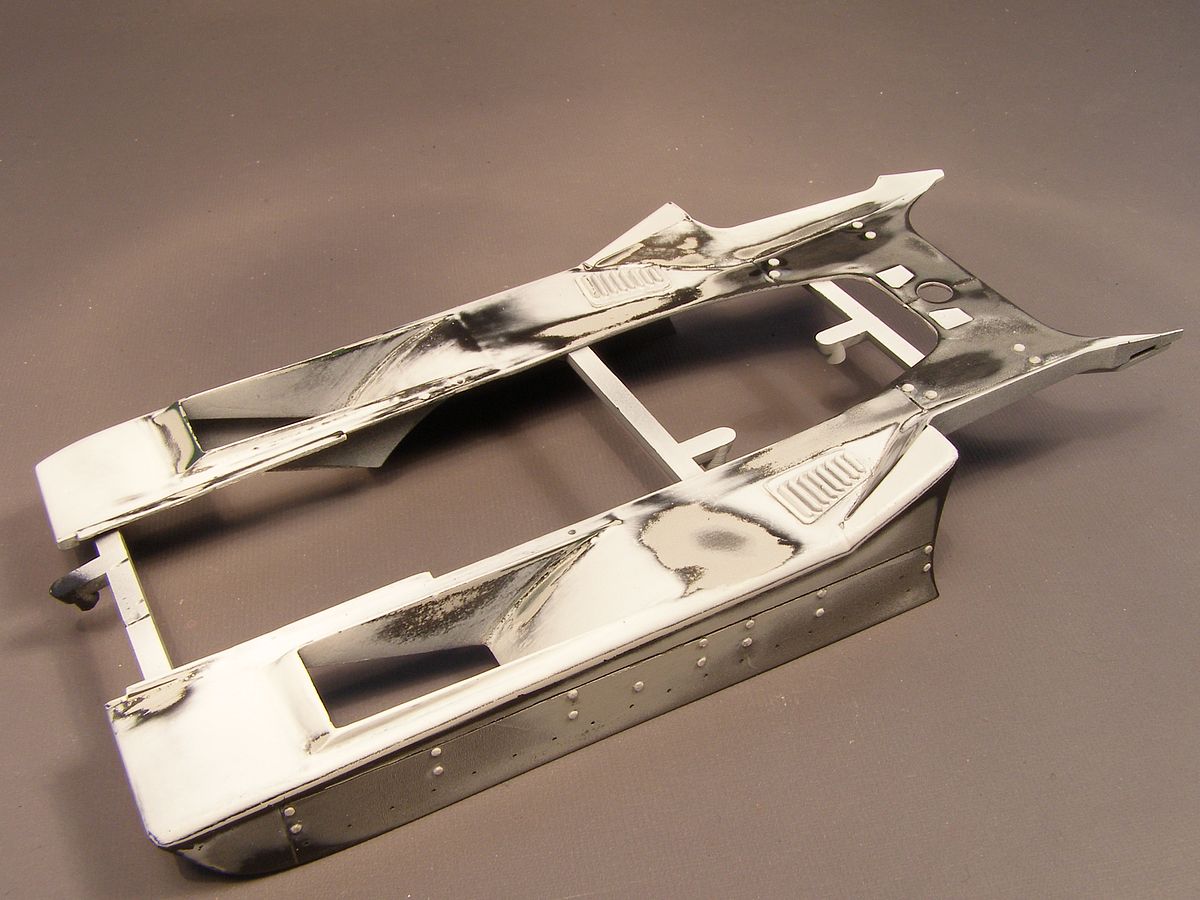
| The smaller rivets were drilled so they are now recessed but I feel that is OK. I started to paint it again and it is now a much smoother surface. It will not be a super finish but either I settle for this or I just throw it out. And another thing: while working with the body it snapped in to two pieces. I glued it together and added some sprues to stabilize it while working on it. |
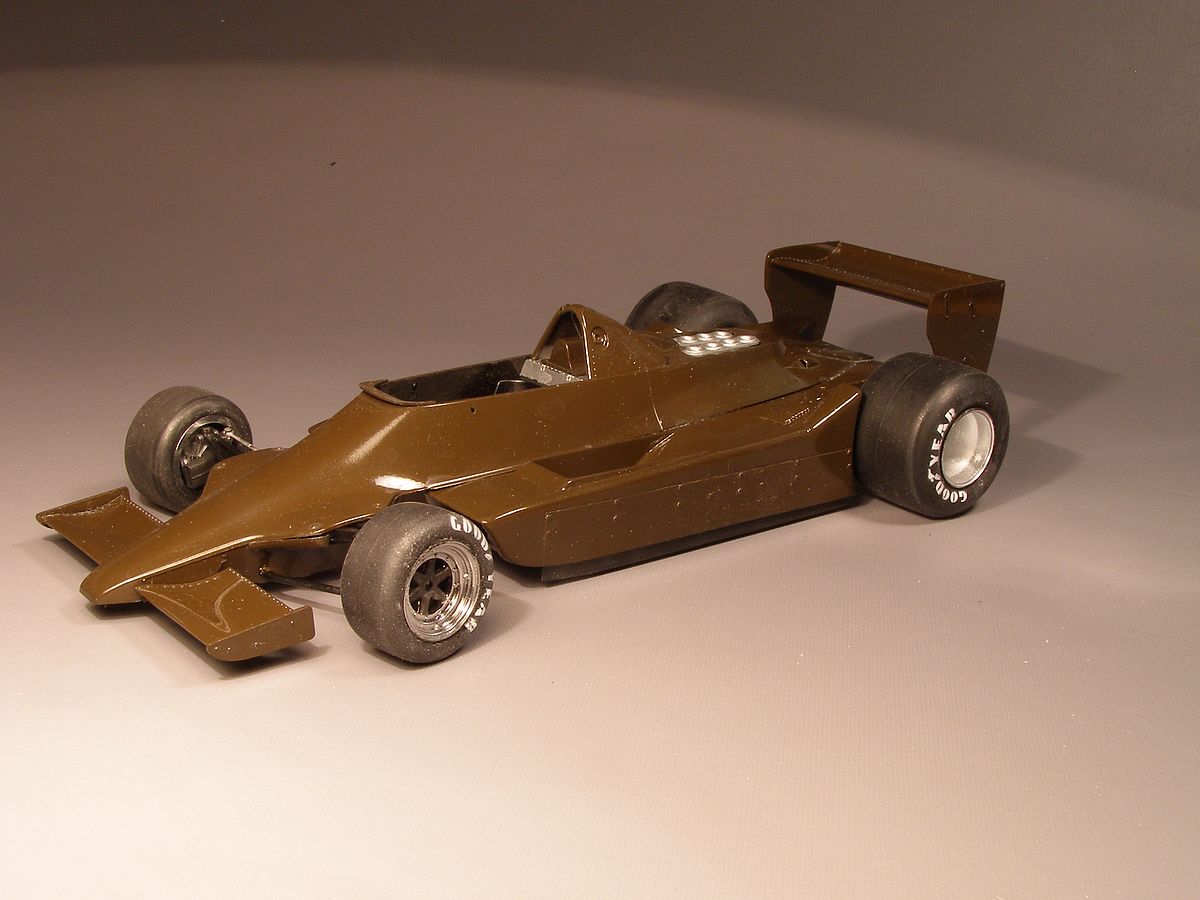
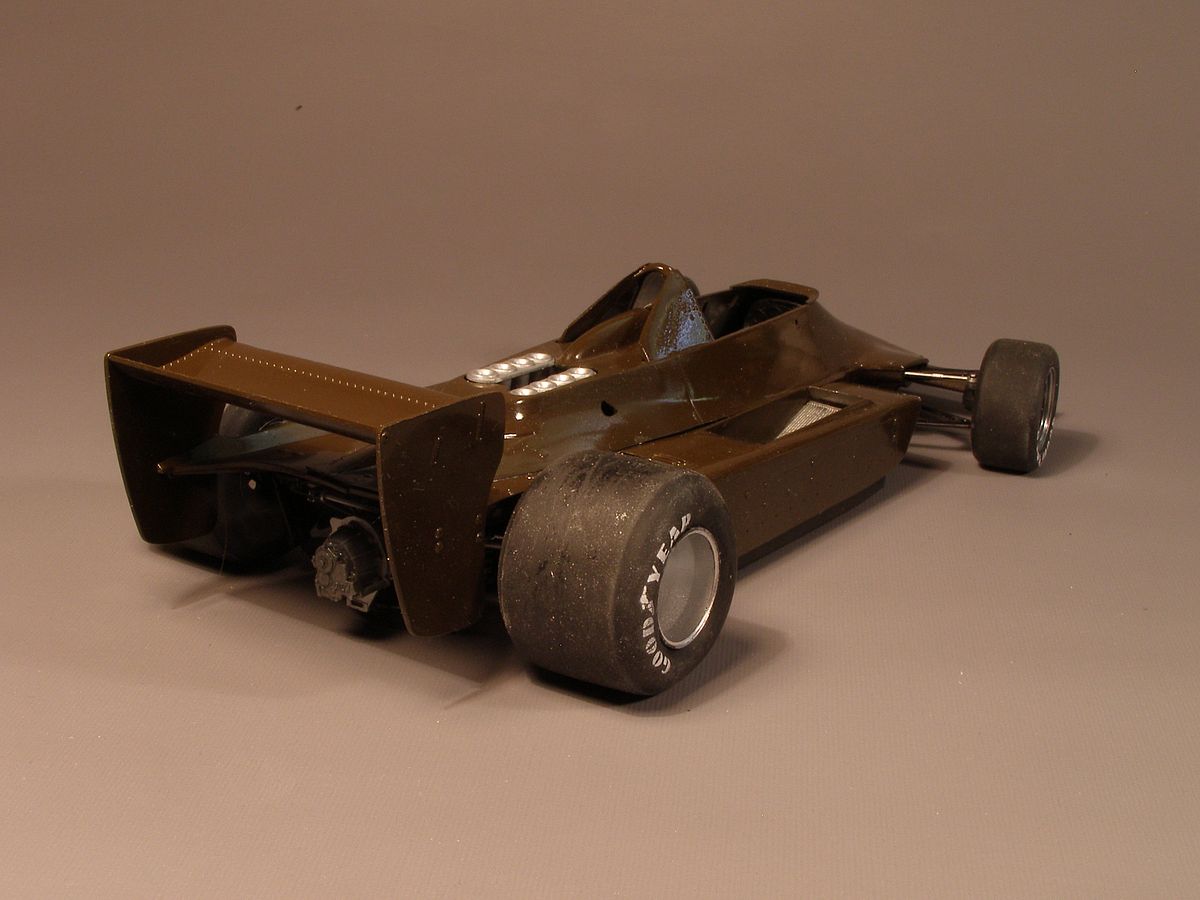
| The pictures are taken under two 60W bulbs, so the car is actually darker than in the pictures. Here is a pic taken in daylight and with no colour compensation for the bulbs. When it later will be displayed it has even less light, so it will look even darker. Looking at pictures of the real car don't give any real clues to the colour either. It varies from black to different shades of brown. It probably should probably be darker and less red but after all the problems I don't dare to add another type of paint in case of any reactions between them. |
| Finally, the paint is on and while it never will win any competitions it isn't the catastrophe that I thought it would be a couple of days ago. Now I will just finish it and hope I've learned something for the other cars in the stash. It will not be as good as I hoped for, but it will be finished. |
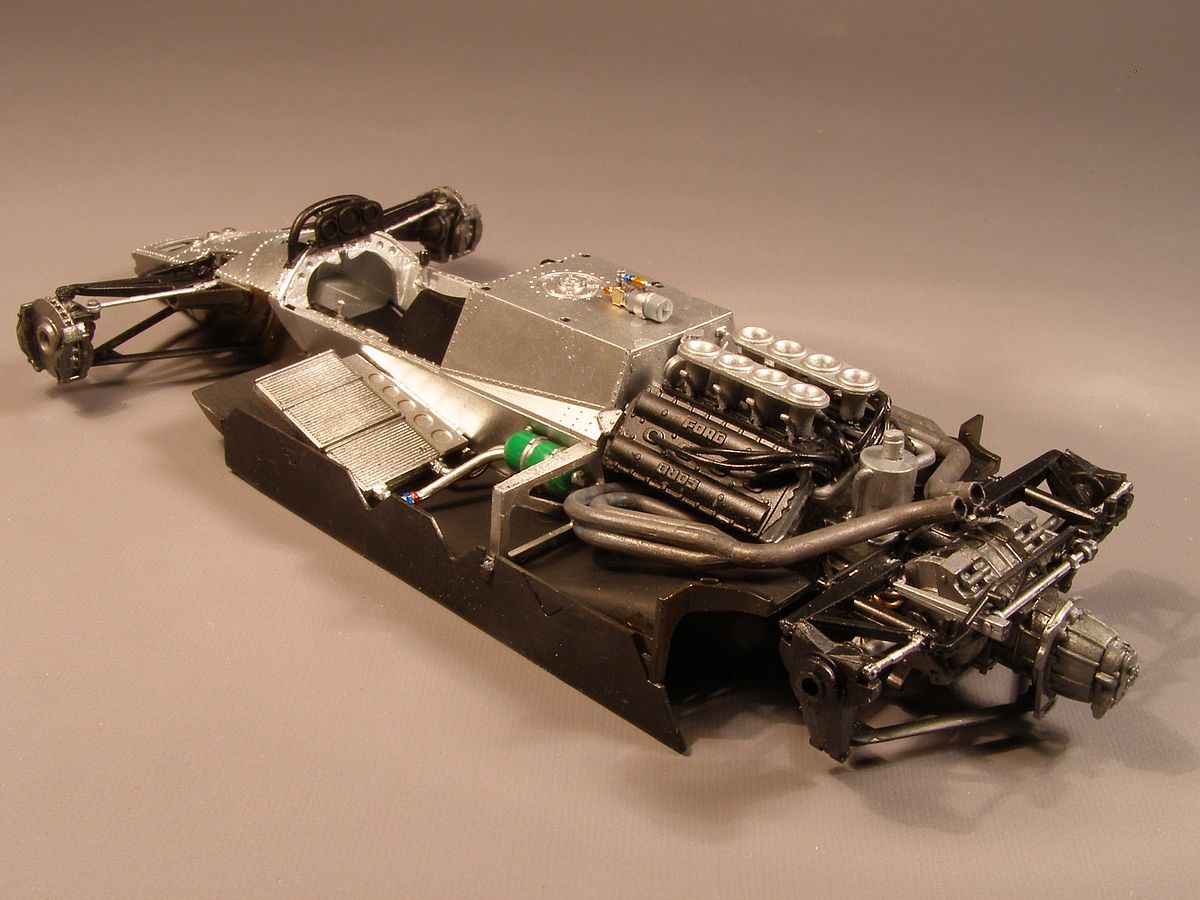
| I had some black cable that I tried to use for ignition wires, but I found them to be too large. I don't think the body work will fit over them. But it doesn't matter if I have to remove them as I will build it "buttoned up so they will not be visible anyway (I hope). |
| The cables were just a test for a possible future build. |
| I glued all body parts on so not too much can be seen of the engine. Now I can see how much I can leave off on the other Lotus I am building. I will glue the body on that one to. |
| I hate to paint but I have decided to repaint it once again hoping that the strange white spots will disappear. I have masked it a washed it, so it is now ready for paint. Wish me luck. I will need plenty of it. |
| I haven't given up.............yet. I don't know if it is the third or fourth try with the paint. I am not happy, but it is better than I expected after all the trouble. |
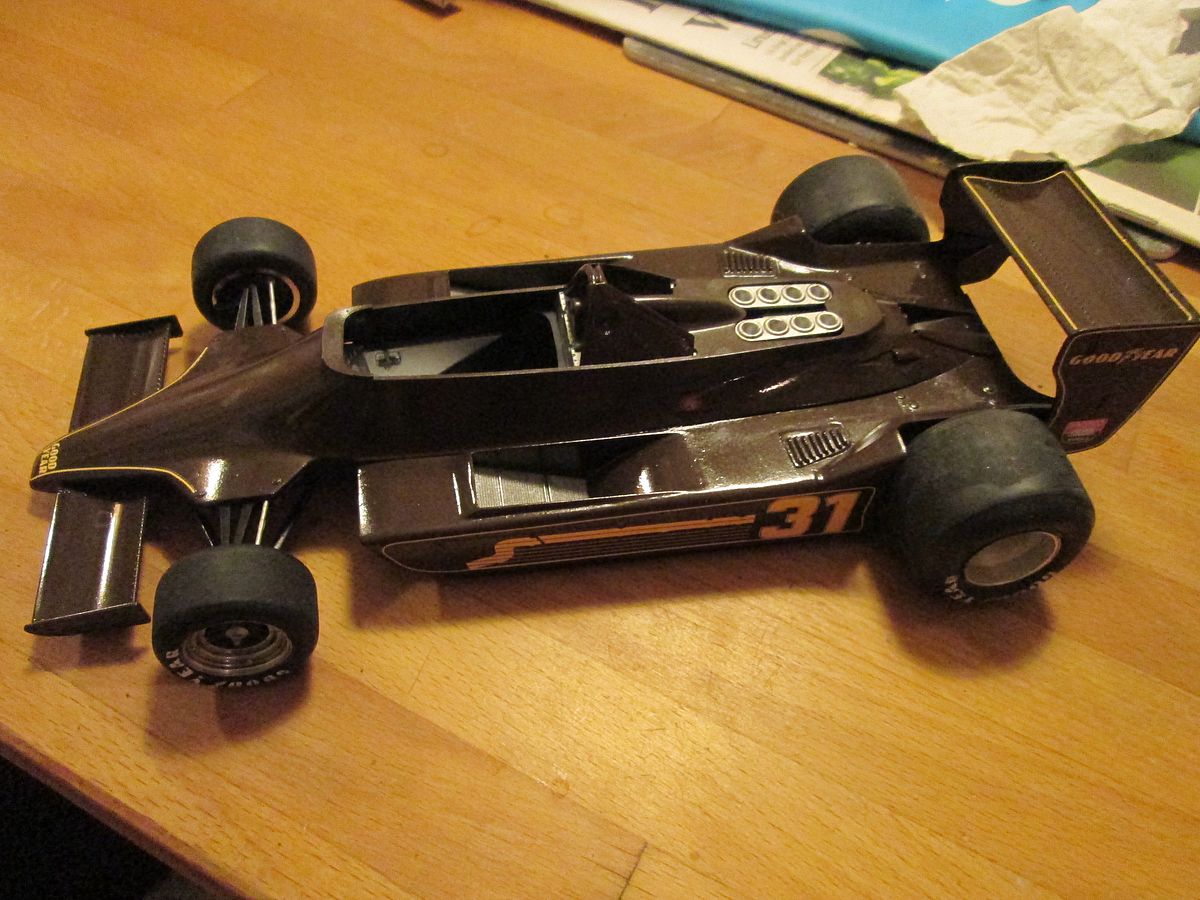
| I am adding the Tabu decals right now and have another Hasegawa kit ready for paint. Black this time. |
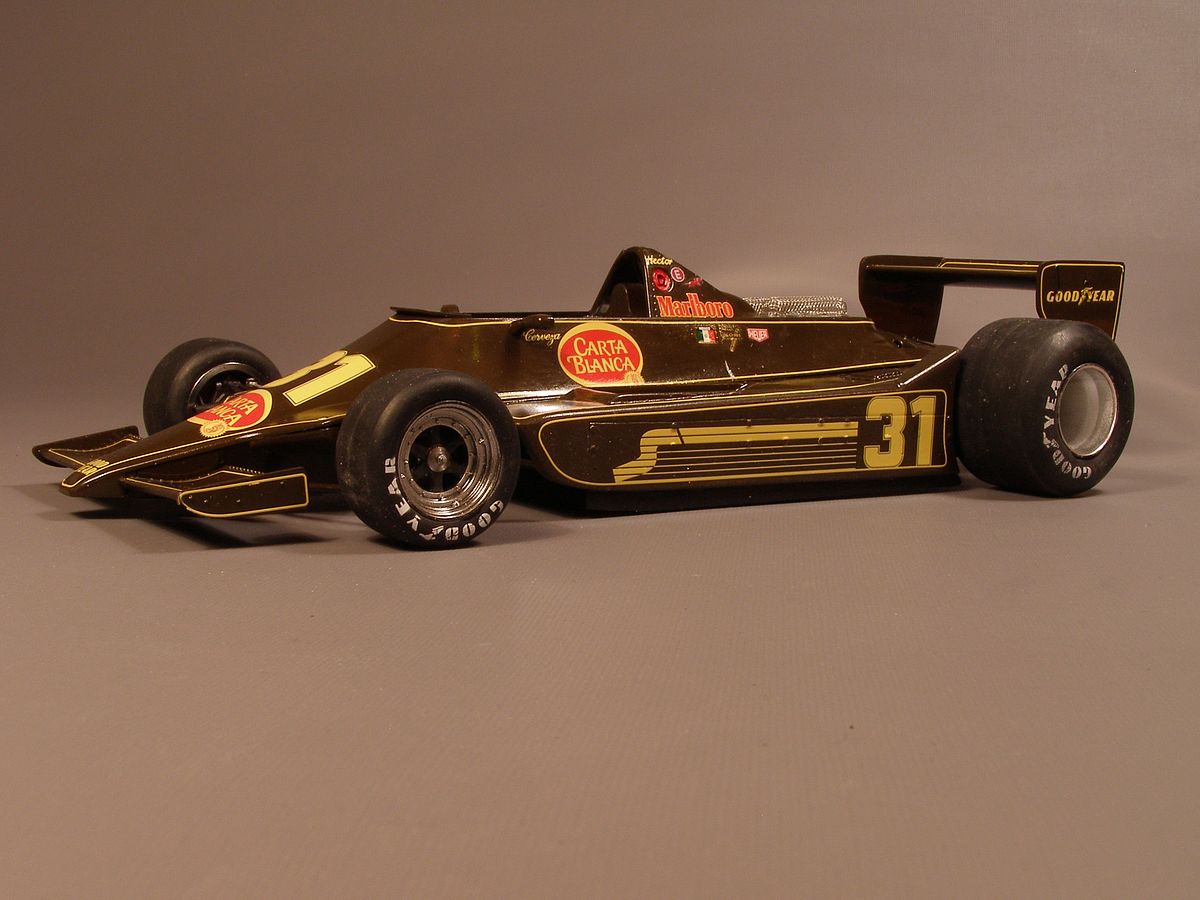

| Finally, it is finished. I started in June last year and almost gave up when the trouble with the paint never would stop. The decals from Tabu went on very nicely but I don't think that they were made for the Hasegawa kit as they didn't always fit. |
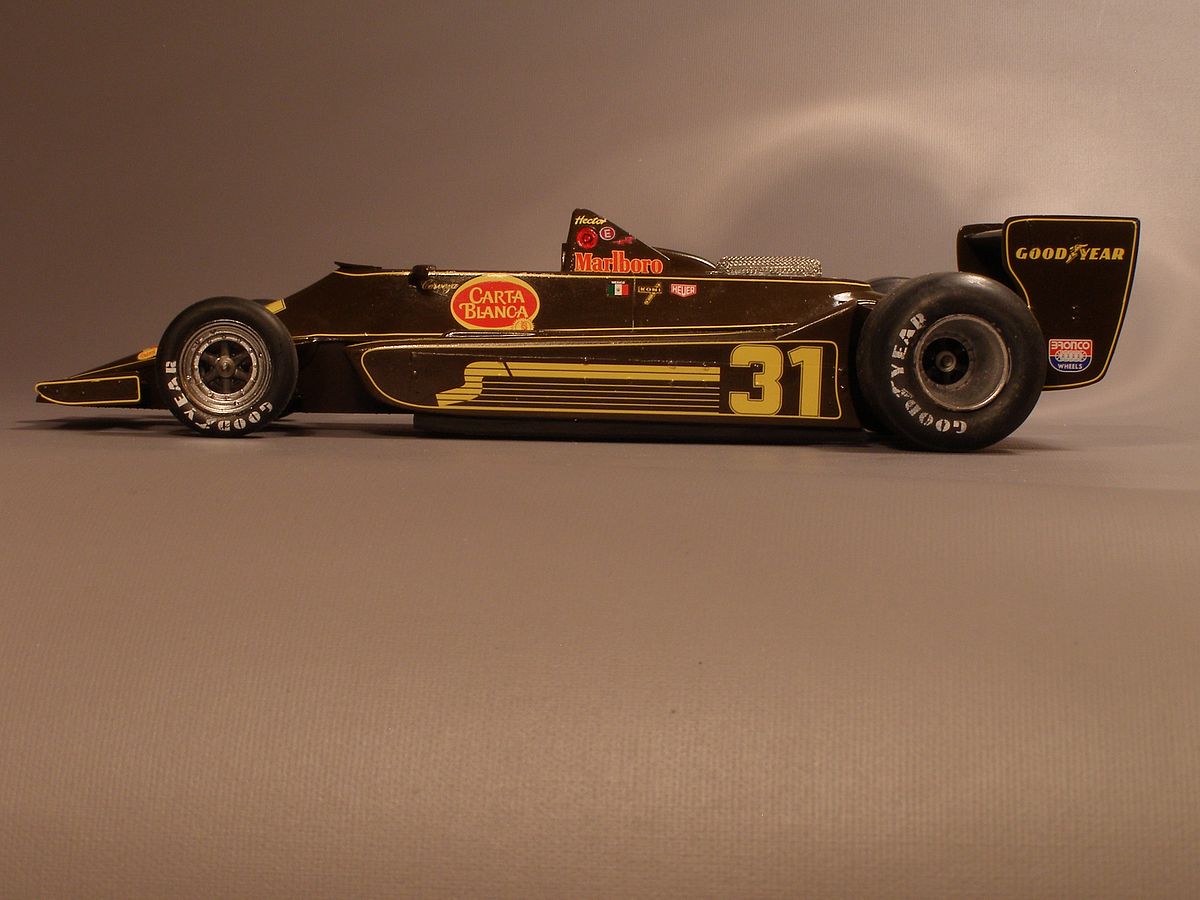
| Luckily, they were mostly to large, so I could trim them and use lines removed for the few lines that was too short. |
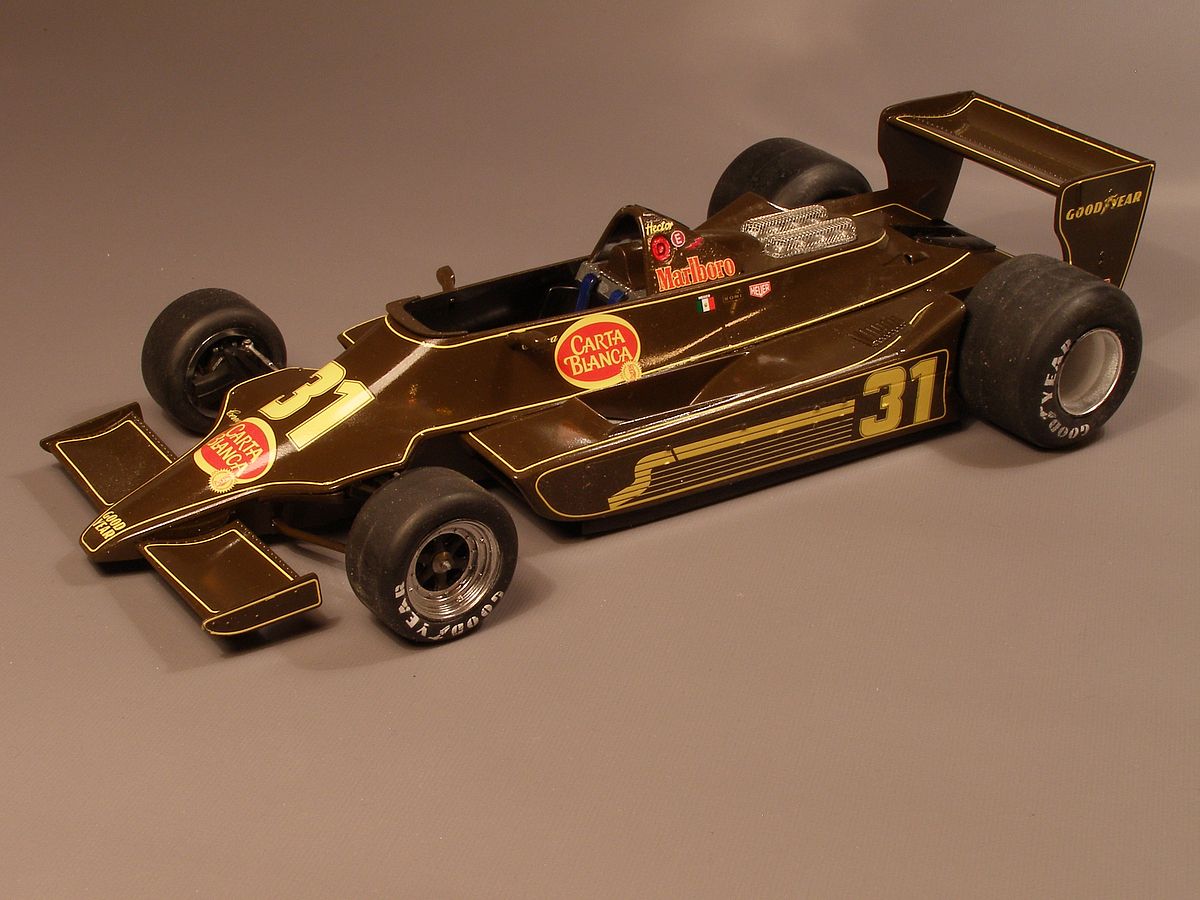
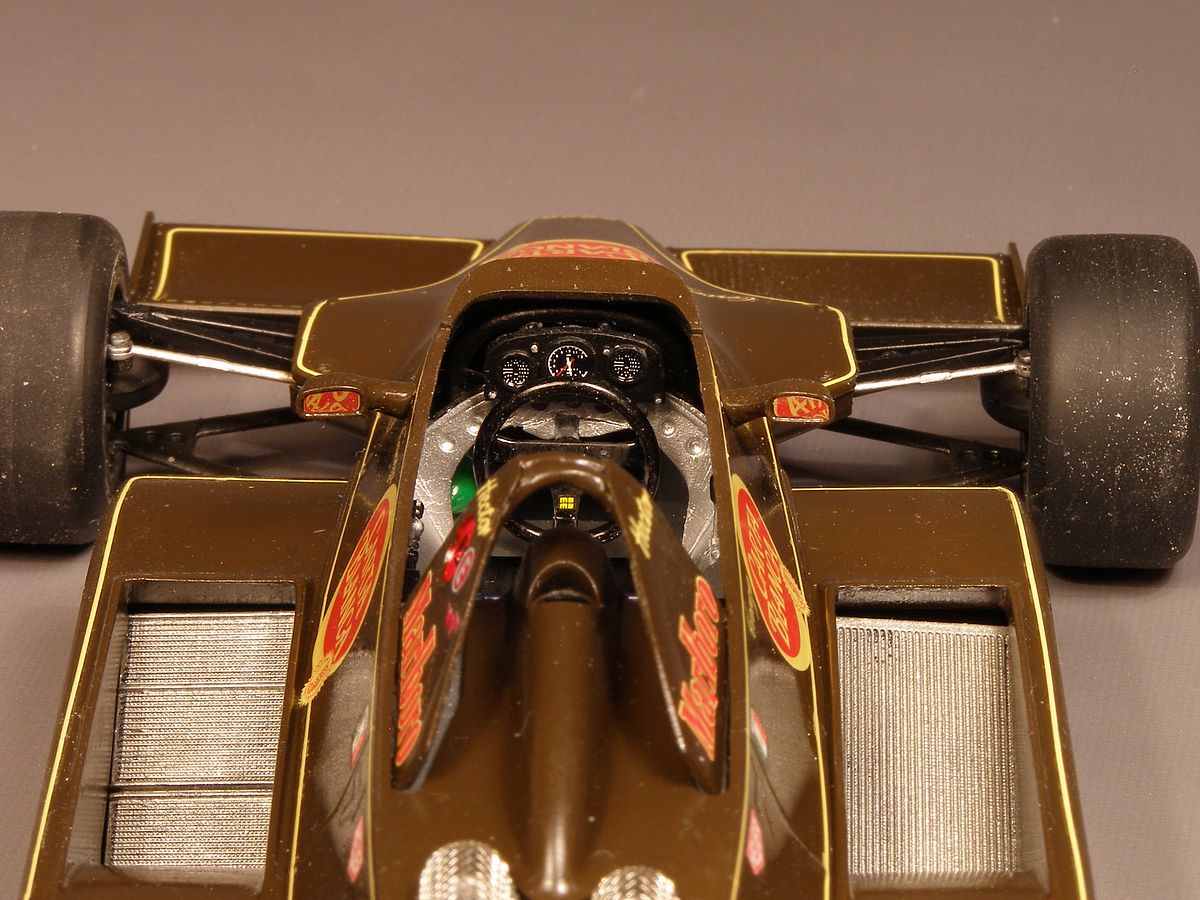
| Not much of the rebuilt front of the cockpit is visible but I feel good having a correct prototype Lotus 79. |
| Stockholm October 02, 2013 |  |
Updated October 29, 2013 |
----------------------------------------------.::. chibi models .::. military vehicles .::. automobiles .::. aircrafts .::.
miscellaneous .::.home .::.-------------------------------------------- |