
|
-------------------------------------------------------.::. chibi models .::. military vehicles .::. automobiles .::. aircrafts .::.
miscellaneous .::.---------------------------------------------- |
|
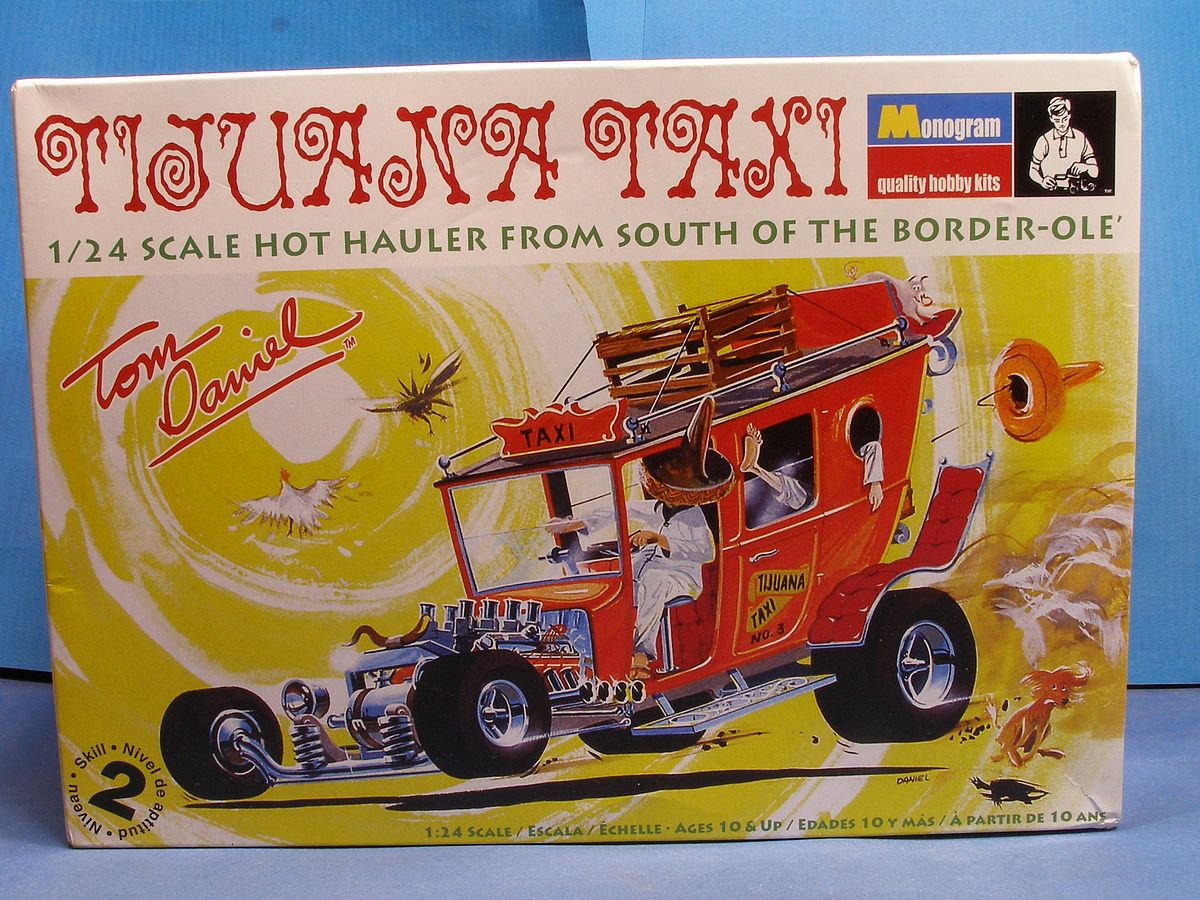
Waiting for a taxi Finally, I have a Monogram Tijuana Taxi. I have wanted one ever since I saw it in a catalogue about thirty years ago. When I read that Revell was going to reissue it I had to get one. When studying it I realized that I wasn't able to build it as Monogram has planned. Perhaps not so unusual when it is me but this time I was a bit surprised myself.
|
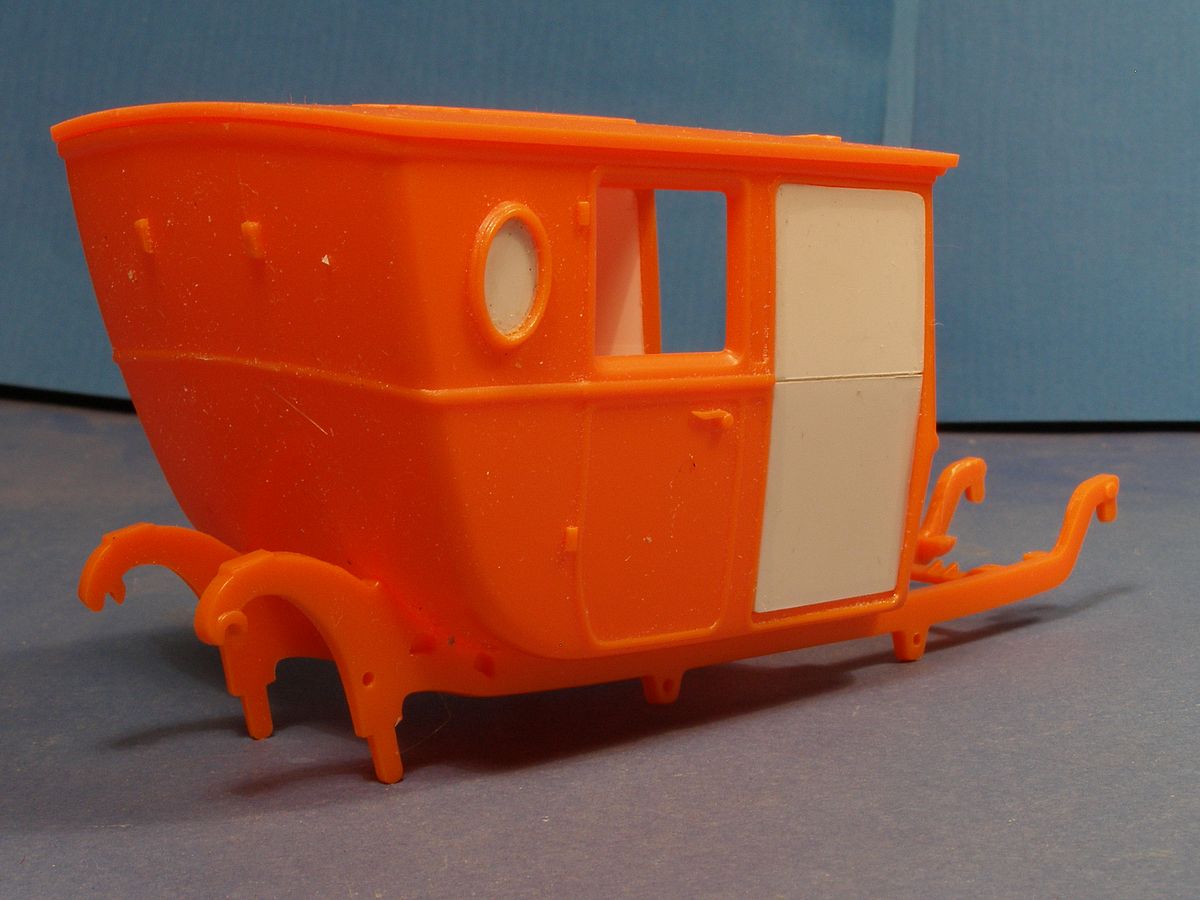
| I started by filling the door openings and the small windows with plastic card. |
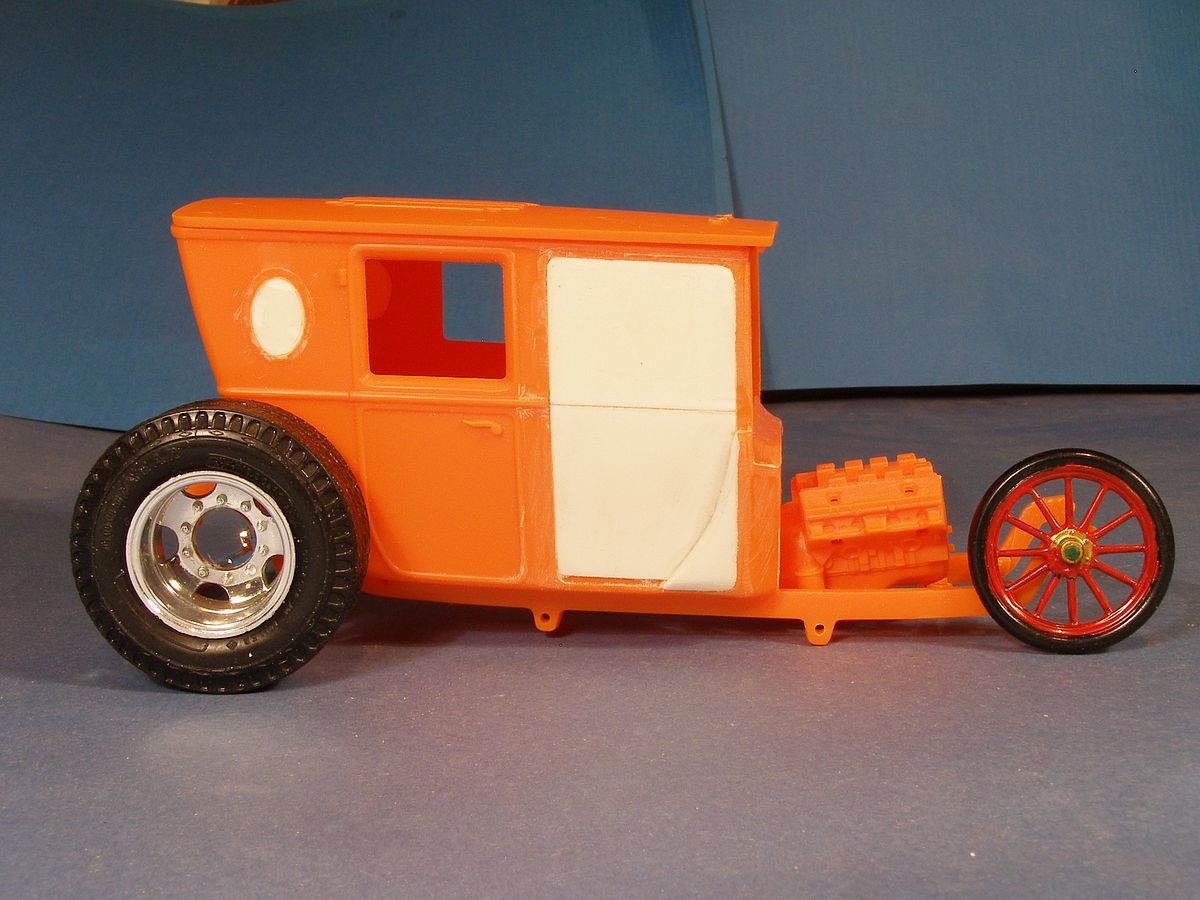
| Then started to think about the wheels and felt that I wanted larger wheels at the rear. I looked at 1/18 scale but didn't find anything I liked. In a box I found a rear axle from a truck trailer complete with wheels. I tried it out just for fun and liked it, but the wheels were too narrow for a Hot Rod. I tried it with double mounted wheels to get it wider, but it still didn't feel right. |
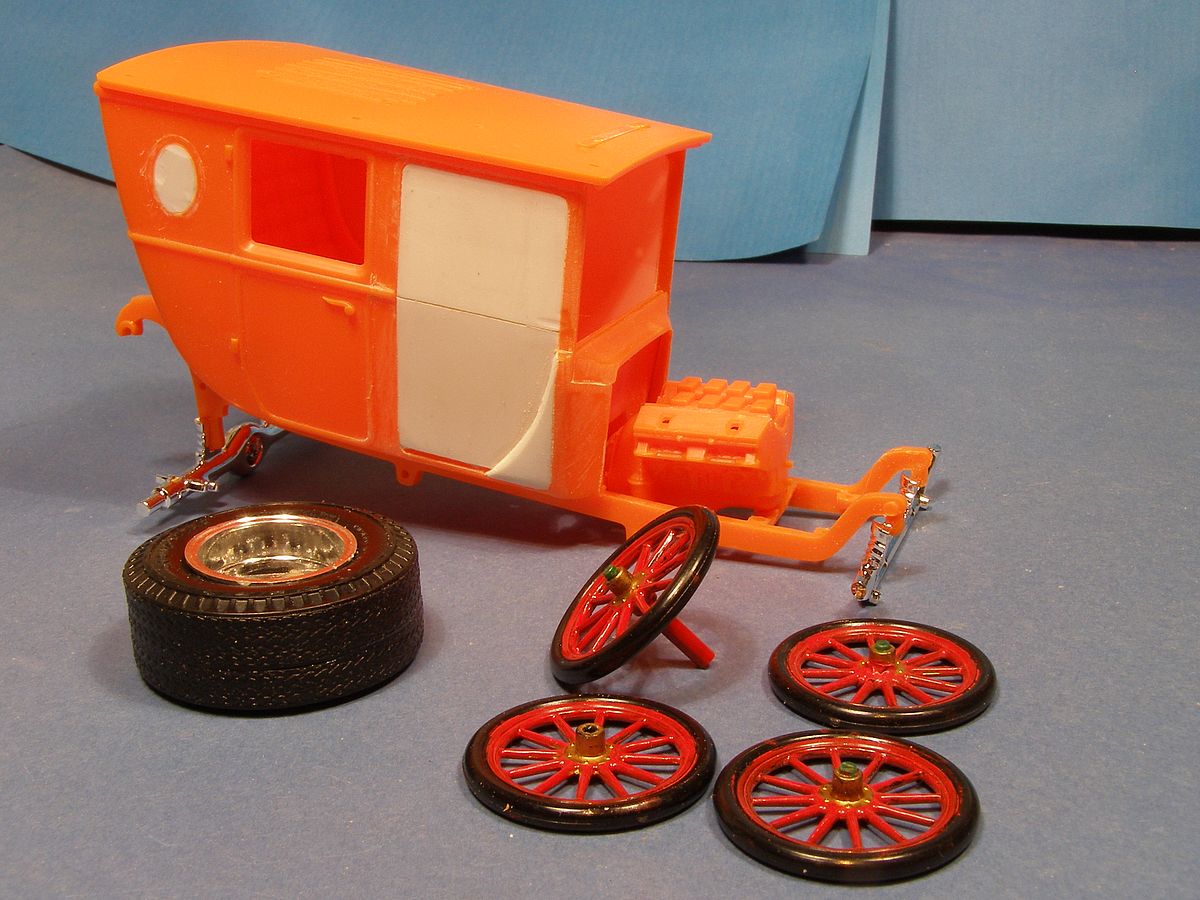
| I decided on an experiment. Why not make the tires wider? I cut the tyre in half and glued it to the side of another tyre. The result was better than expected. I had found wheels from some veteran car that also might be of use here. |
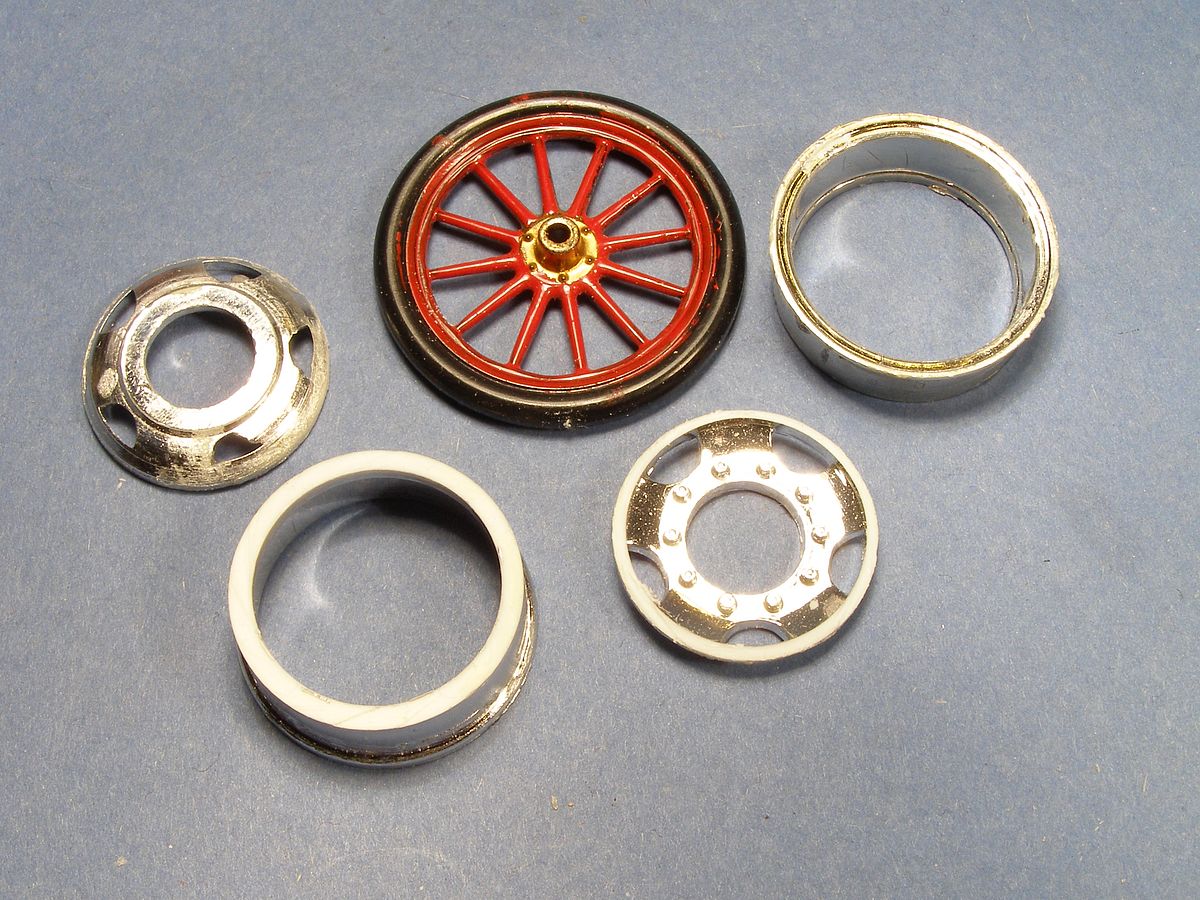
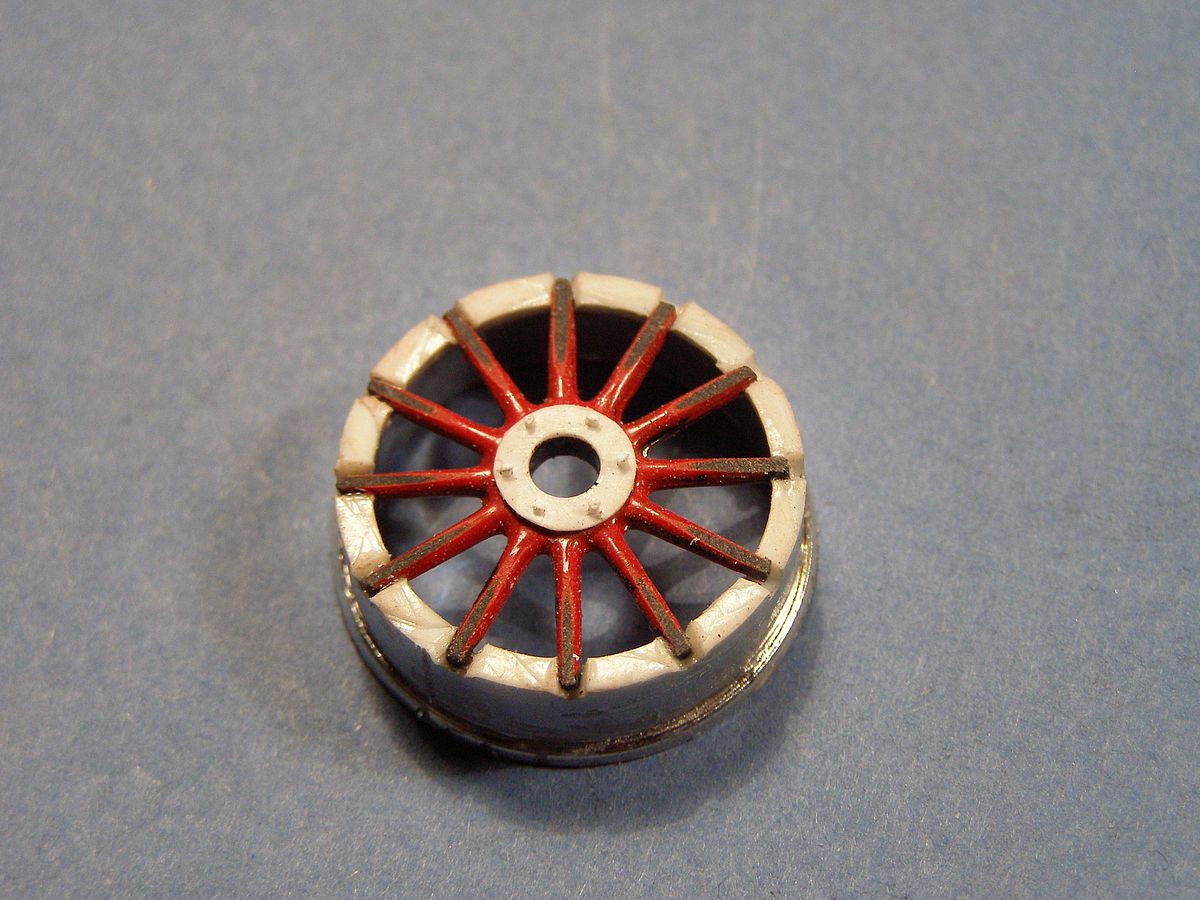
| I removed the bottom of the truck wheel |
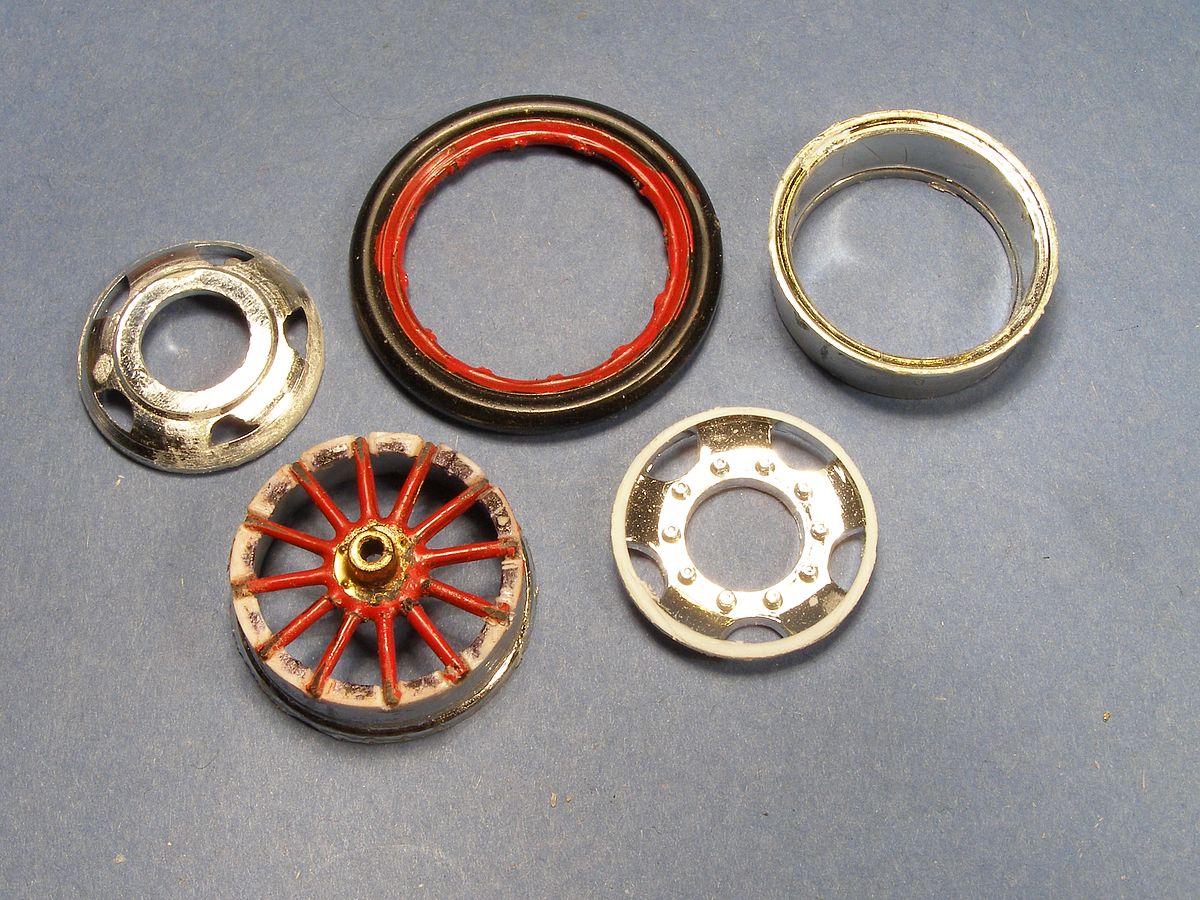
| and added the spokes from the veteran car wheel. |
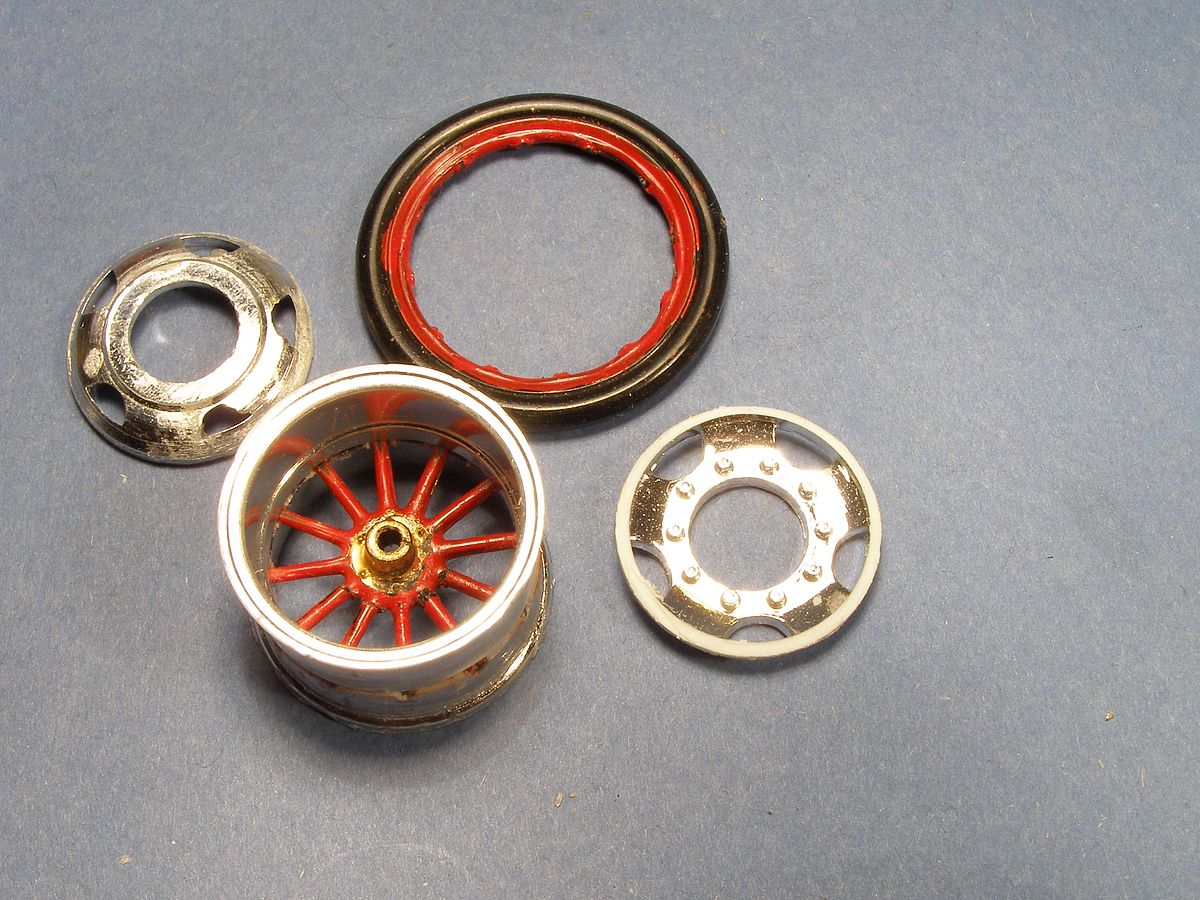
| With the bottom removed on the next truck wheel it was mounted to the newly spoked wheel. |
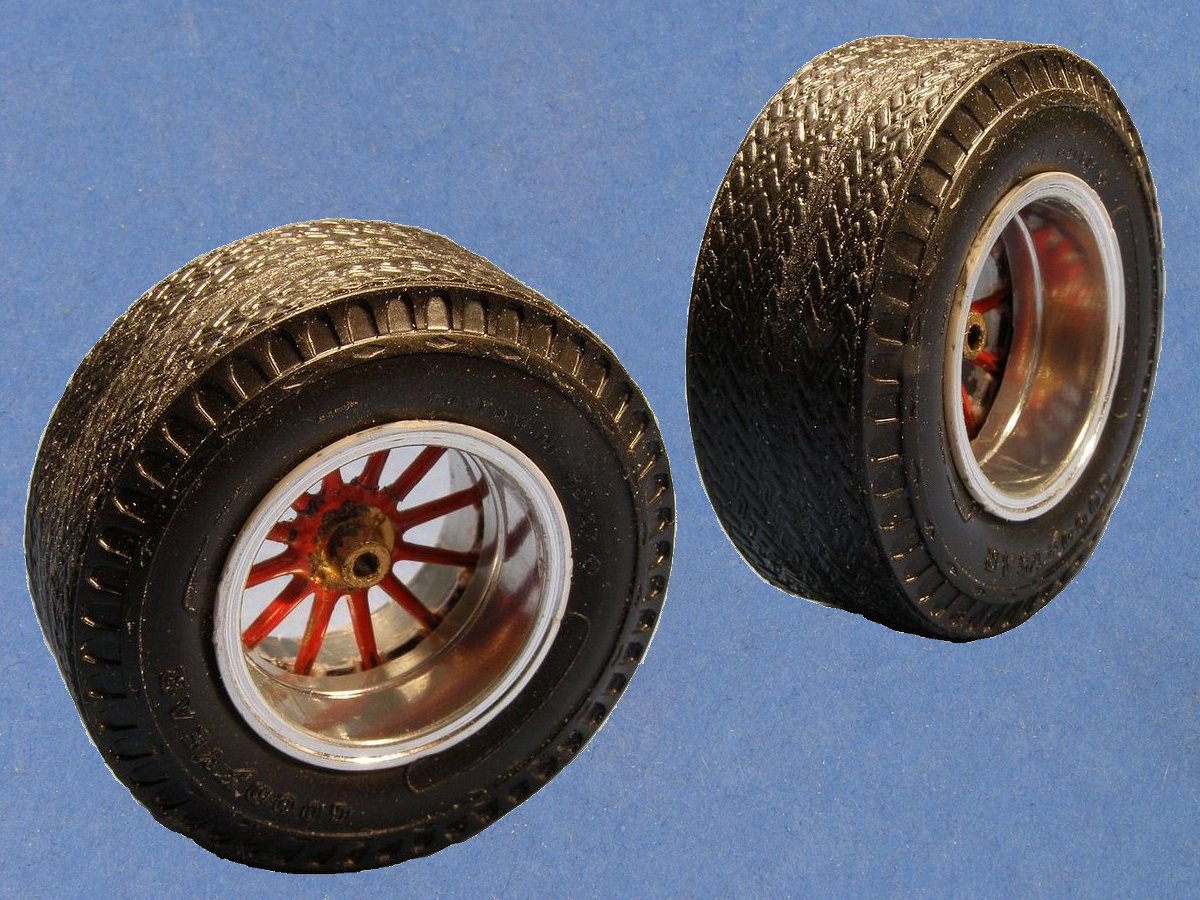
| and here is the final result. |
| Working with the rear wheels destroyed the details of the centre so I'm trying to reconstruct them. |
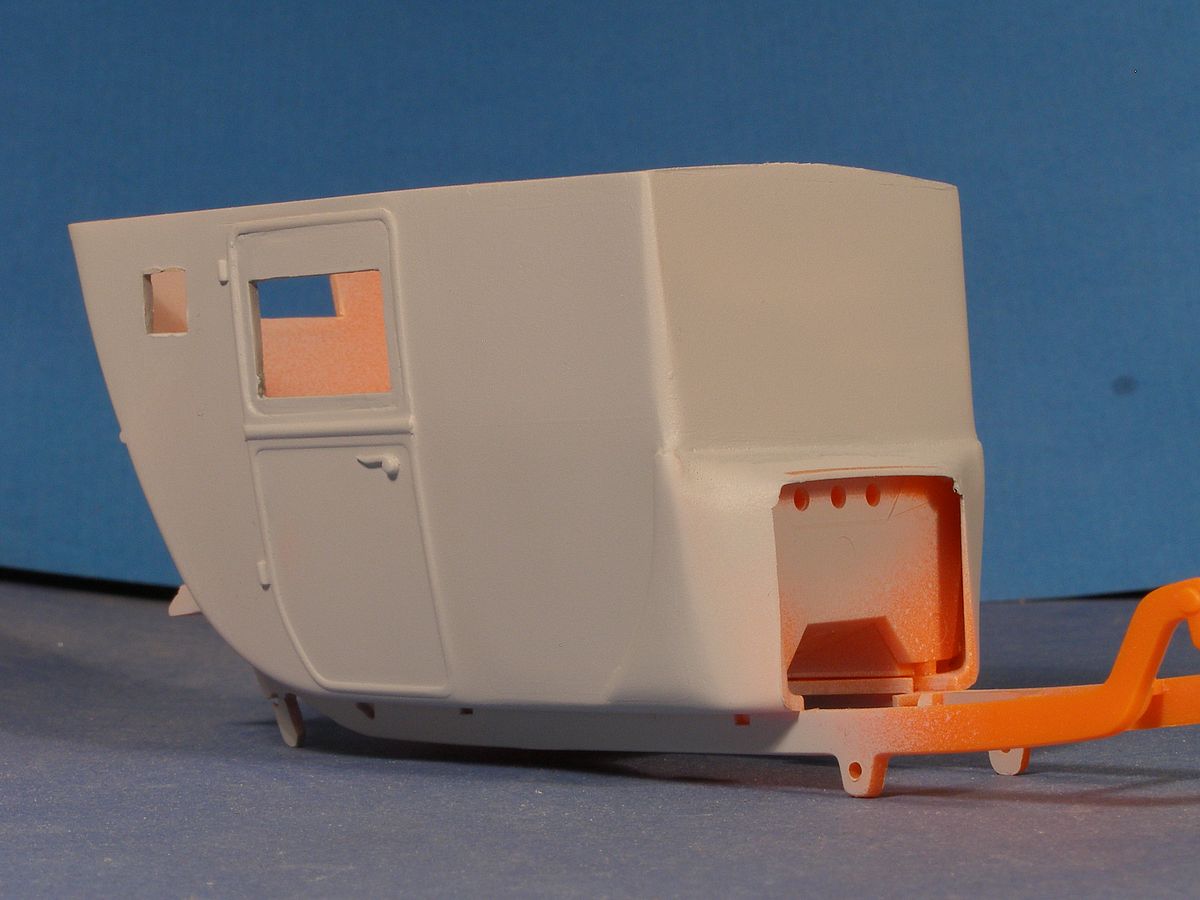
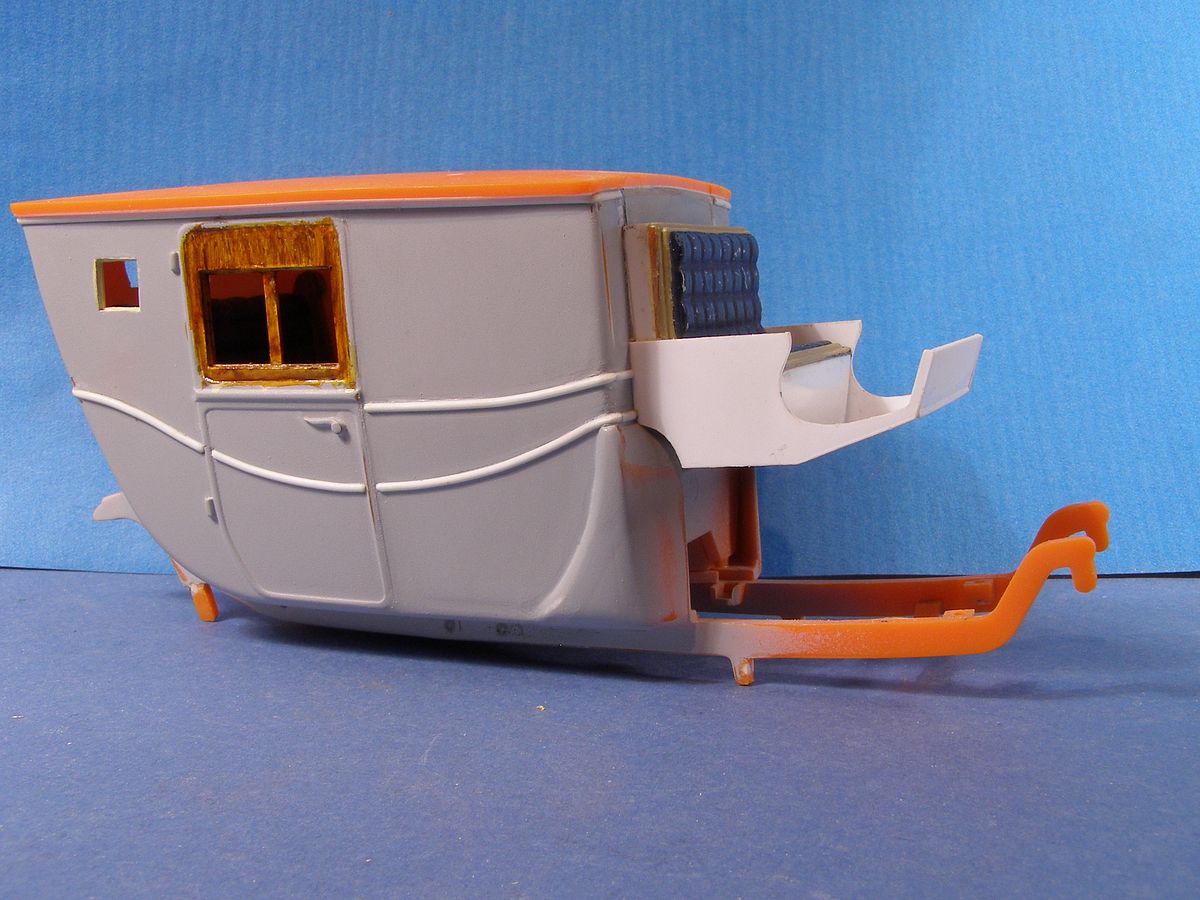
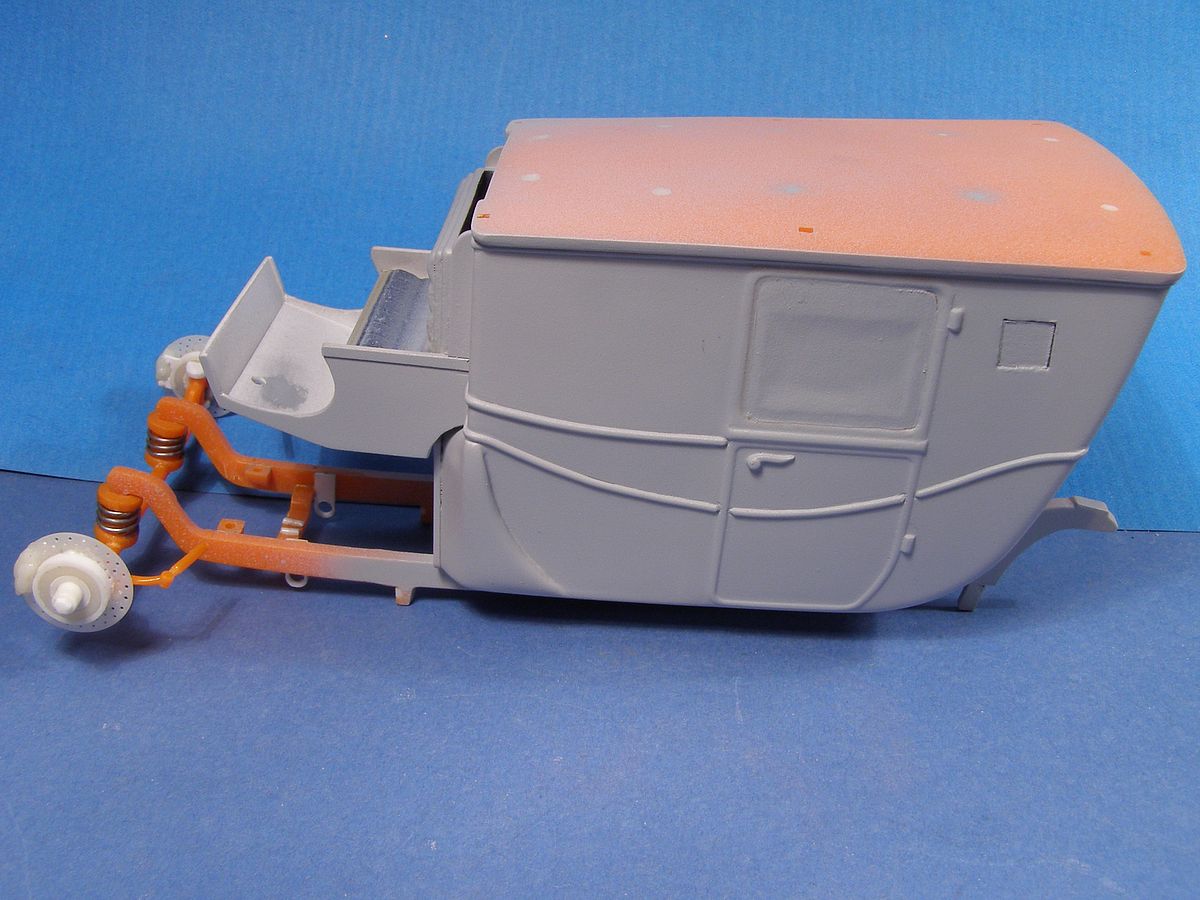
| I had to make new windows, but now with a rear window to. Then came the tedious work with filling and sanding. |
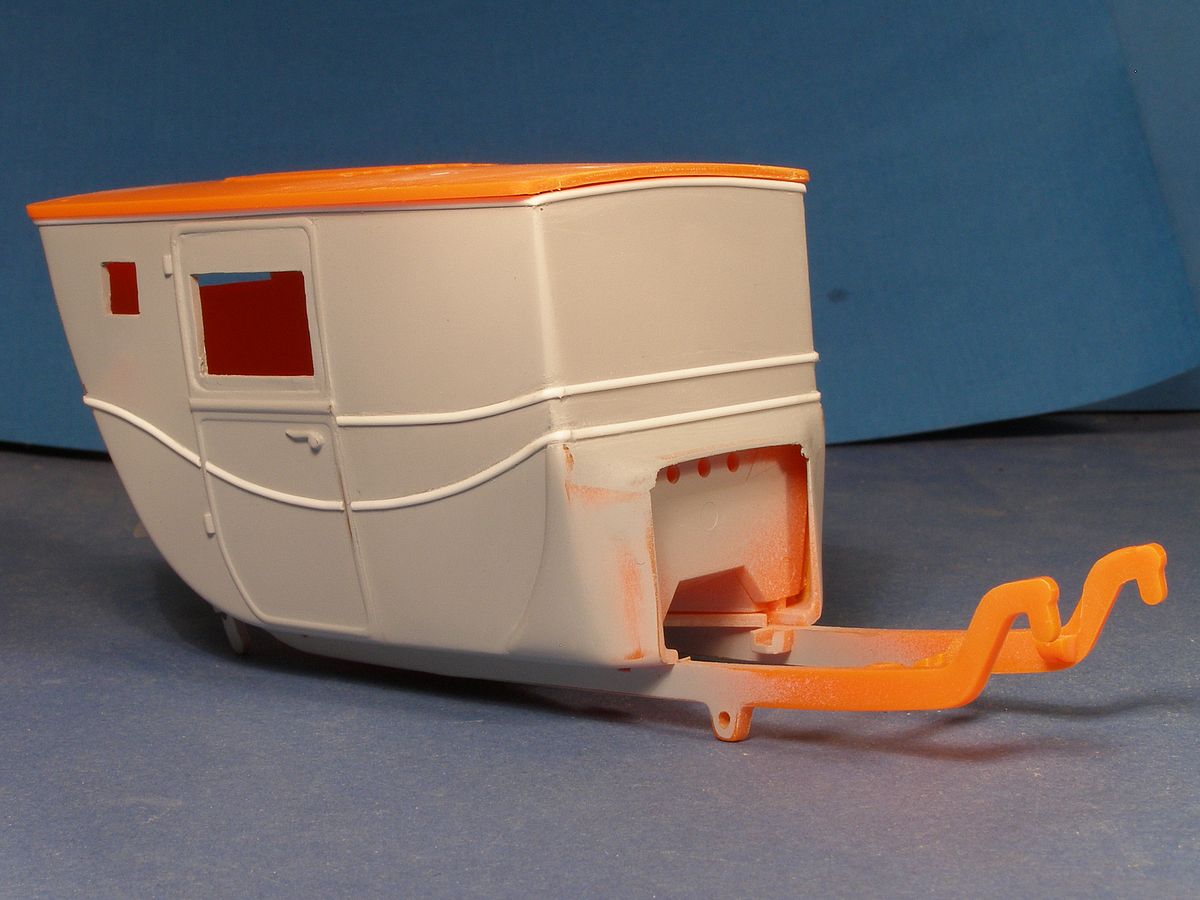
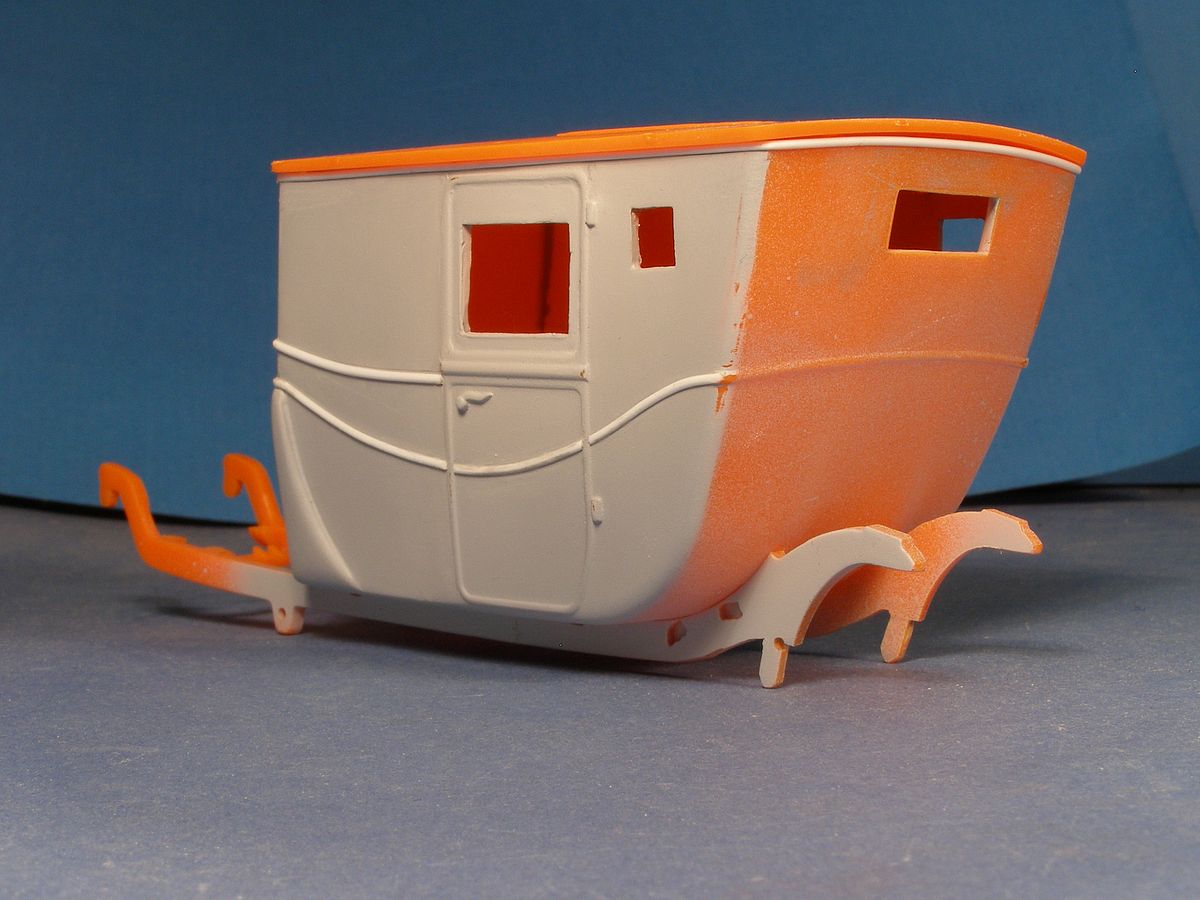
| Time to start decorating the bodywork. Half round plastic rods are used to replace the strips that was removed, now with a slightly different pattern. |
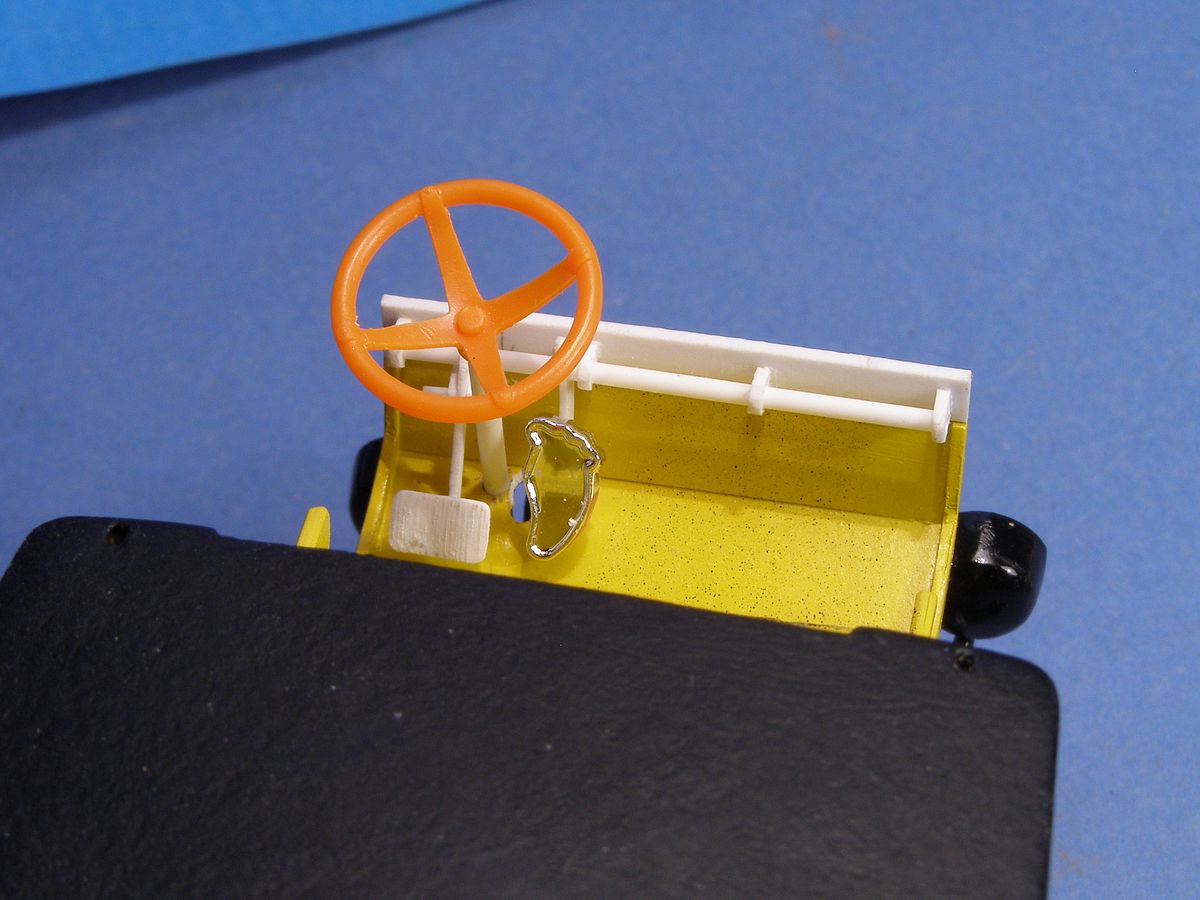
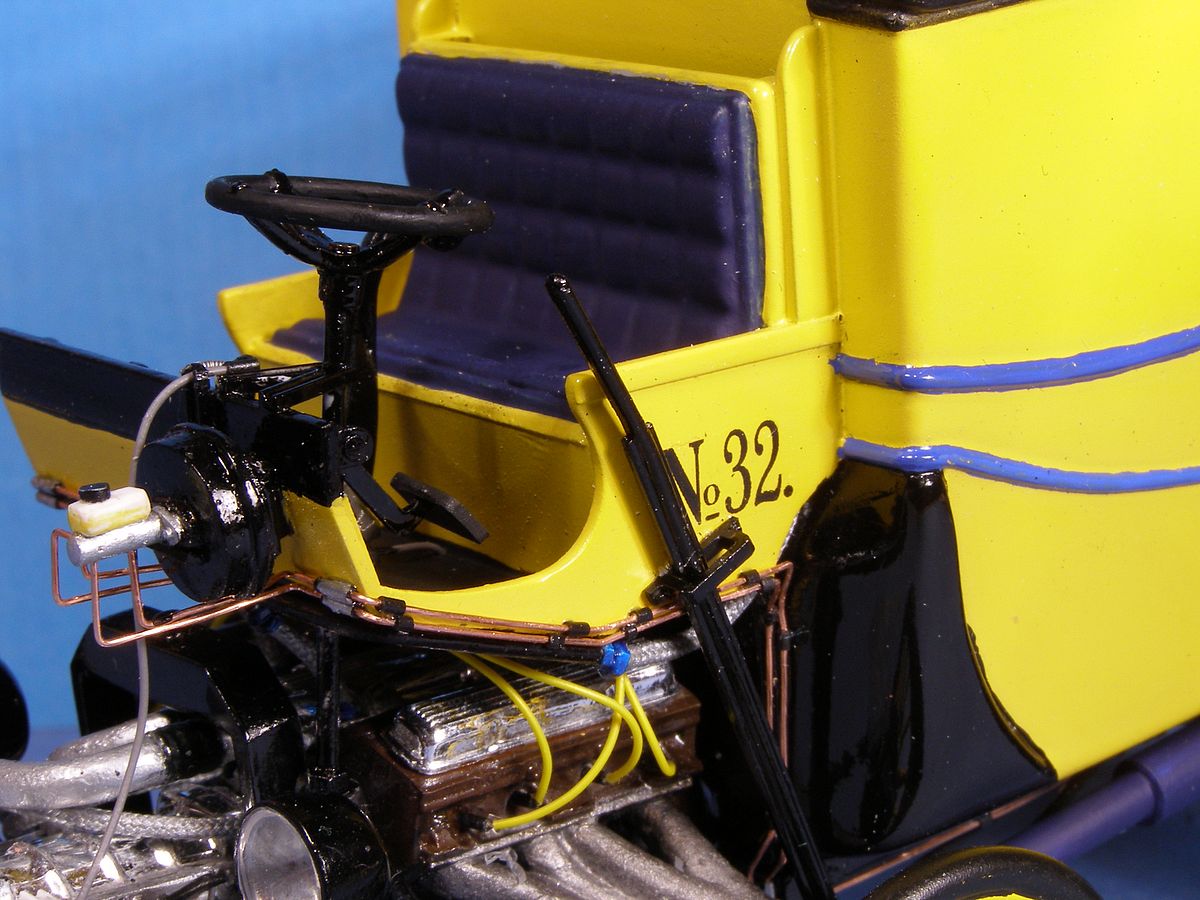
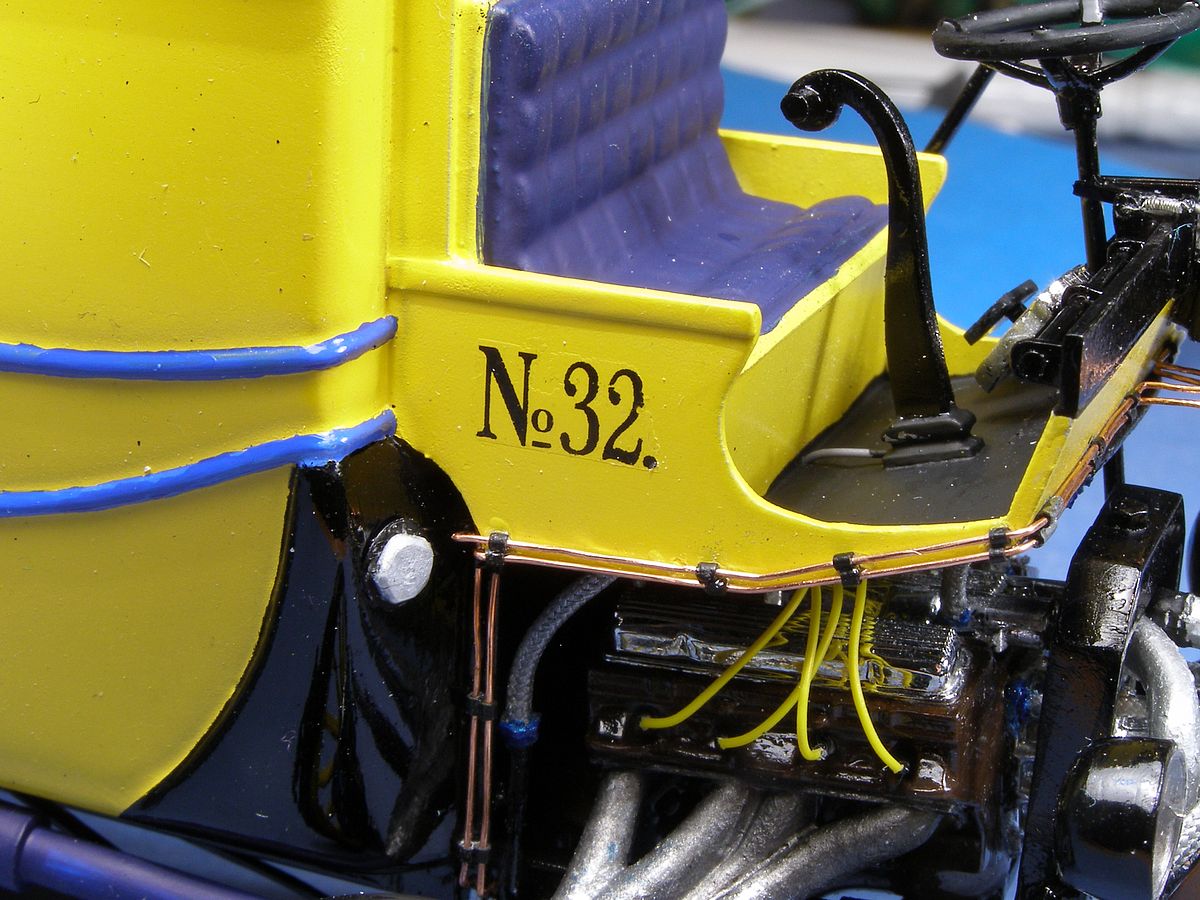
| The driver had to move up one step in order to get more passengers in the coach. |
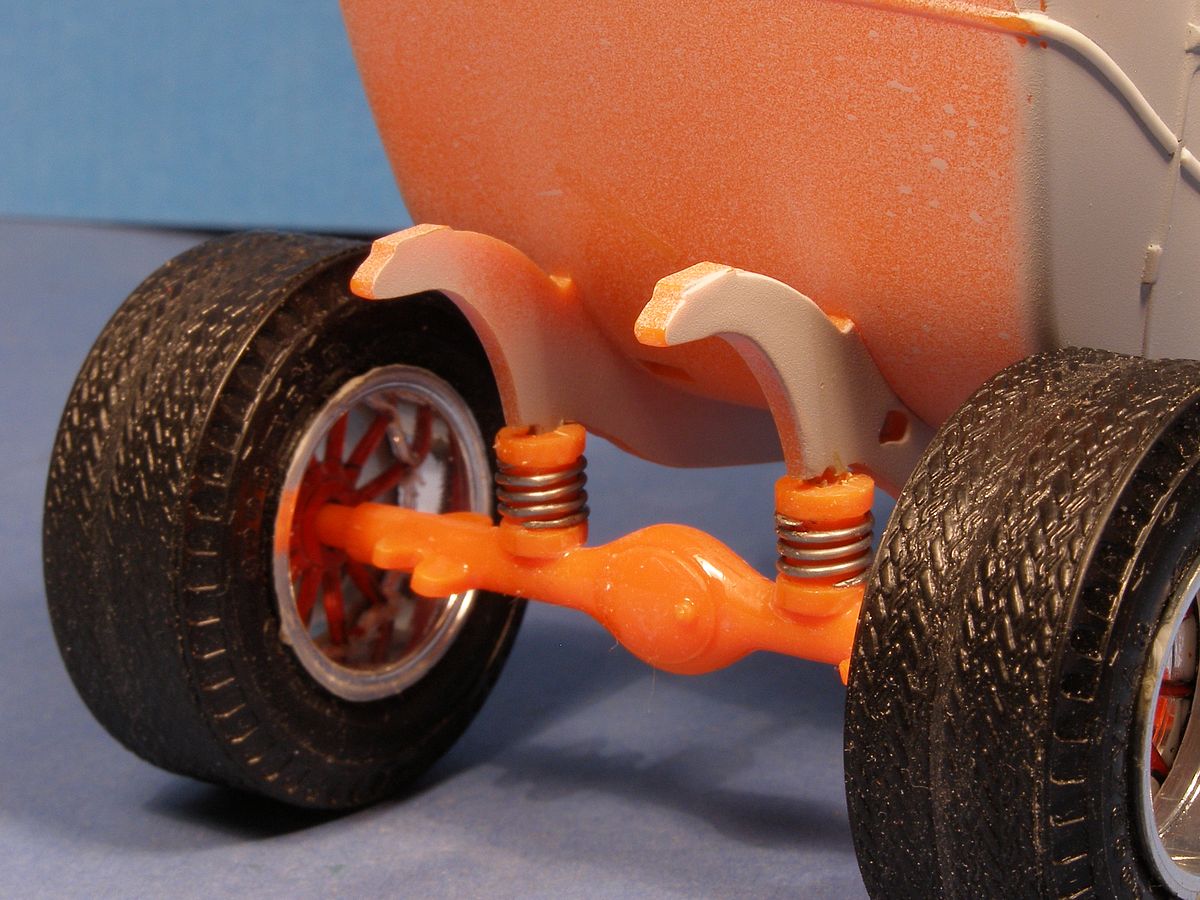
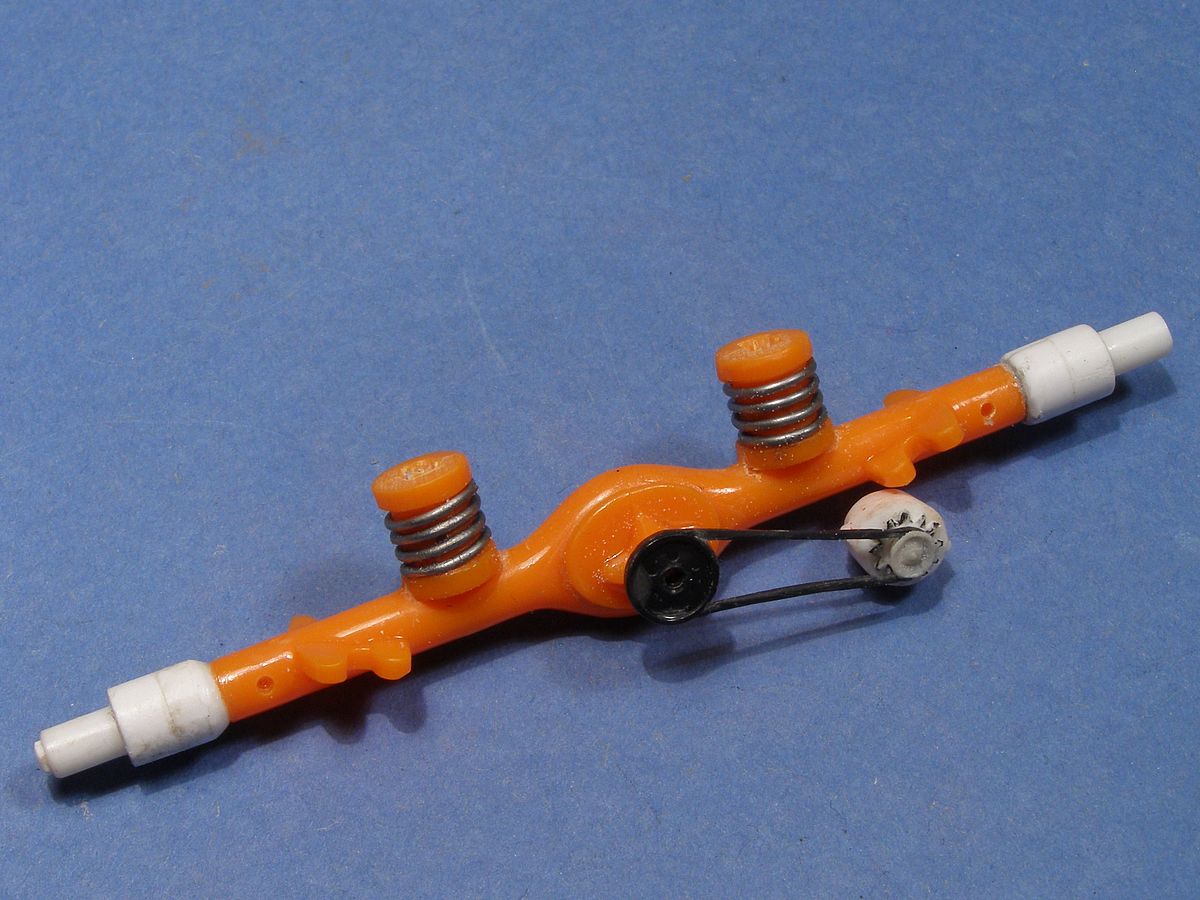
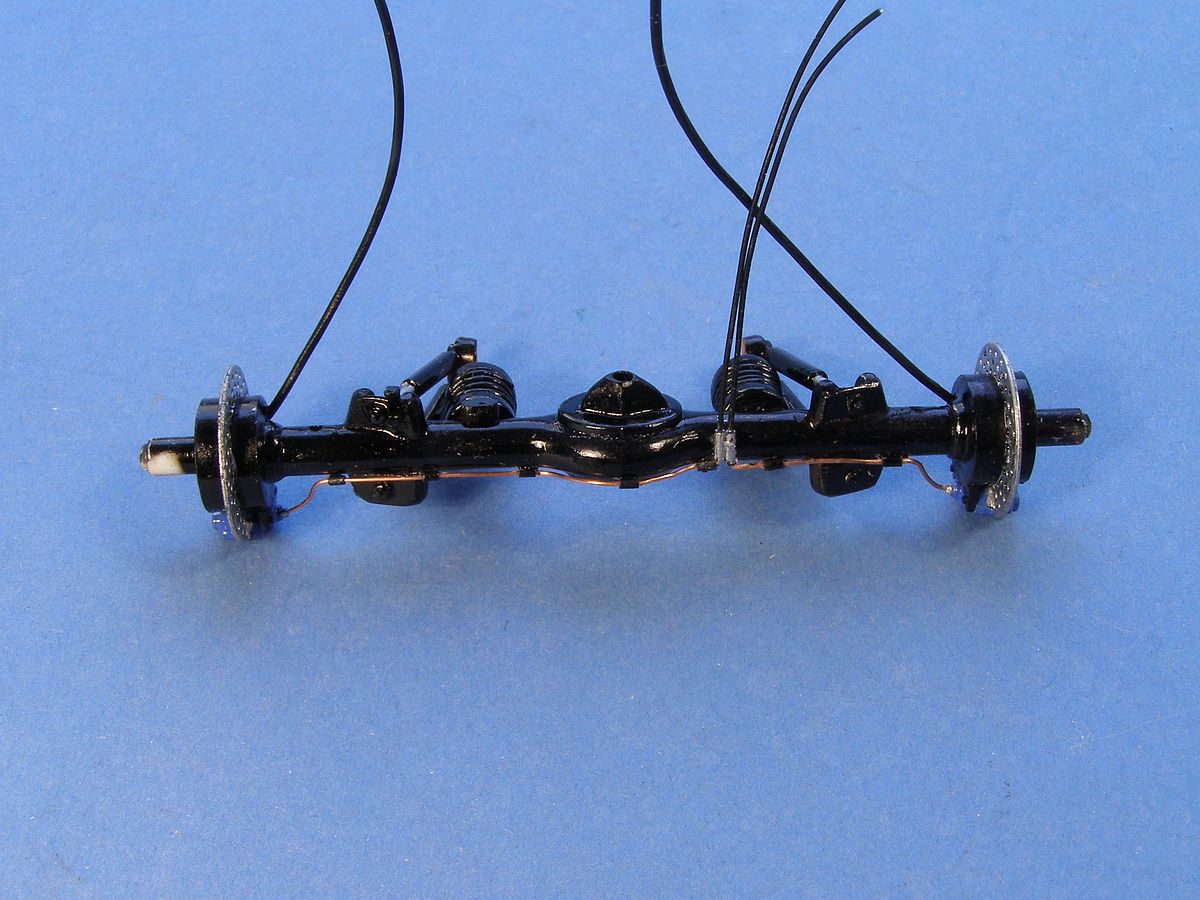
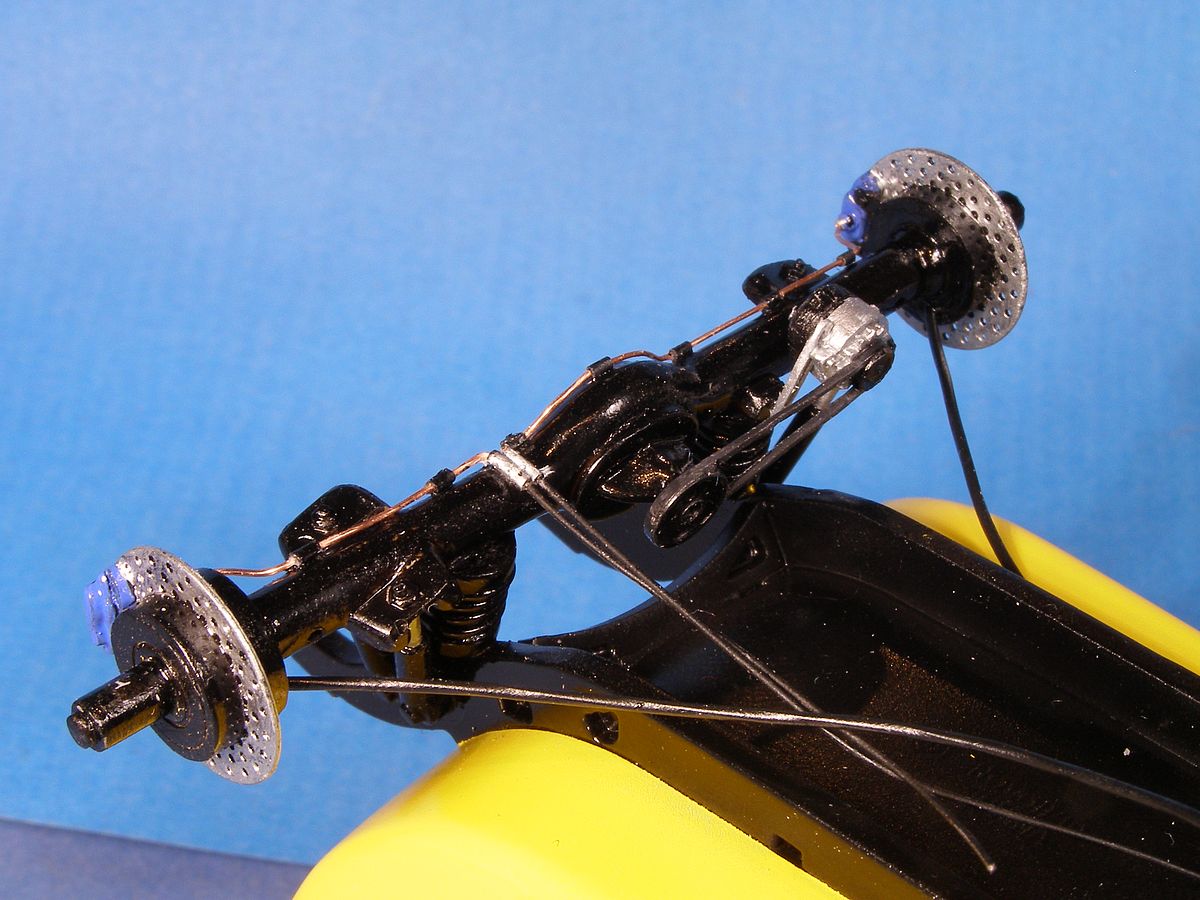
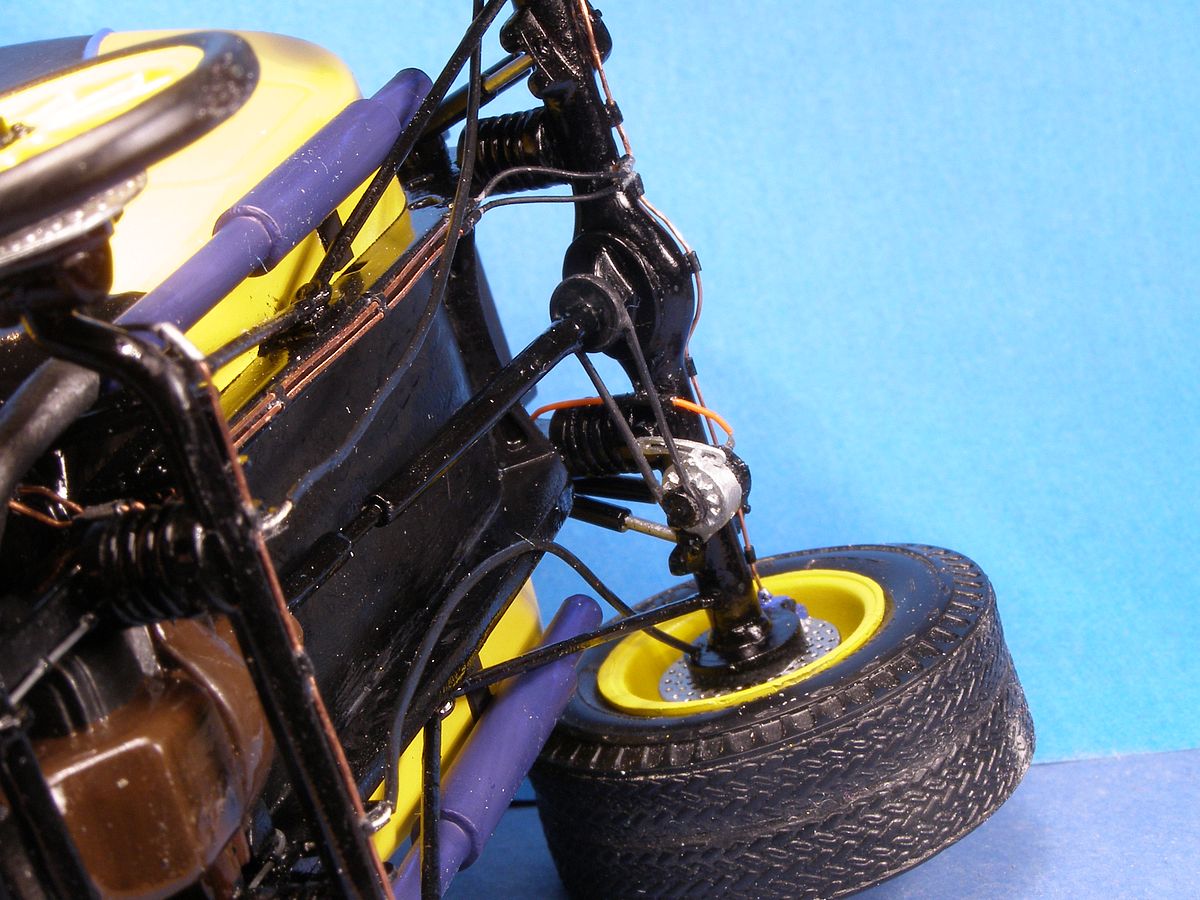
| New springs for the rear axle was made of thin solder. |
| Same thing was made for the front. The brakes are next on the agenda. |
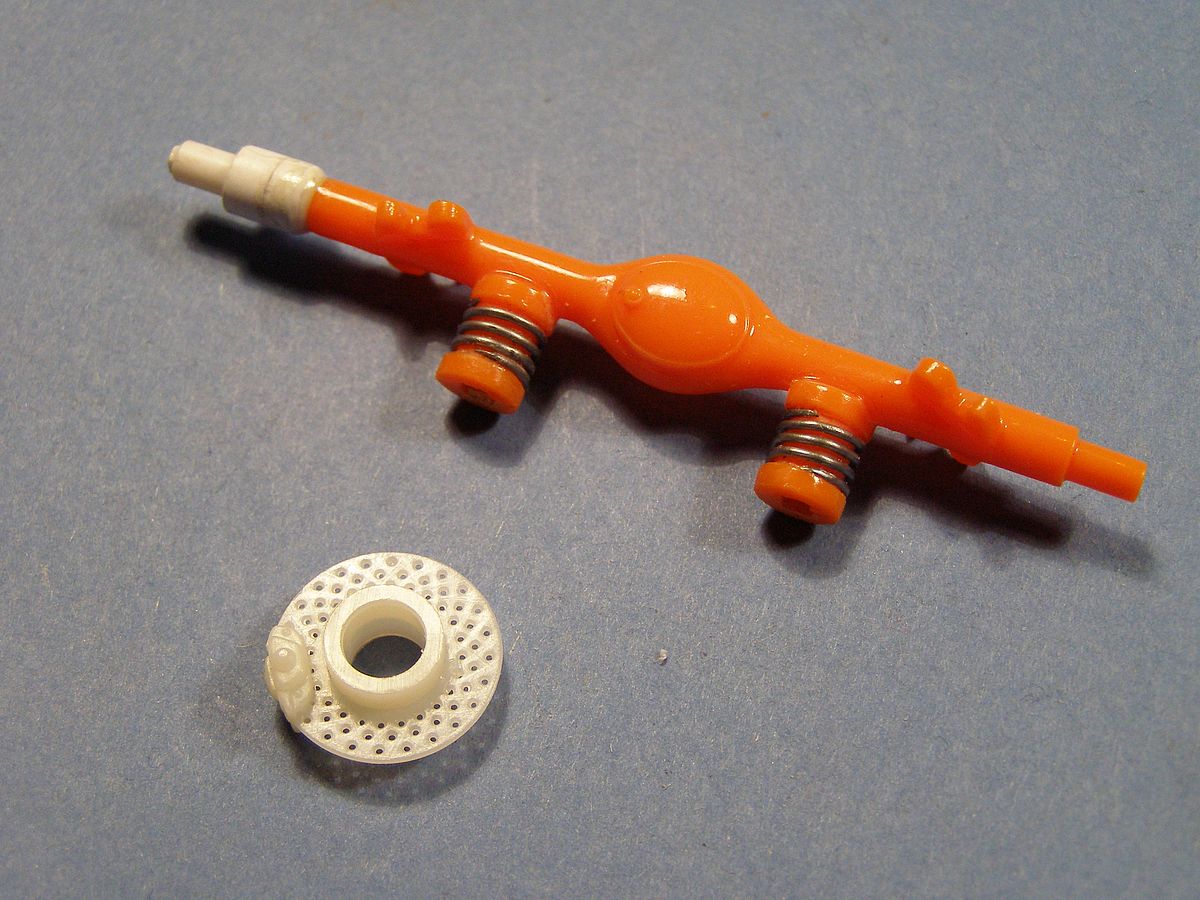
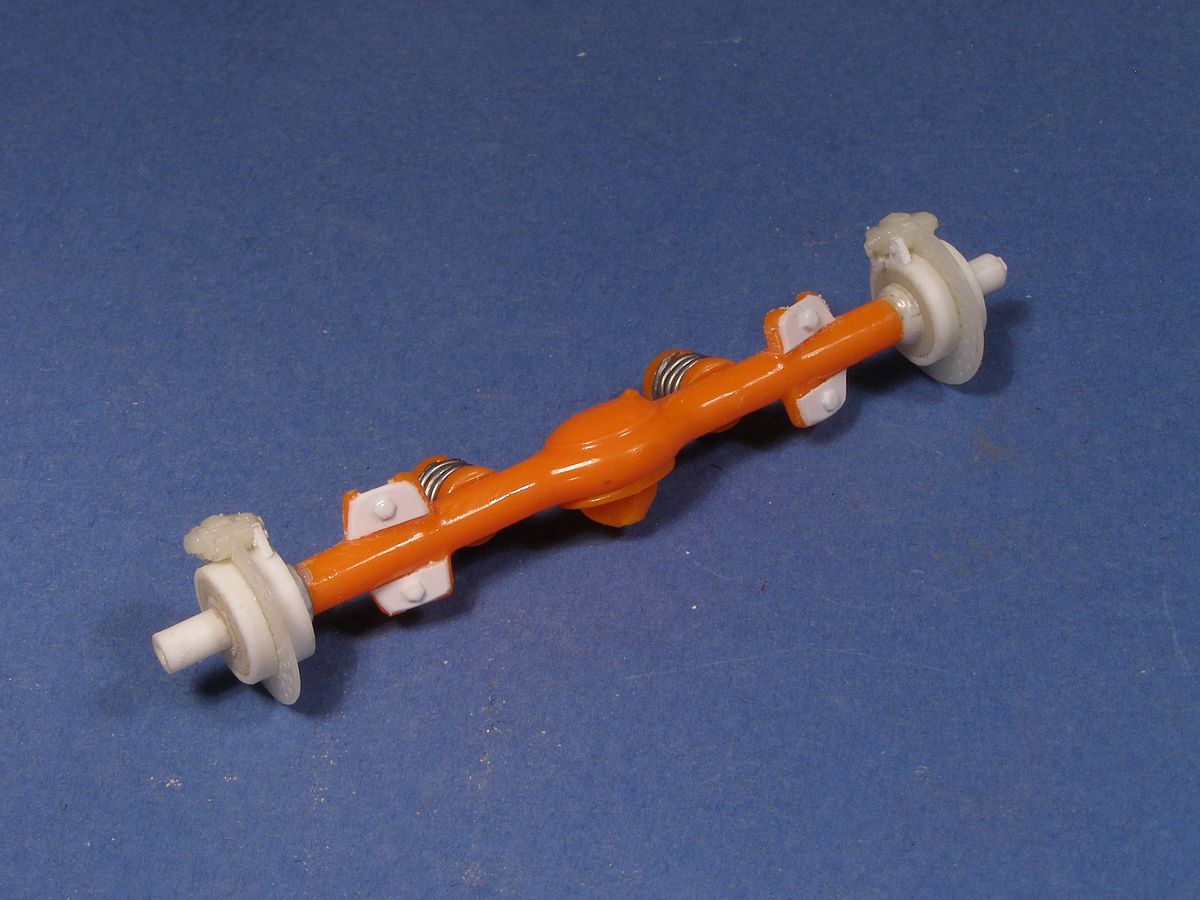
| I found the rear axle to narrow for the new wheels and to thin for the new disc brakes. |
| Left side of the rear axle is finished. |

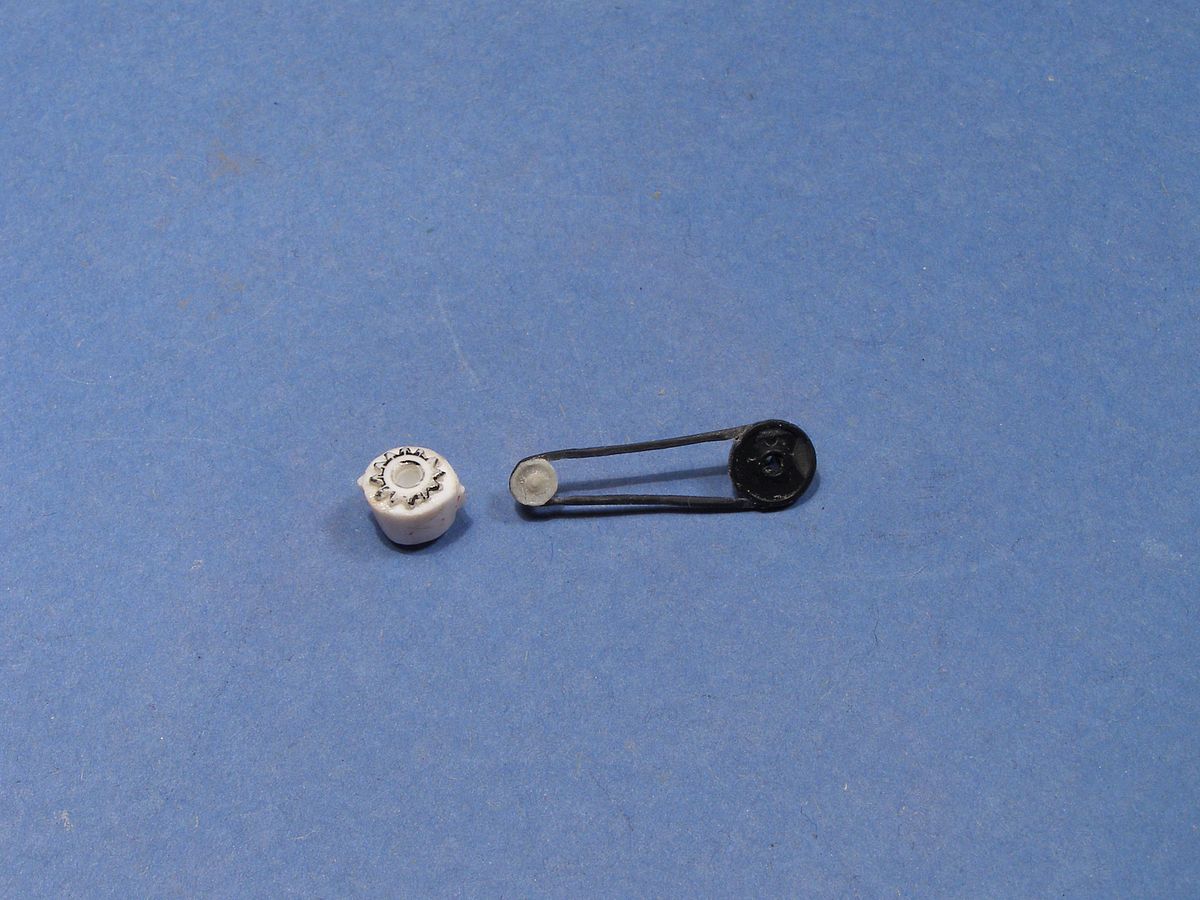
| Finding a modern looking alternator turned out difficult, in the end I used parts from two different types to build one. |
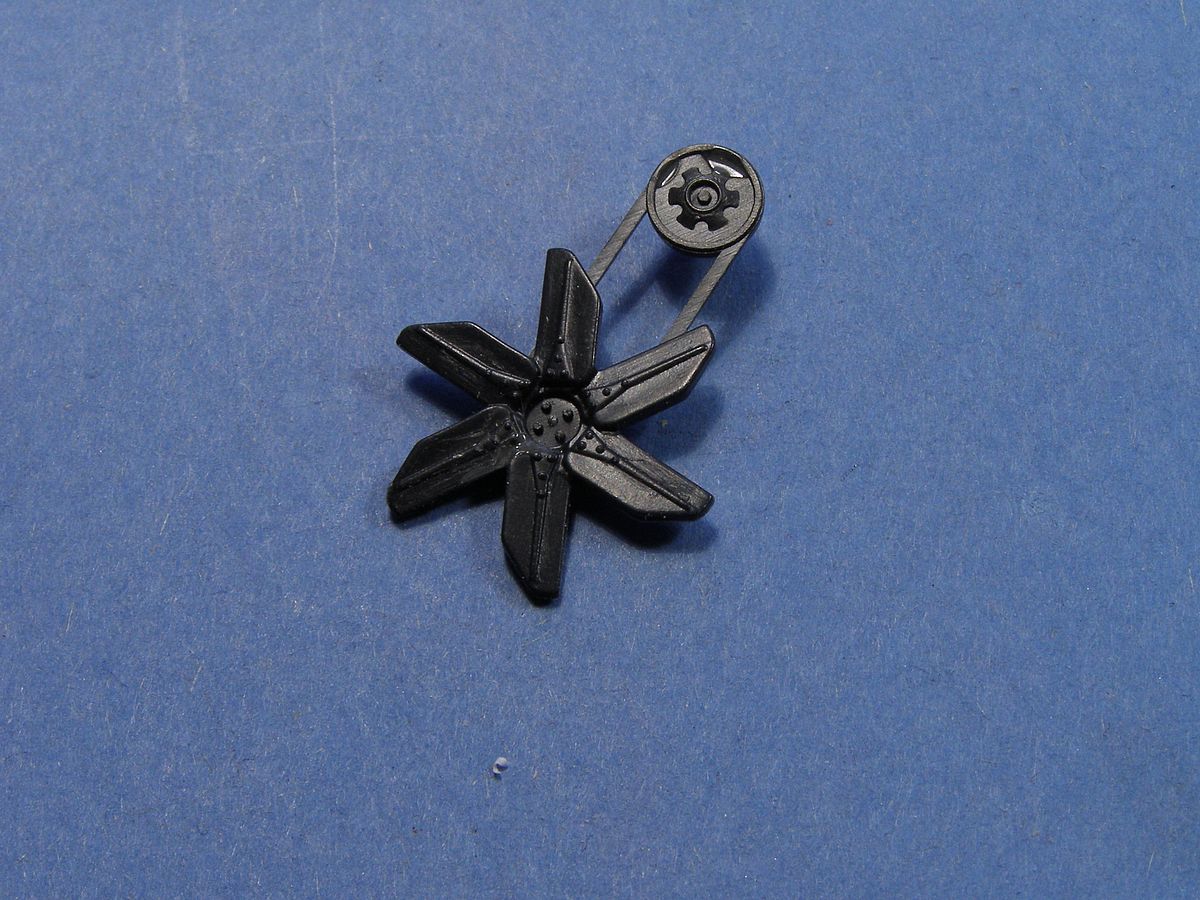
| I found this fan with belt that will be used. |
| I started by cutting the fan blade loose, then I reduced the diameter. I also cut the fan belt lose from the remains of the fan. |
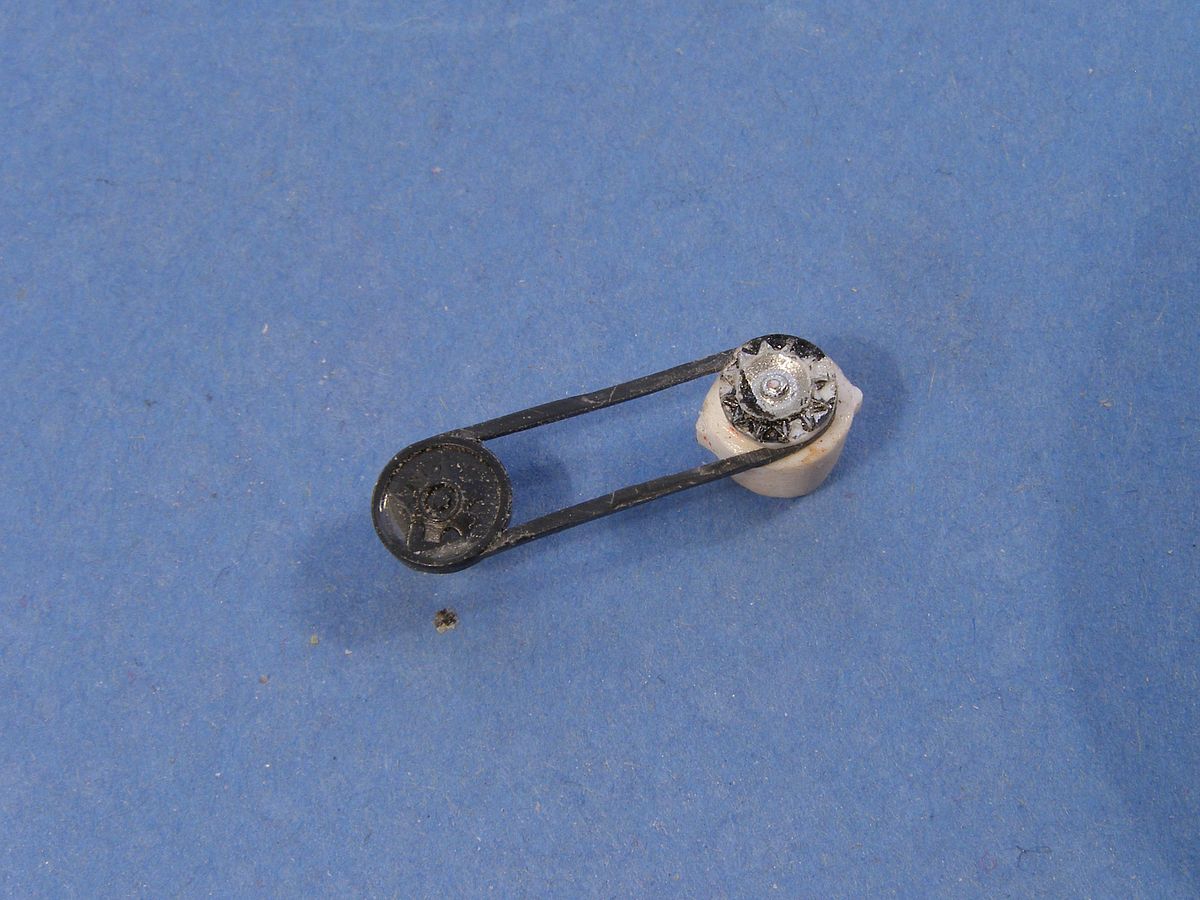
| Now the alternator can be attached to the belt. |
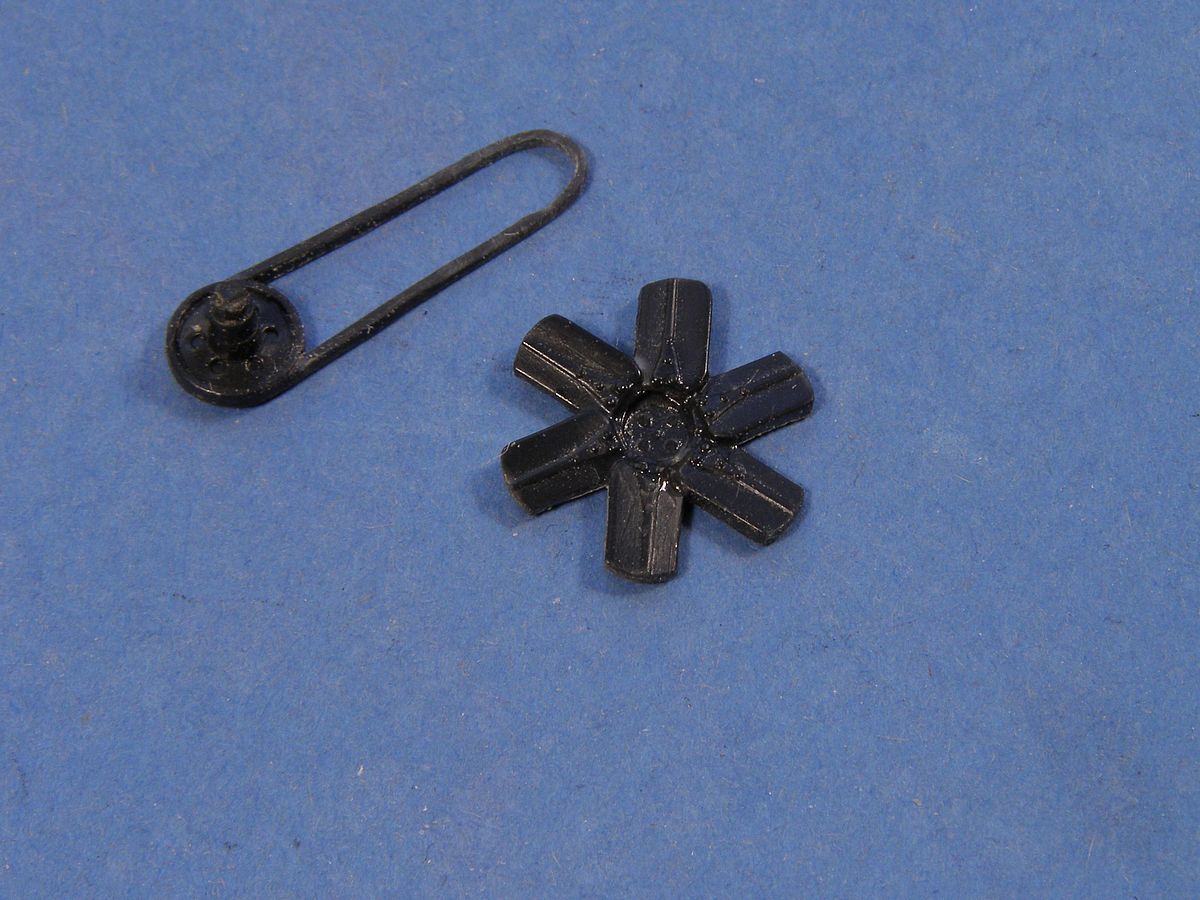
| At this point I learned that my alternator is wrong. The small fan should be inside the fan belt. |
| Well it was just as well. It didn't look right so I rebuilt it. The fan blade was cut lose and attached to the alternator. Then I made a mould of the pulley, so I could make a new one as the original was too thin for the fan belt to be attached. |
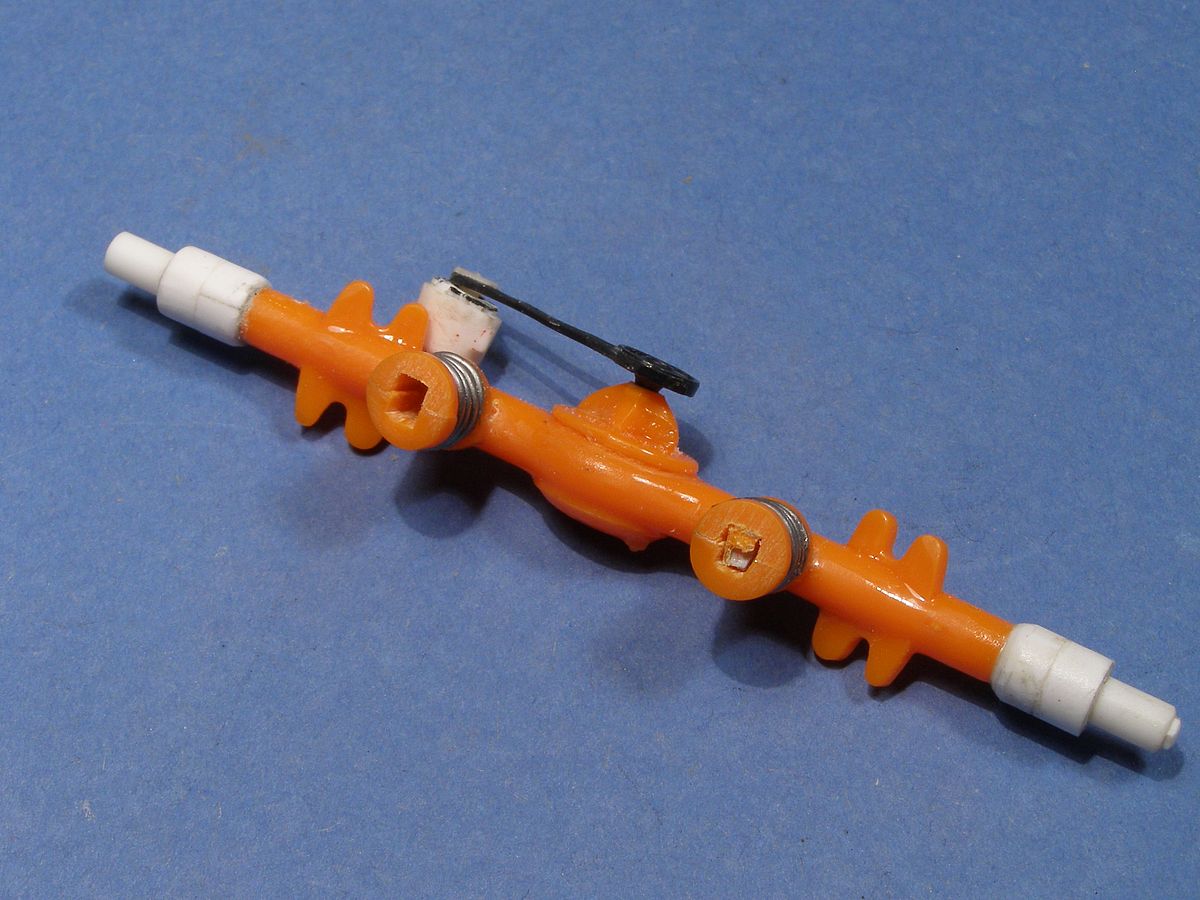
| As you can see the alternator will be mounted at the rear. |
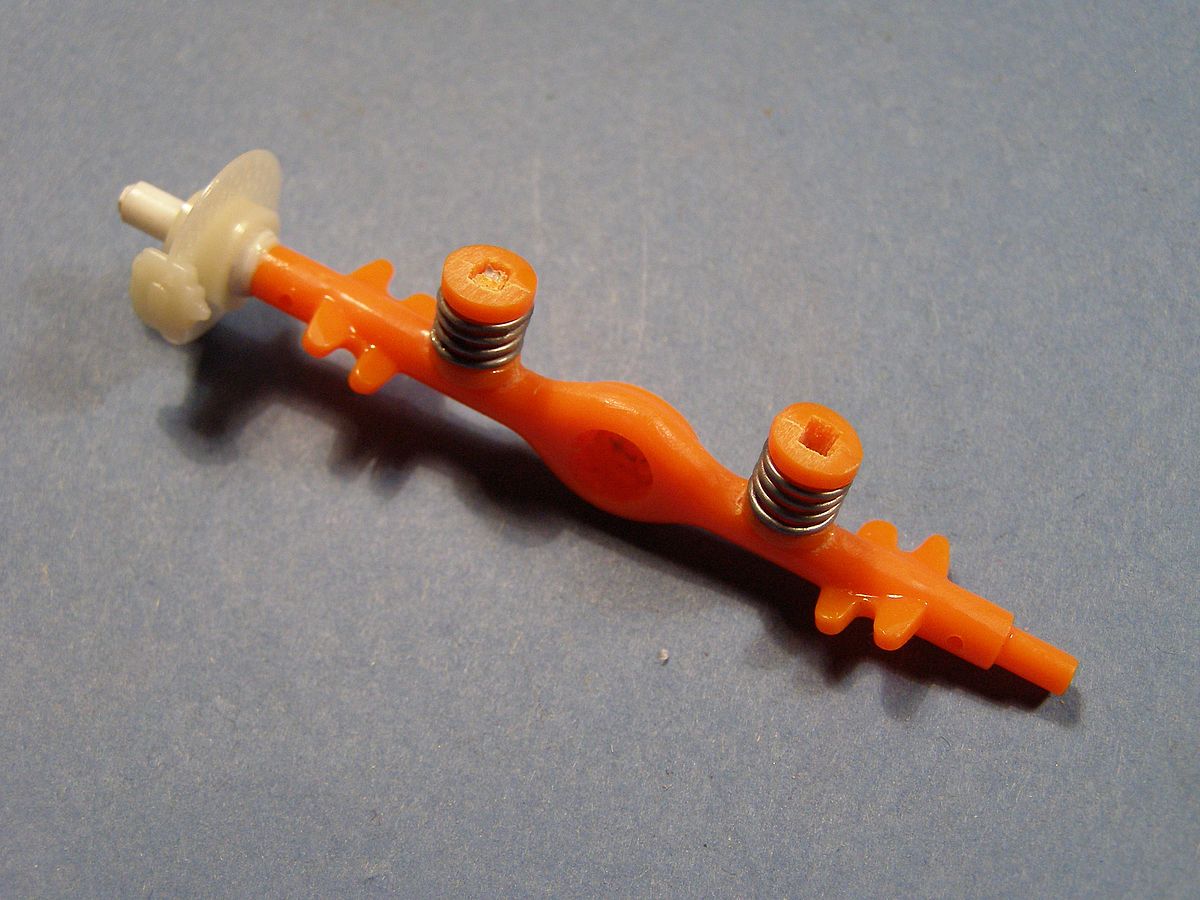
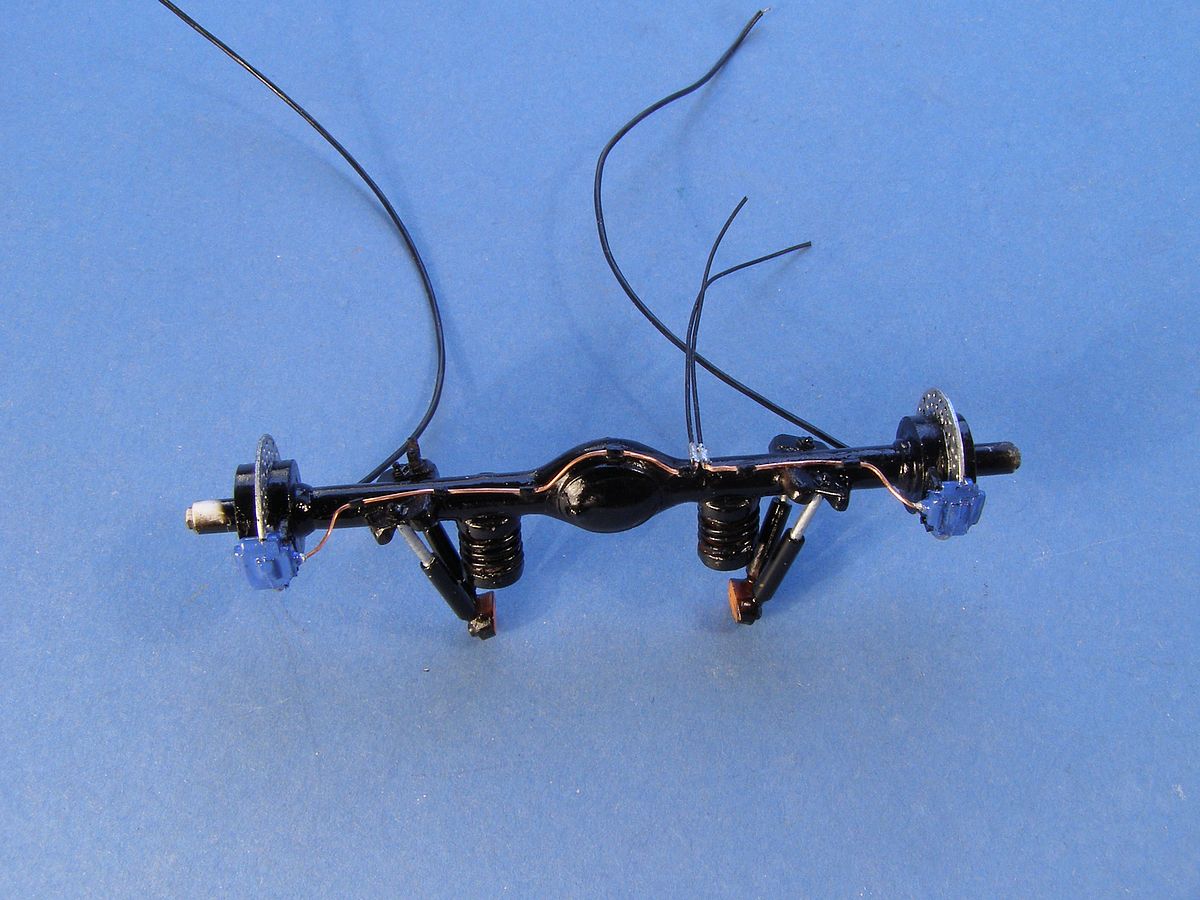
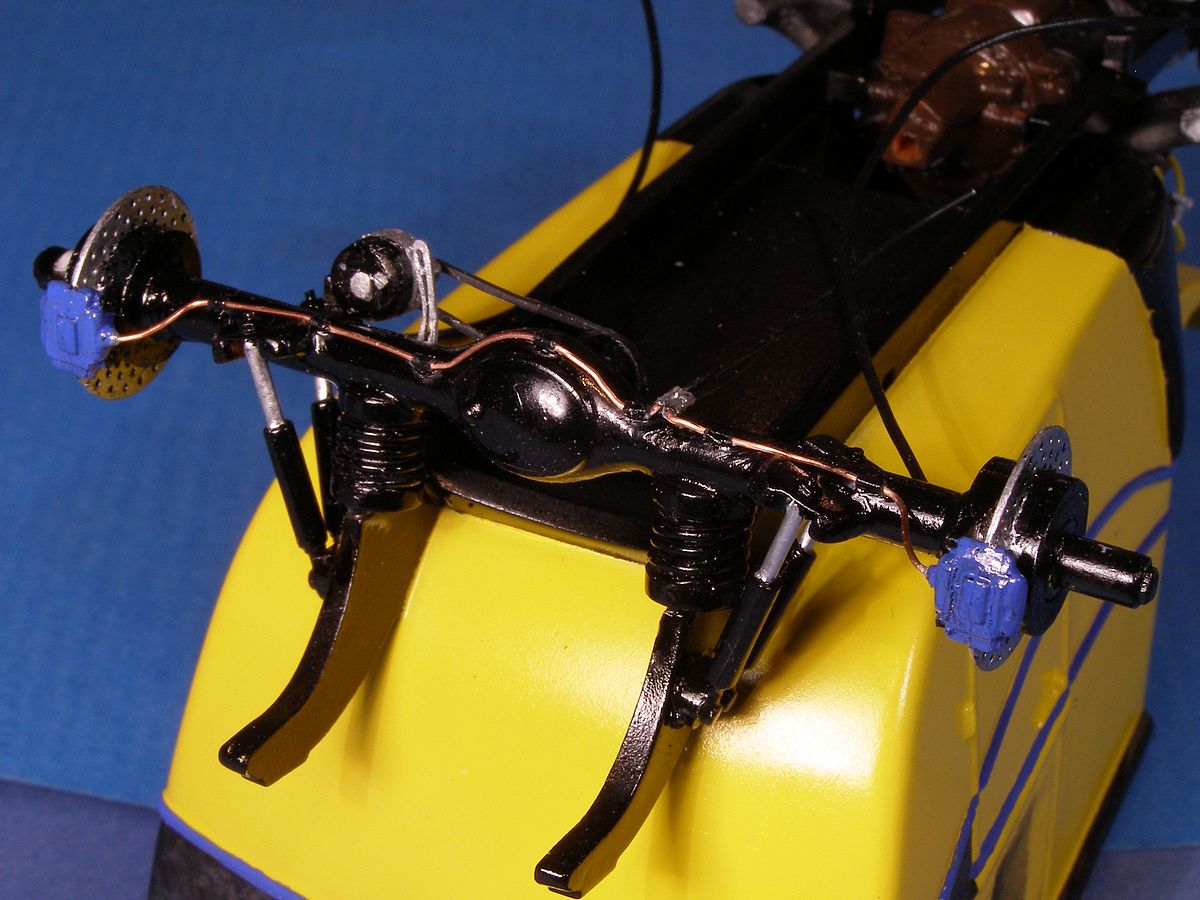
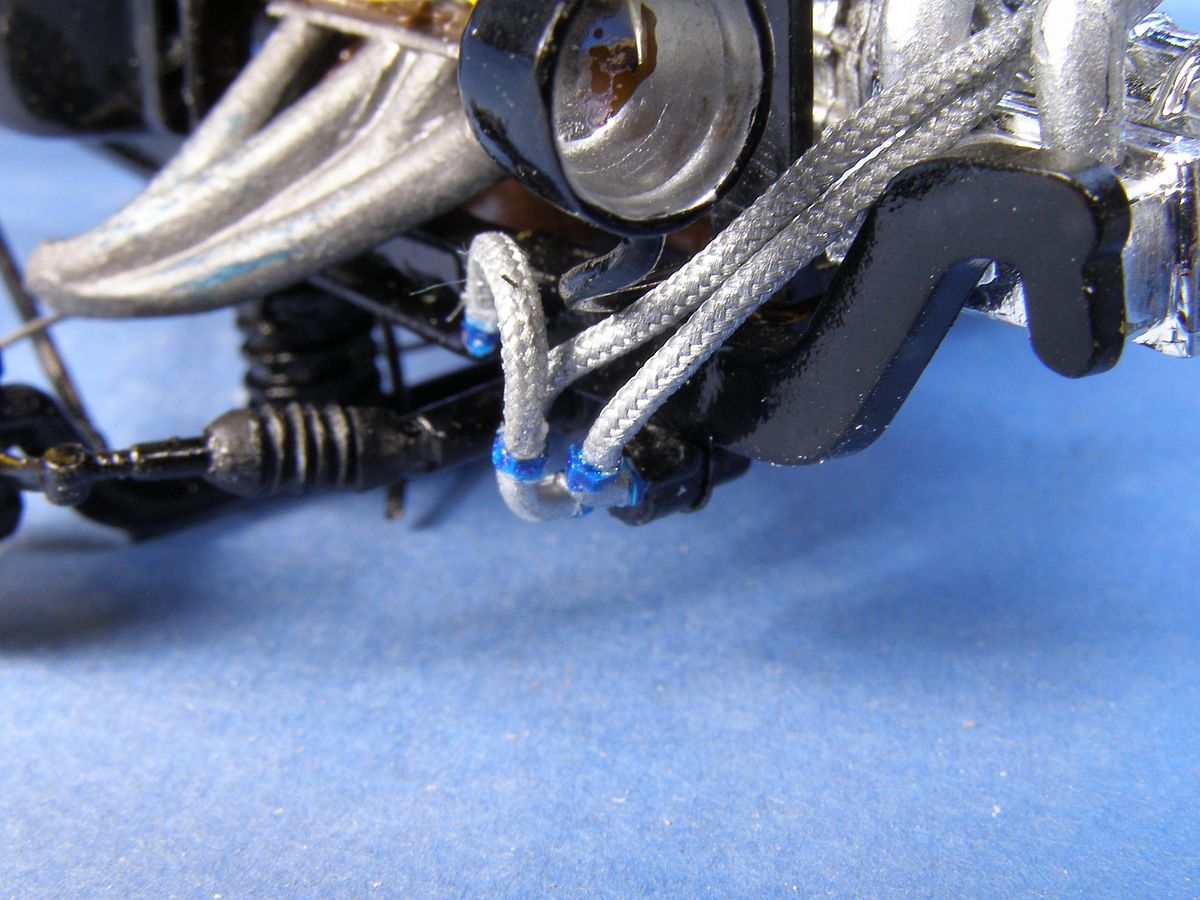
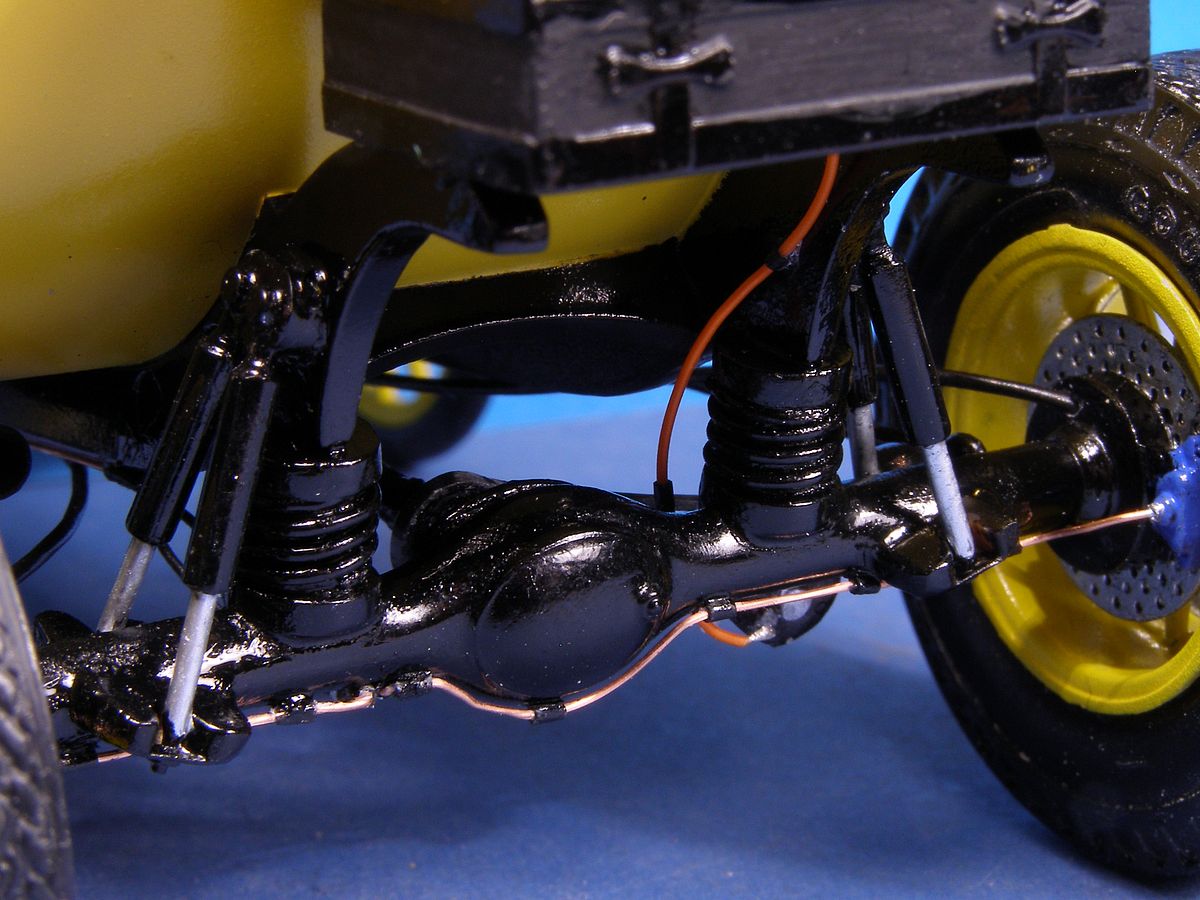
| The parts of the rear axle are being assembled. Mountings for the brake callipers has been built and holes for the brake lines has been drilled. |
| I've also improved the fittings for the shock absorbers. |
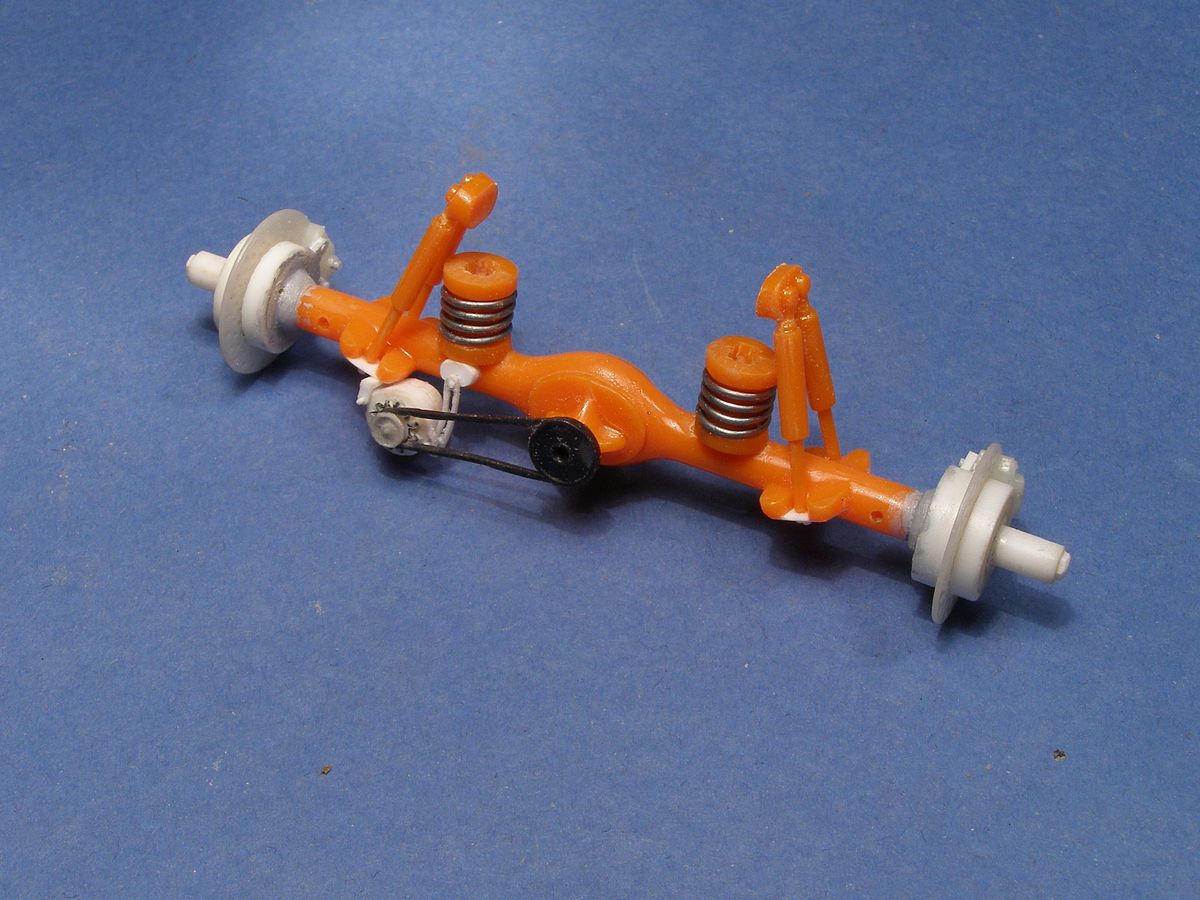
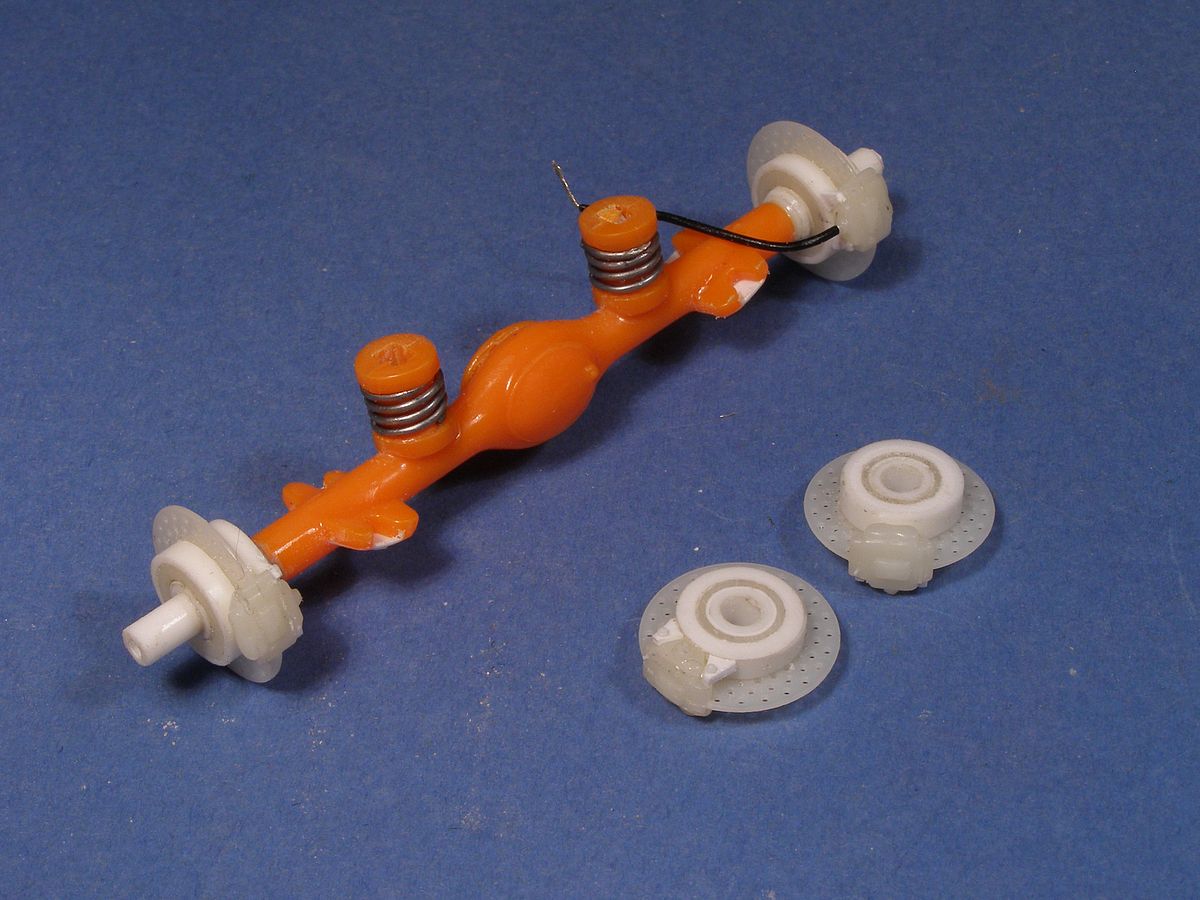
| The alternator has got its final position on the rear axle. |
| The lower nuts for the shock absorbers was further detailed. |
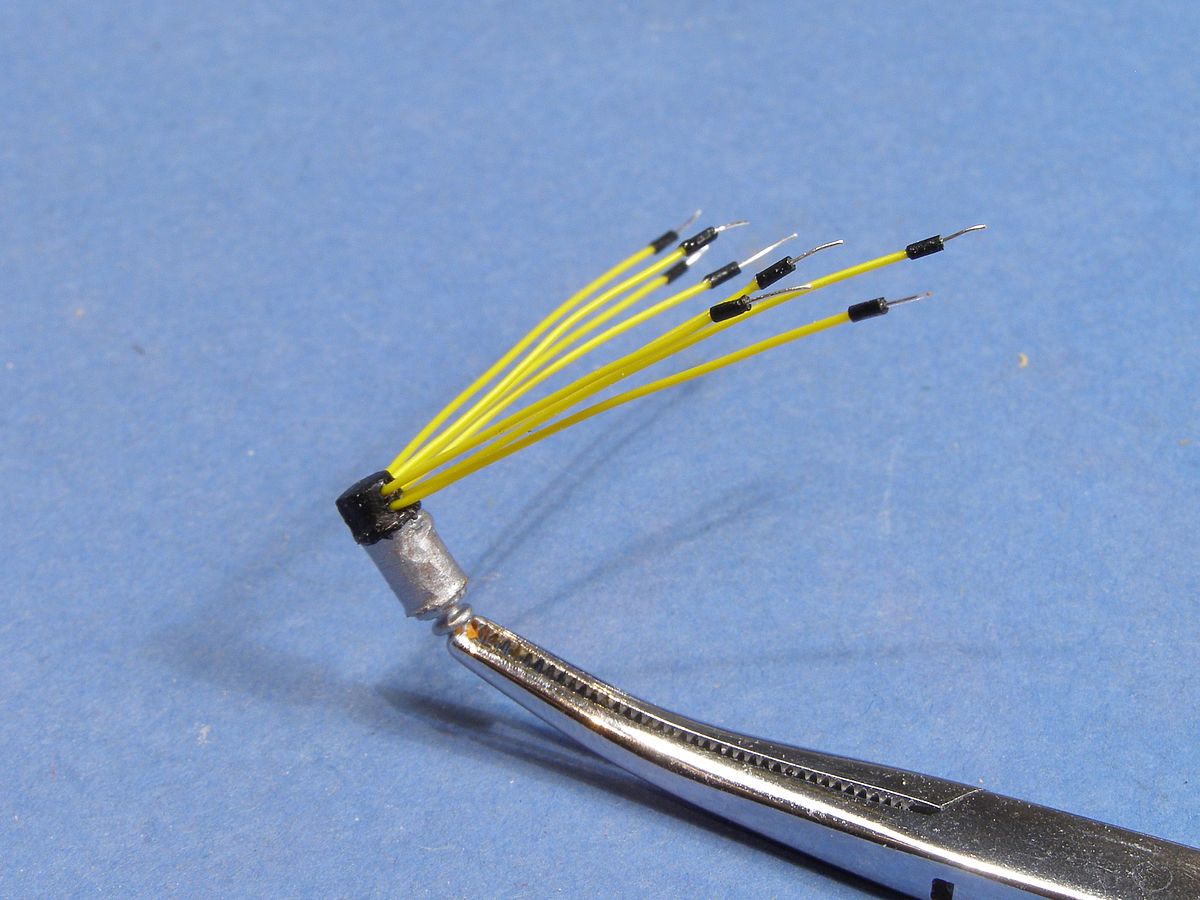
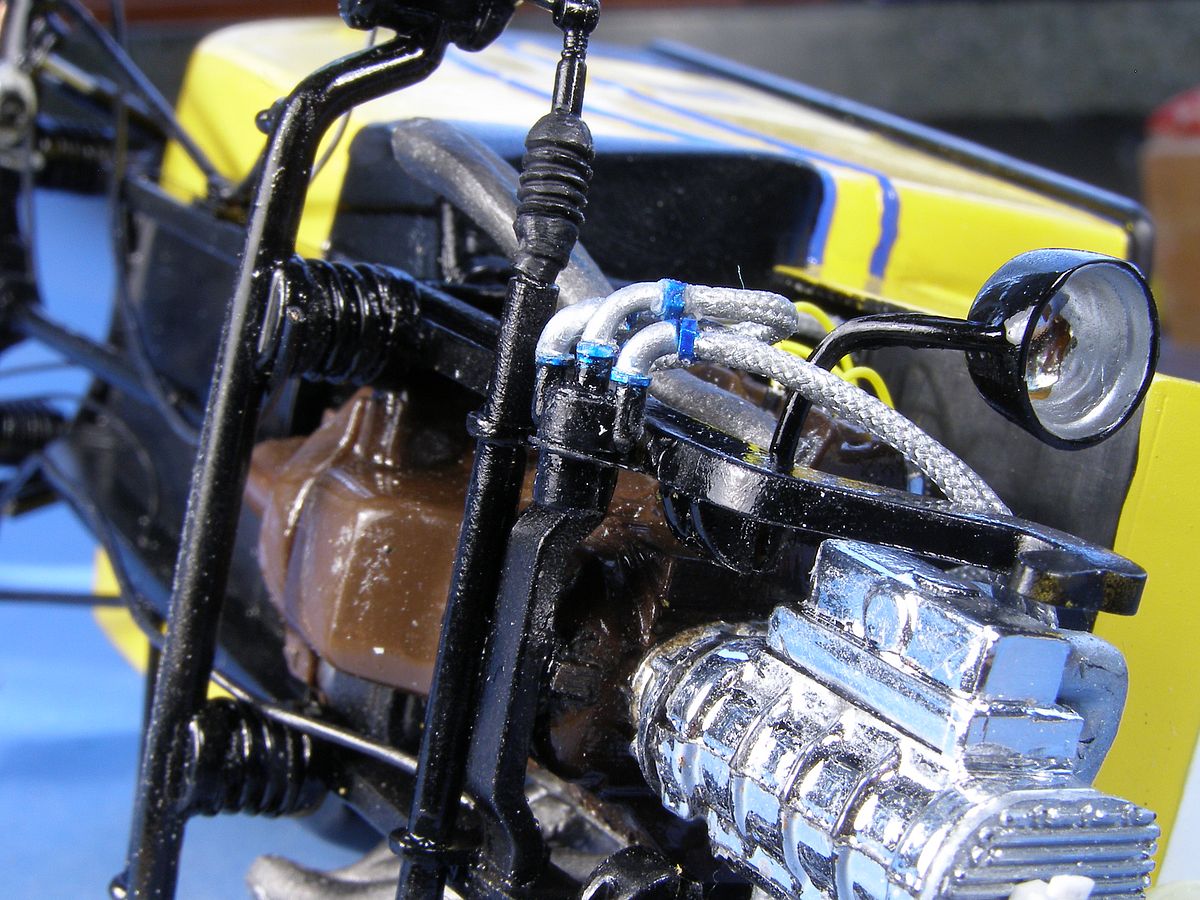
| I drilled holes in the distributor and added the cables. |
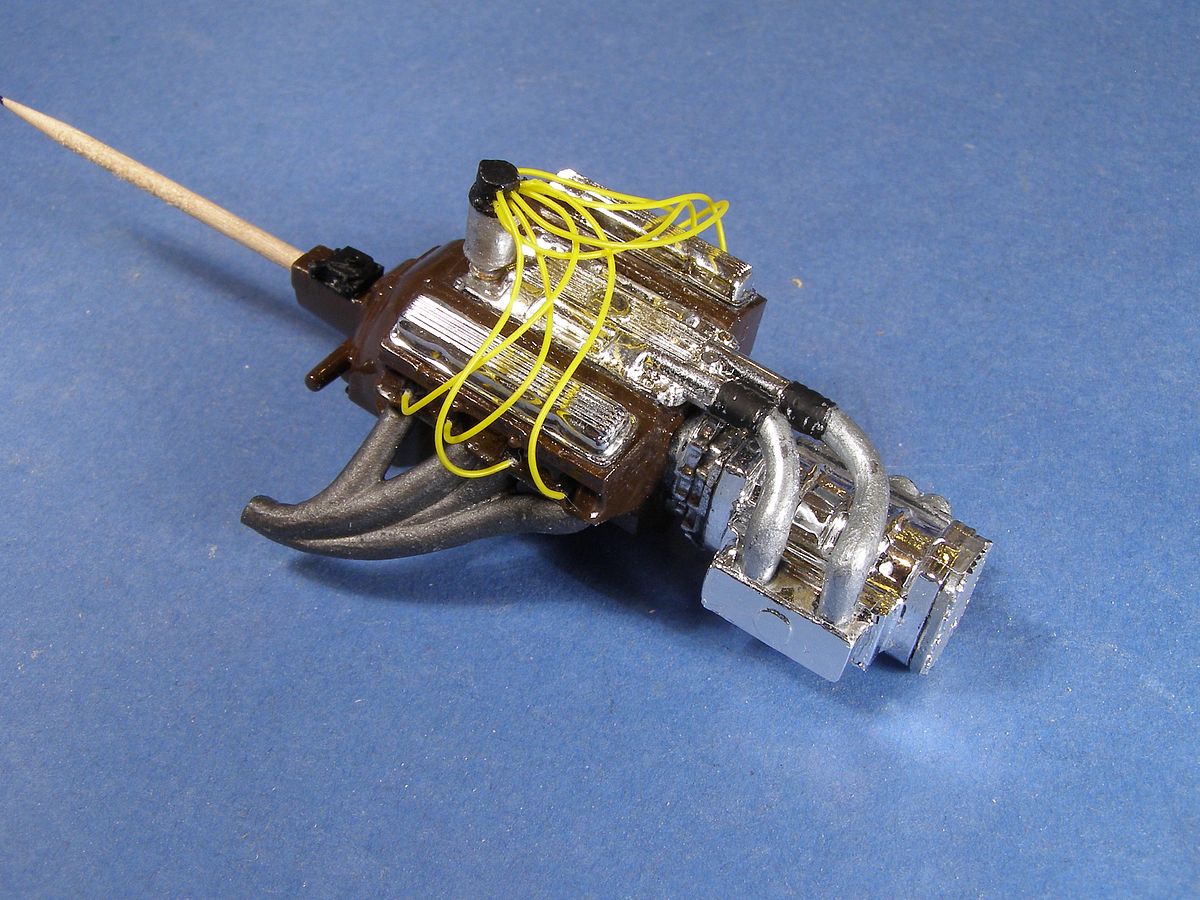
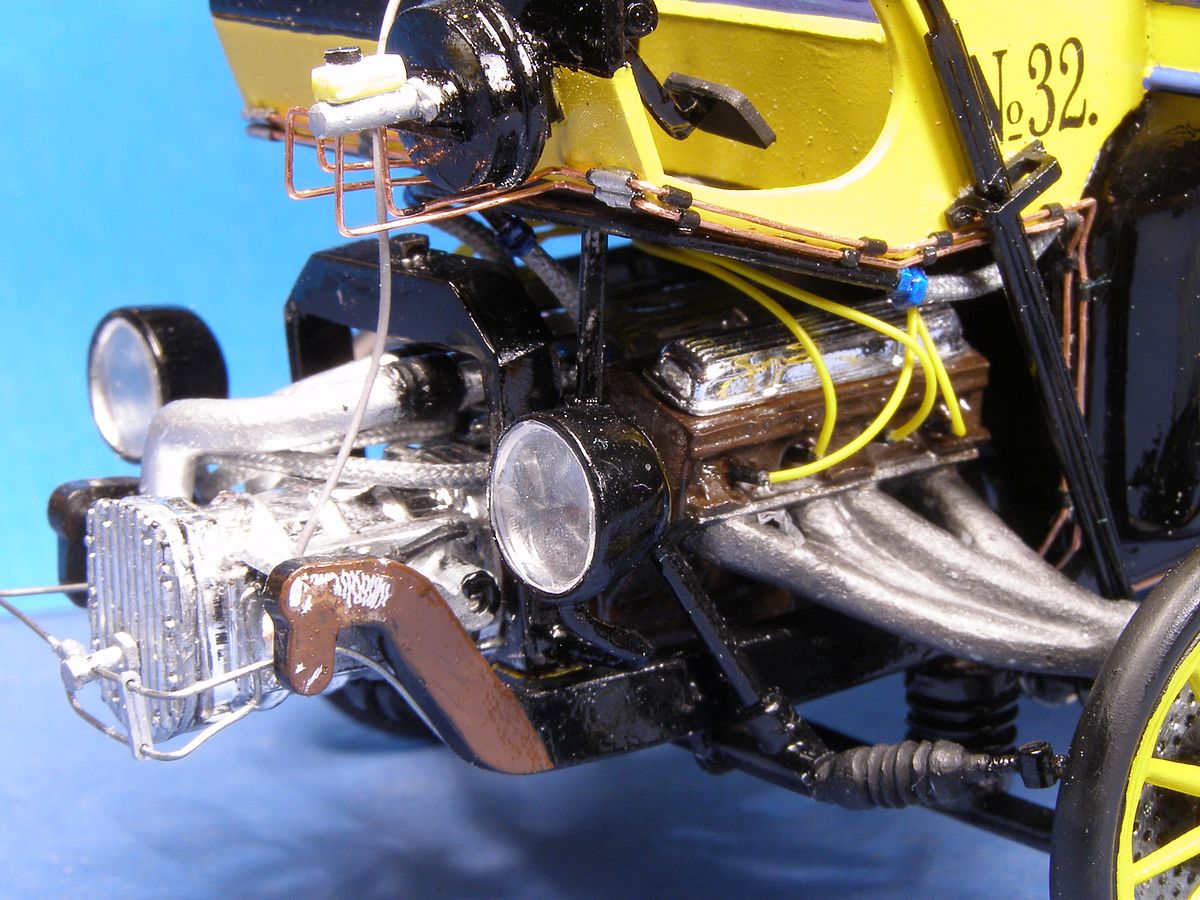
| The engine is getting closer to being finished. |
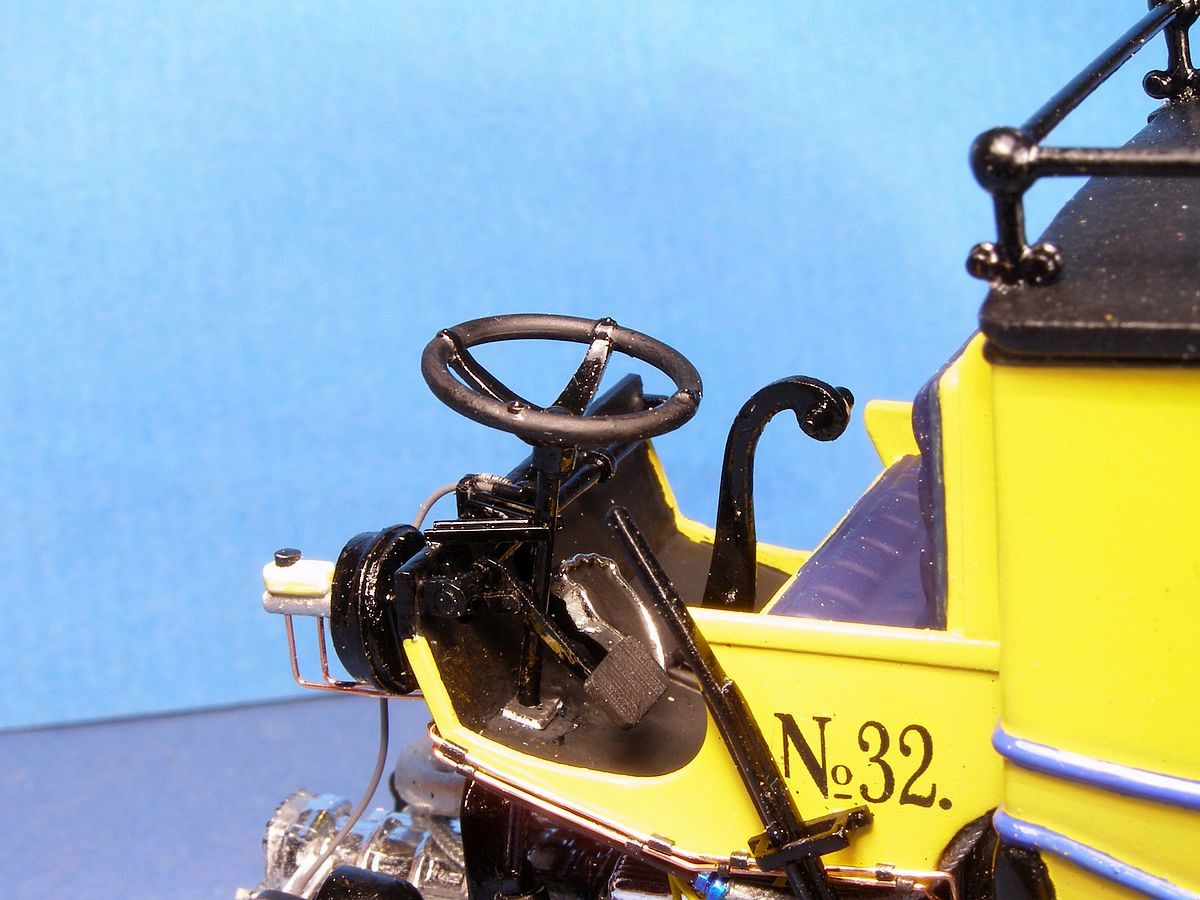
| I didn�t like the look of the drivers position so I removed the parts and started all over with it. |
| As I happened to use a Potvin blower, the engine became rather low (and long). Now I could lower the drivers position and get a look I liked better. But I can't mount the engine with the distributor in place, so I have to do this afterwards. That is how I do things, don't plan to much. Just build. |
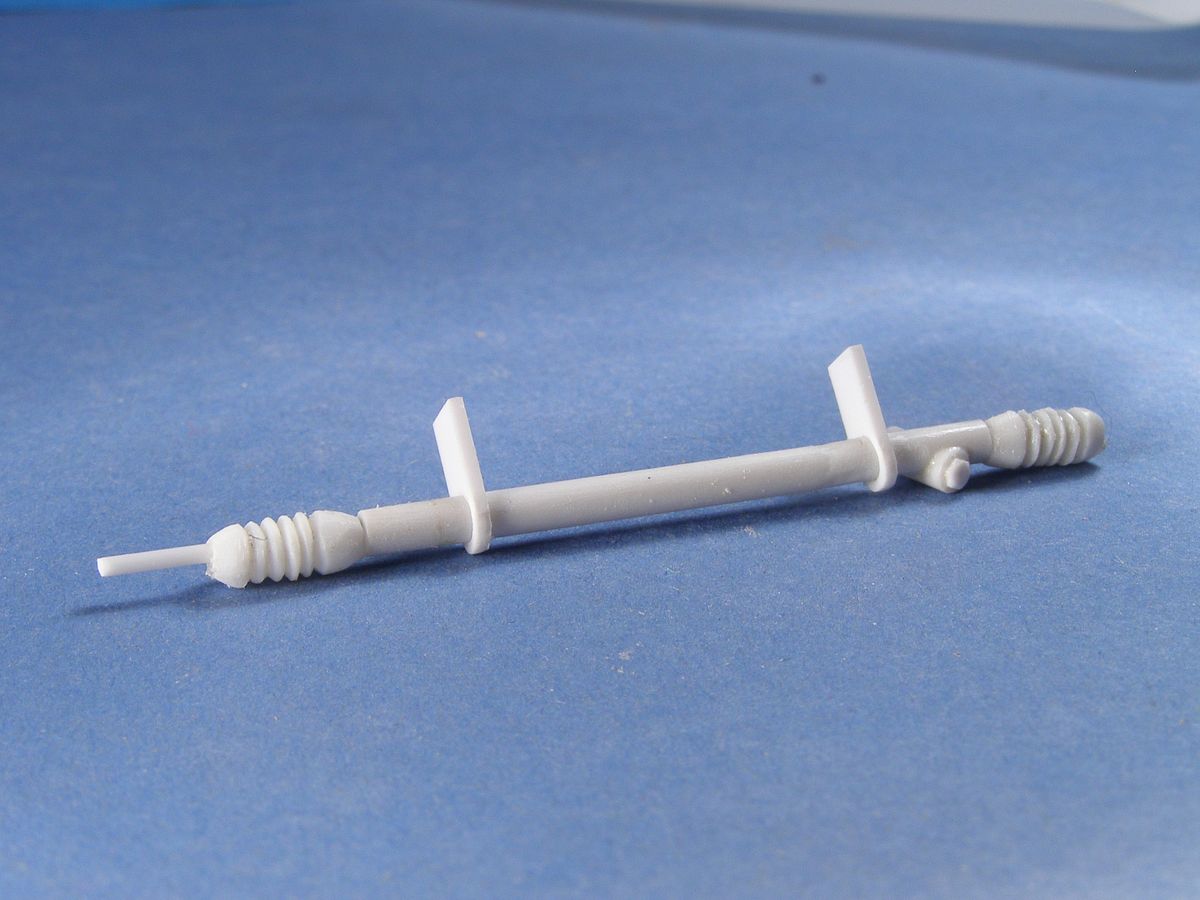
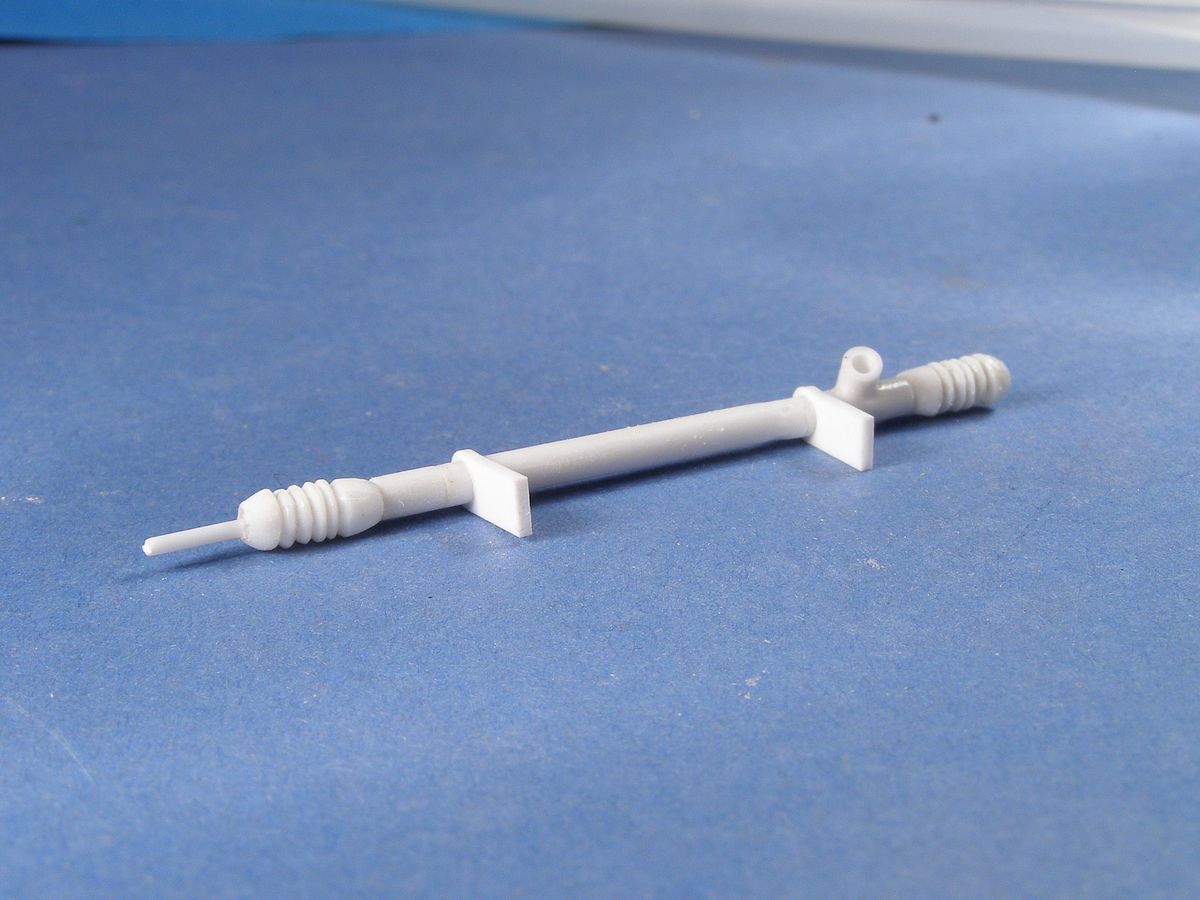
| I have started on details for the steering. 18 pieces needed for such a simple thing. |
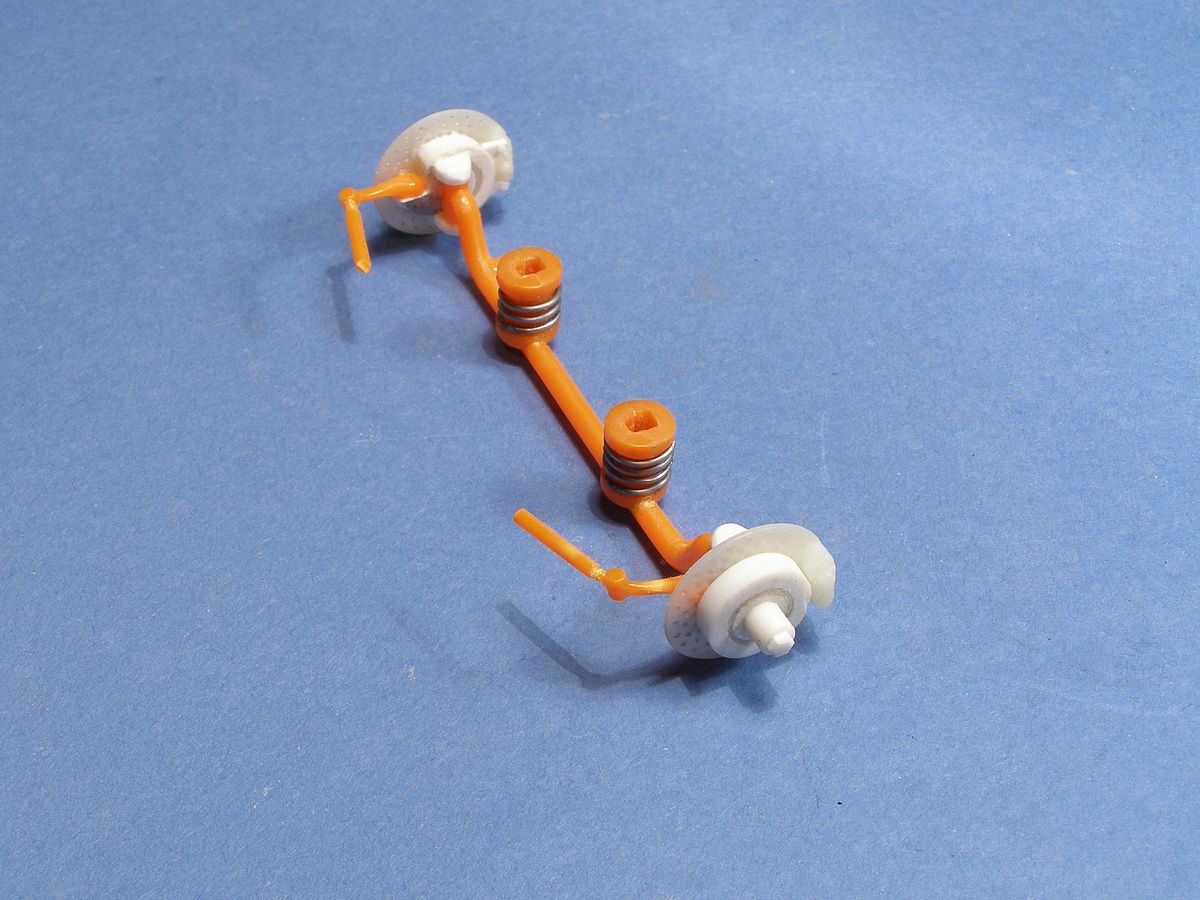
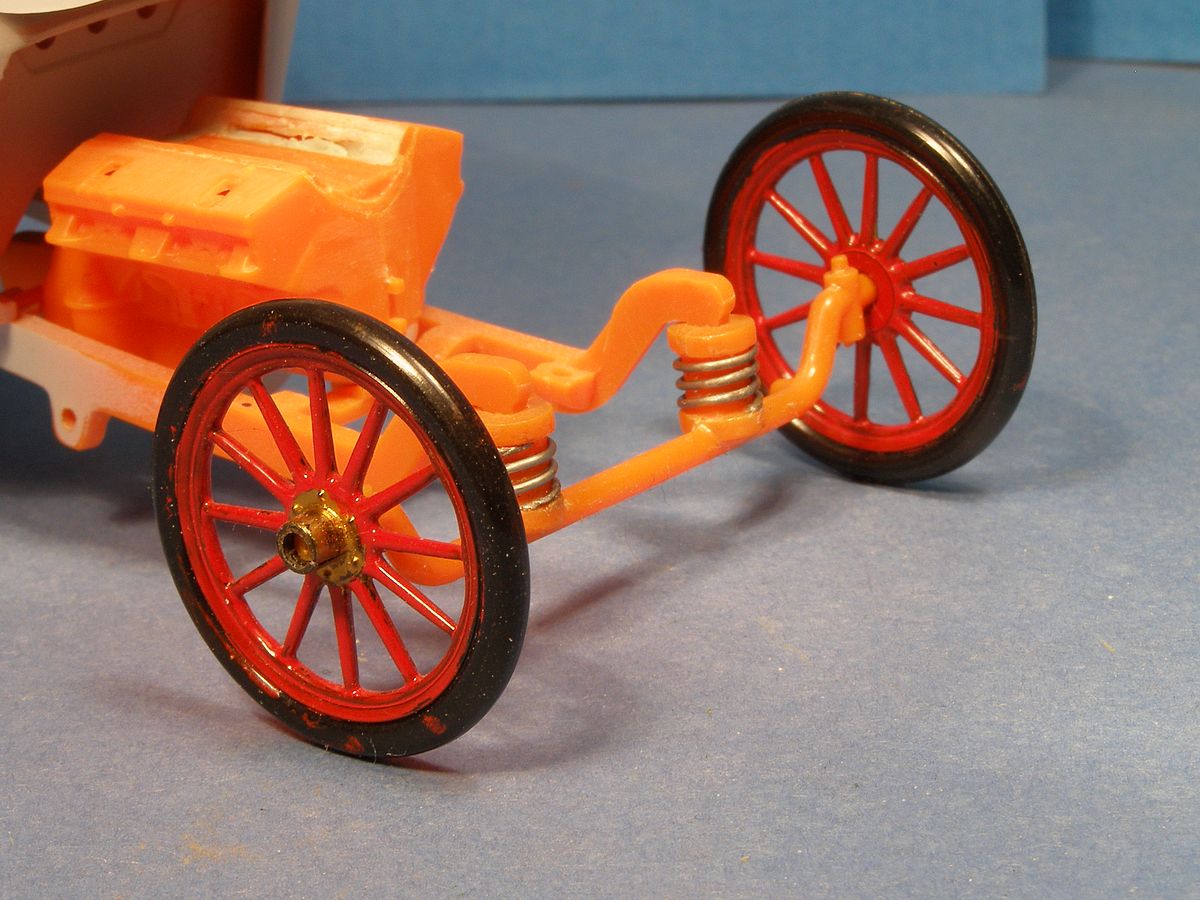
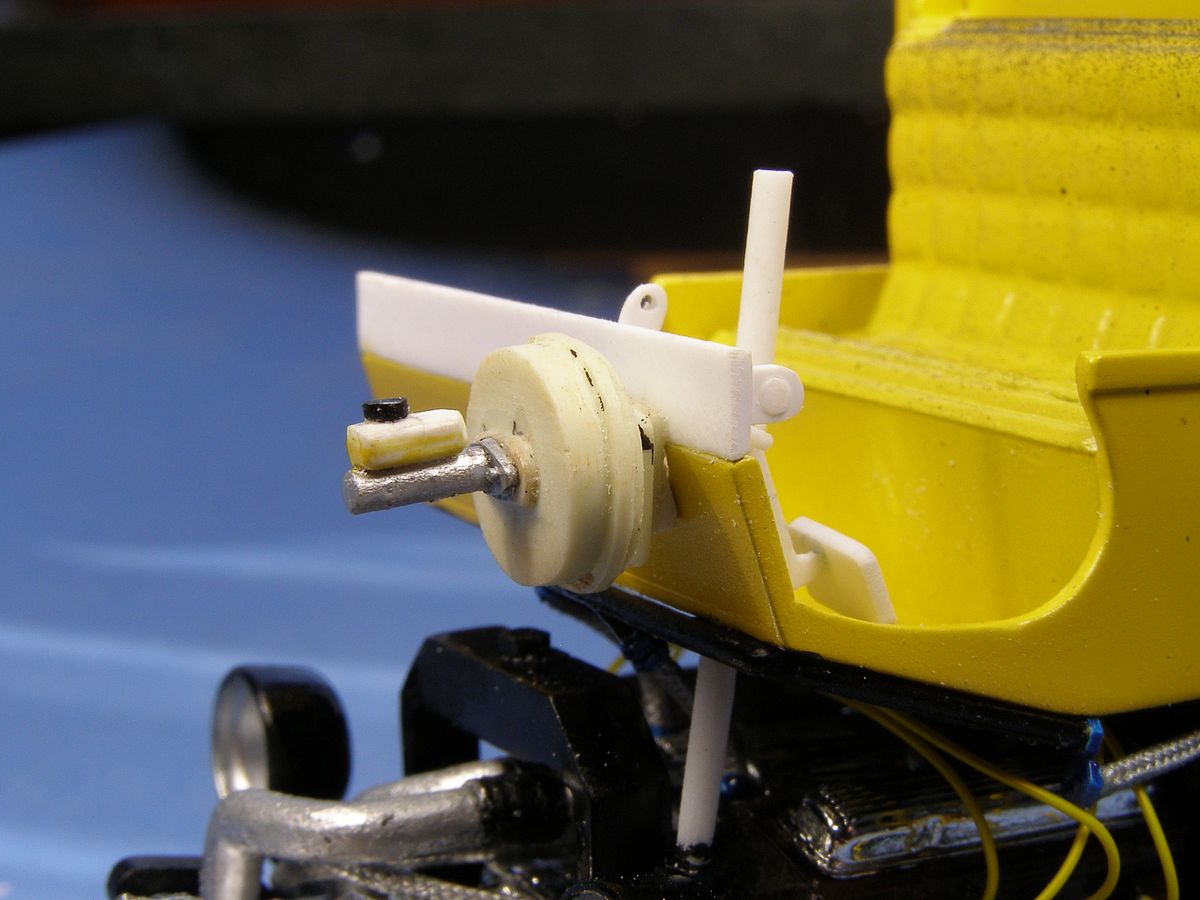
| The end is getting closer. The front axle is almost done. |
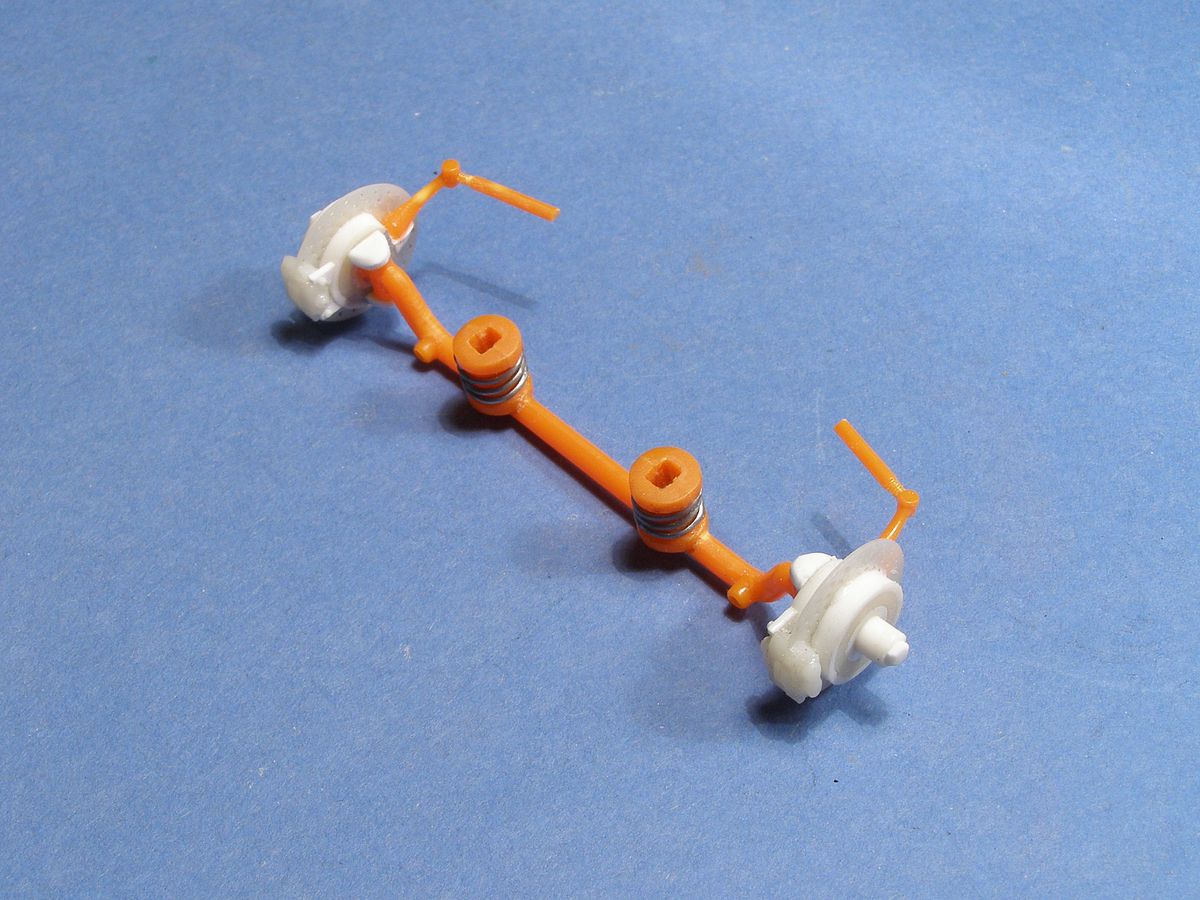
| It needs some minor details and some filler though. |
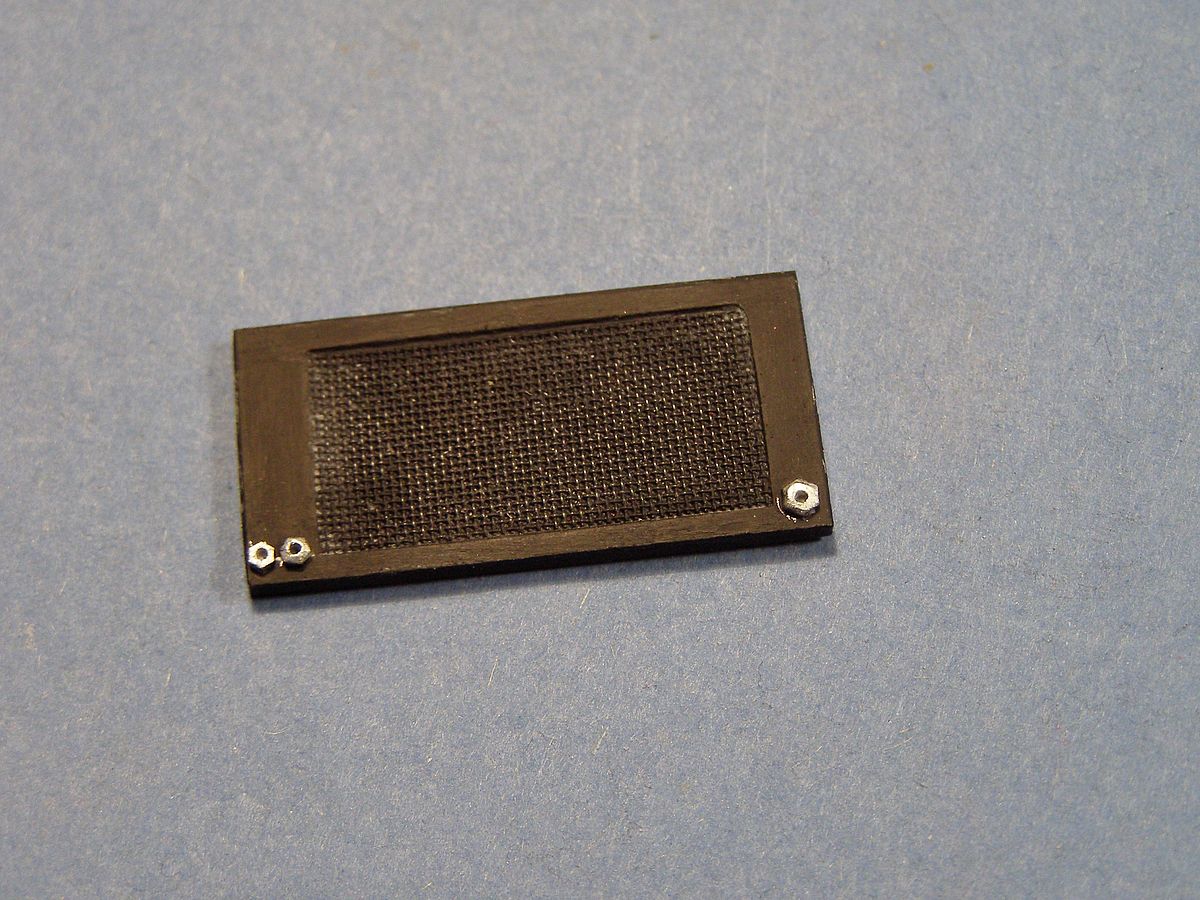
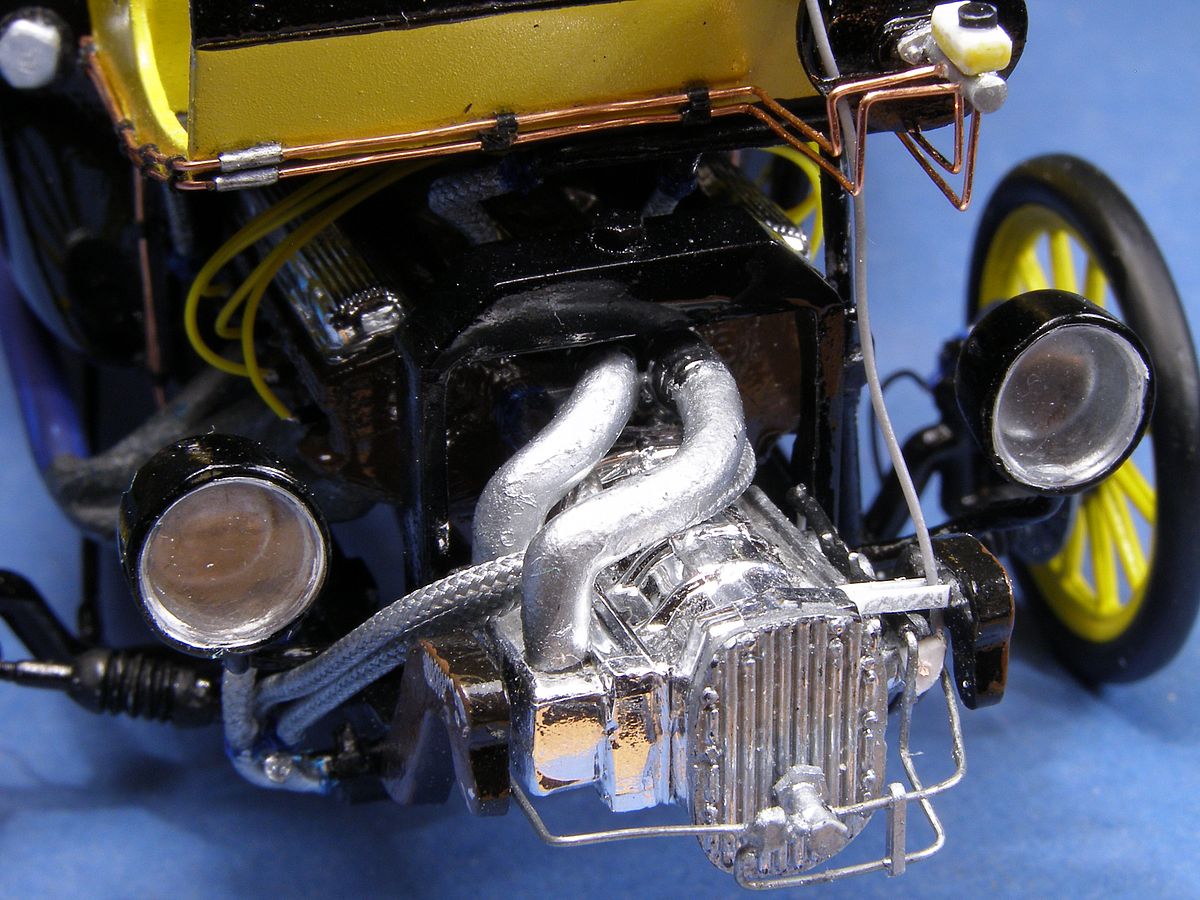
| I never found a suitable radiator so in the end I had to scratch build it using plastic card, plastic strips and a net from a tea bag. |
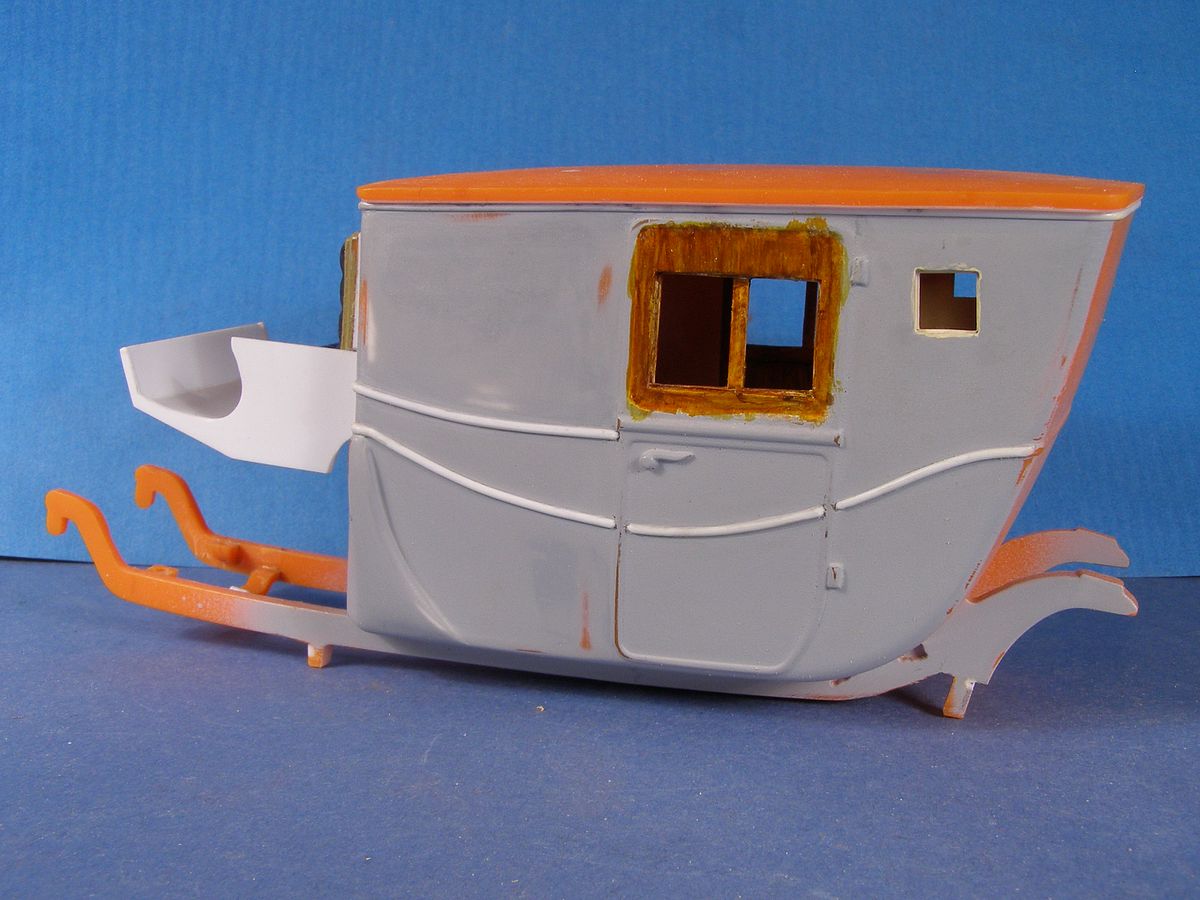
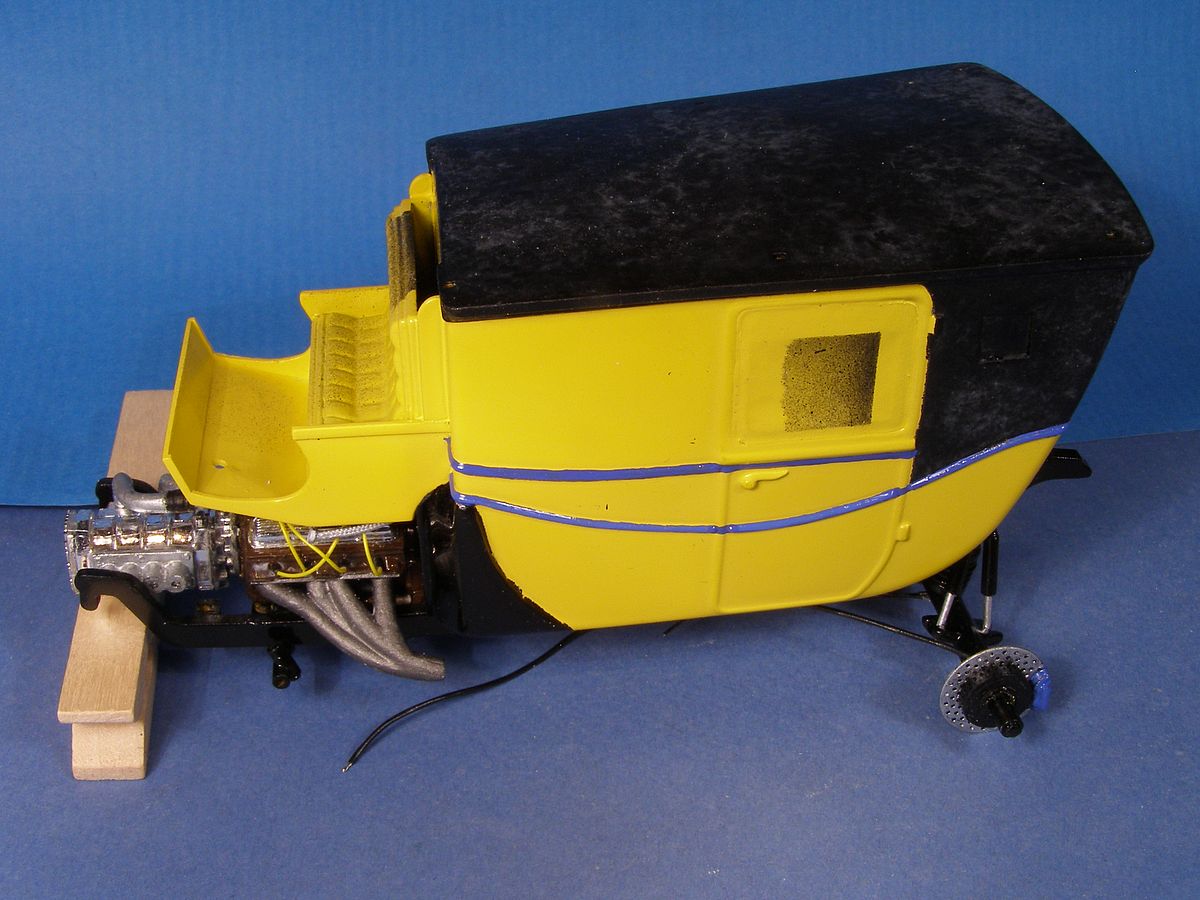
| Finally, the body is ready to paint. |
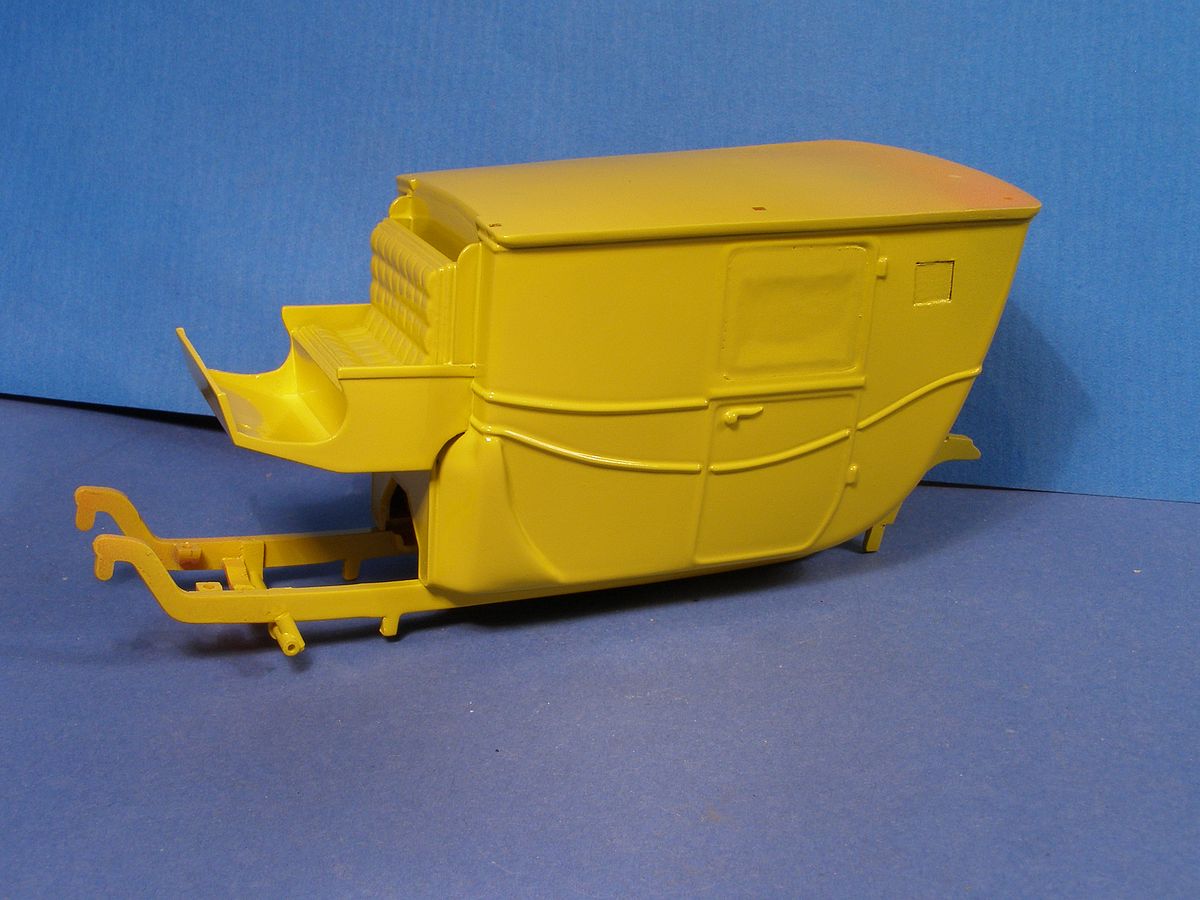
| Yellow will be nice with the dark brown engine. |
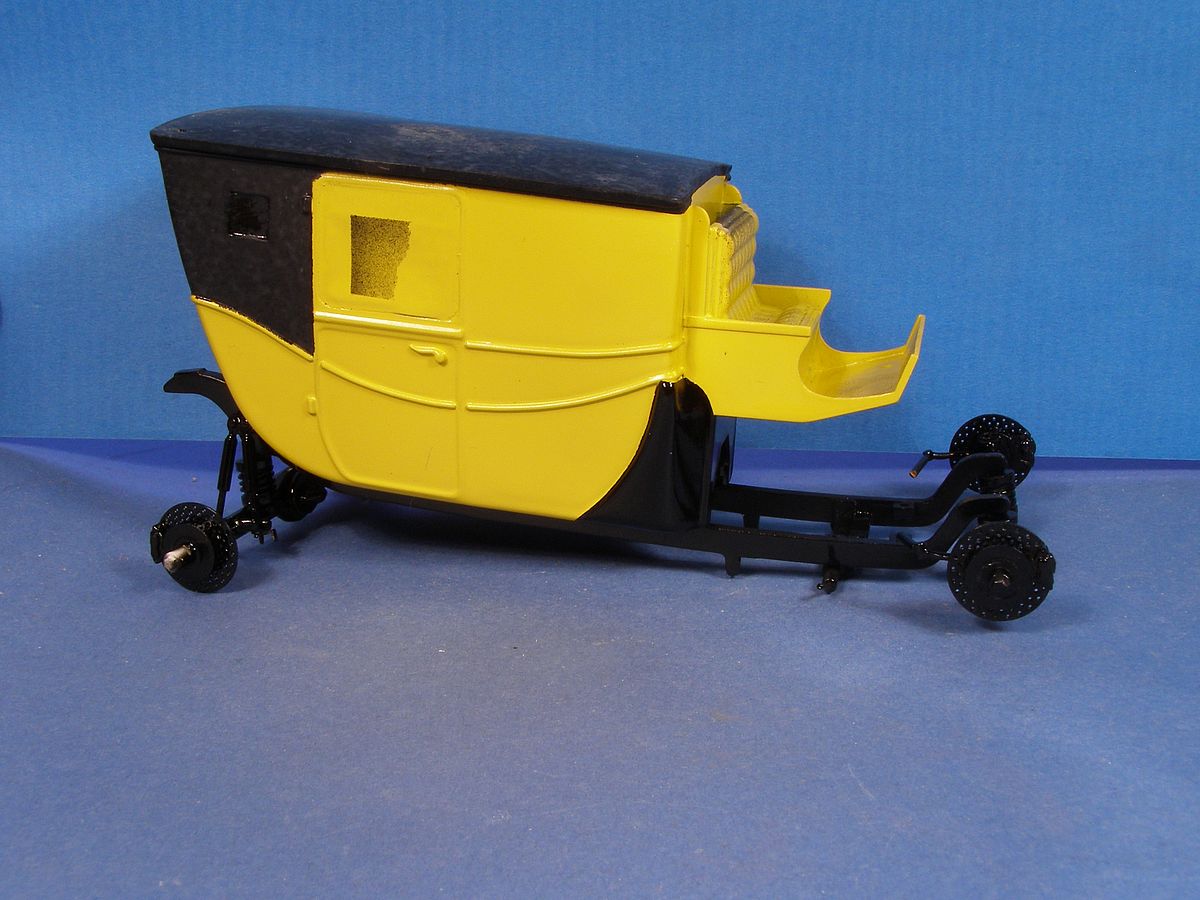
| The vinyl roof gave me problems. For once I wanted an orange peel but goth a mirror like finish. In the end I painted it with a brush. |
| The Humbrol spray cans are now acrylic. Takes forever to dry so I got traces of the masking tape in the paint job. Luckily the paint could be saved by polish it out. |
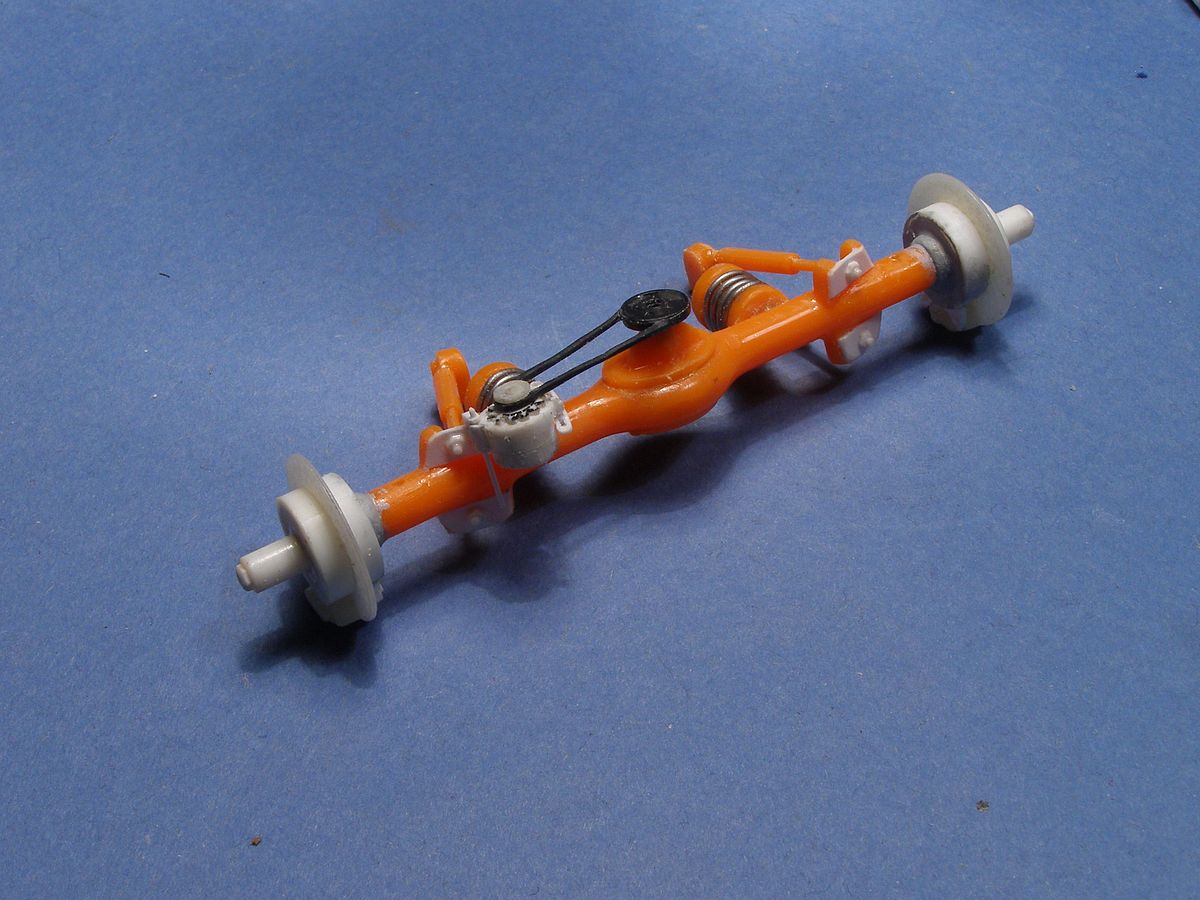
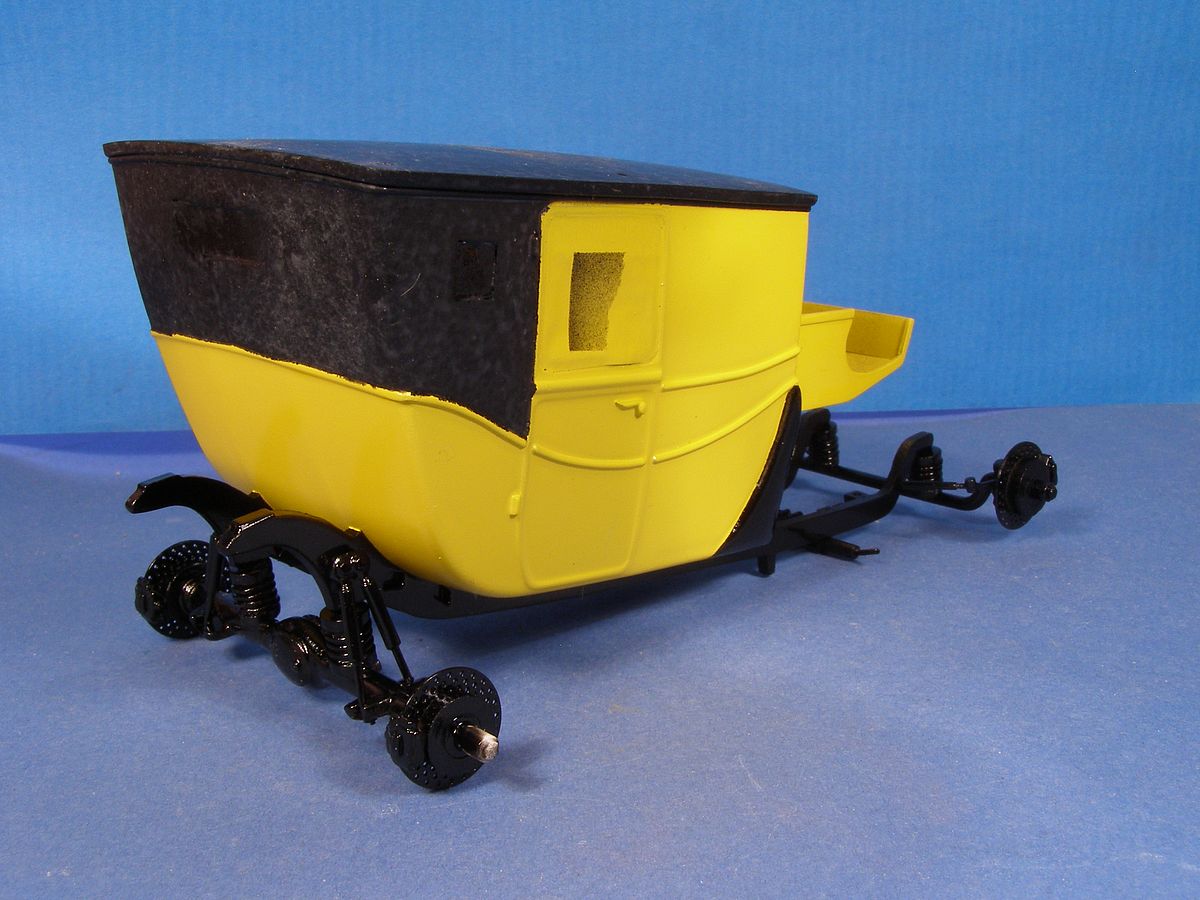
| Back to the work on the rear axle. |
| Blue brake callipers and brake lines in copper added some colour to the black. |
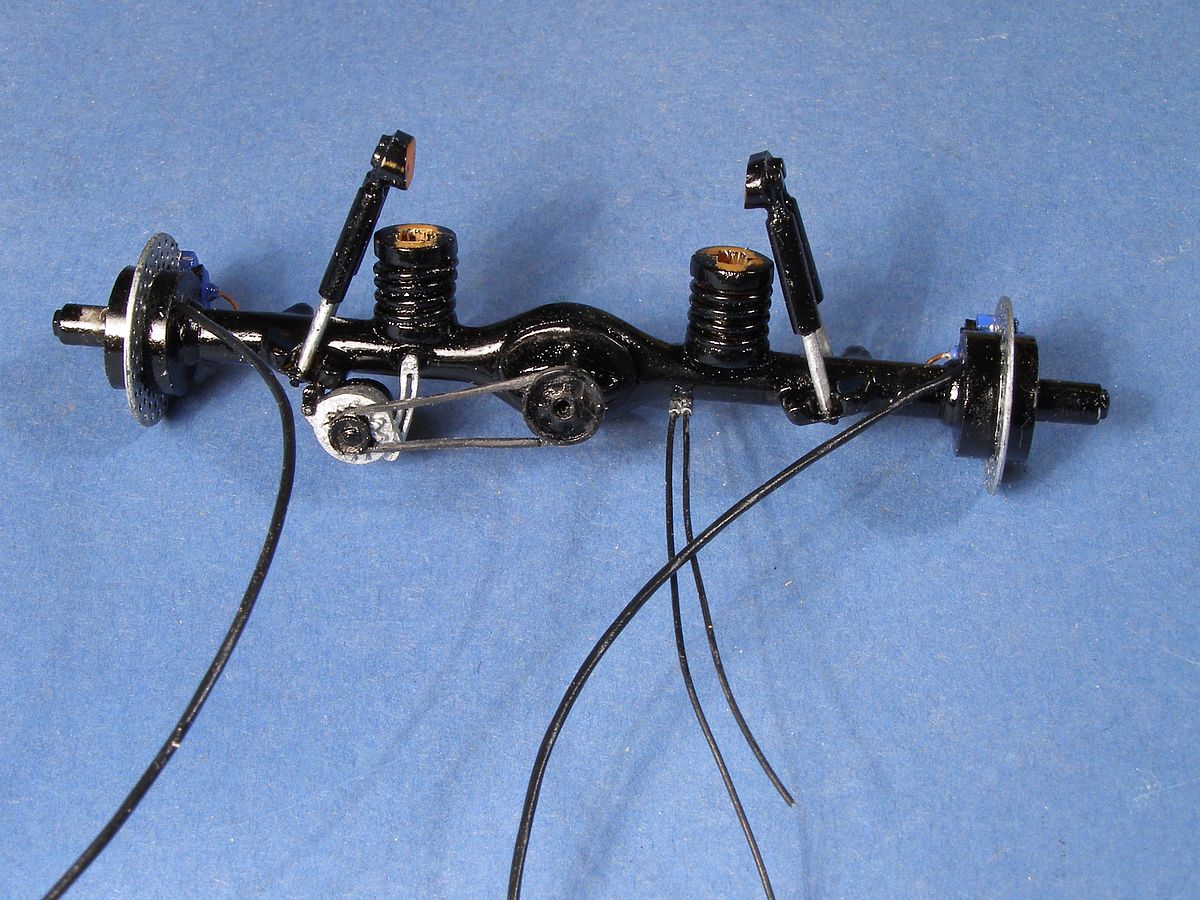
| The alternator is in place and so are the wires for the parking brake. |
| I mounted the radiator and added an electrical fan. Sadly, the fan don't fit the space. |
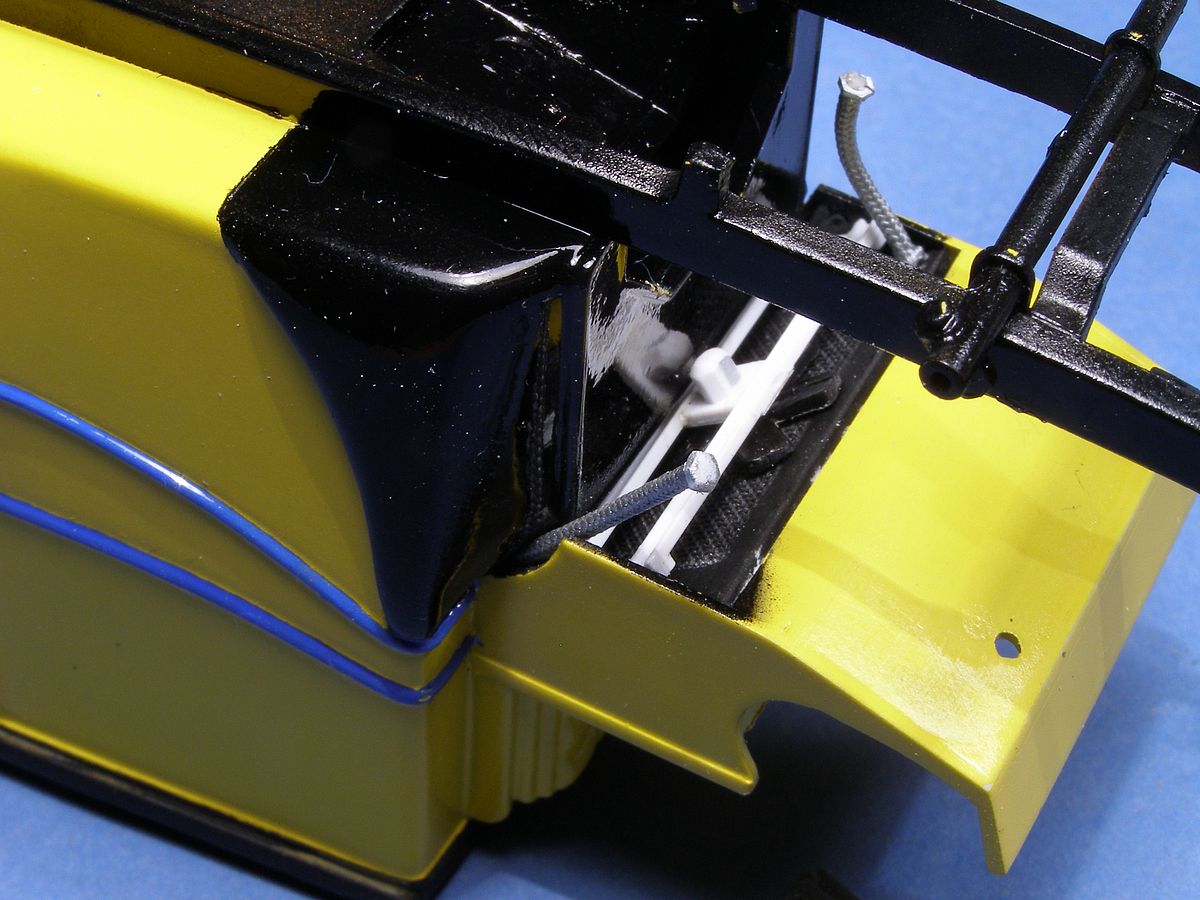
| The rear axle in place |
| But it is hard to see any details with all the back colour. |
| With the fan removed I could fit the engine in, it is a long one. |

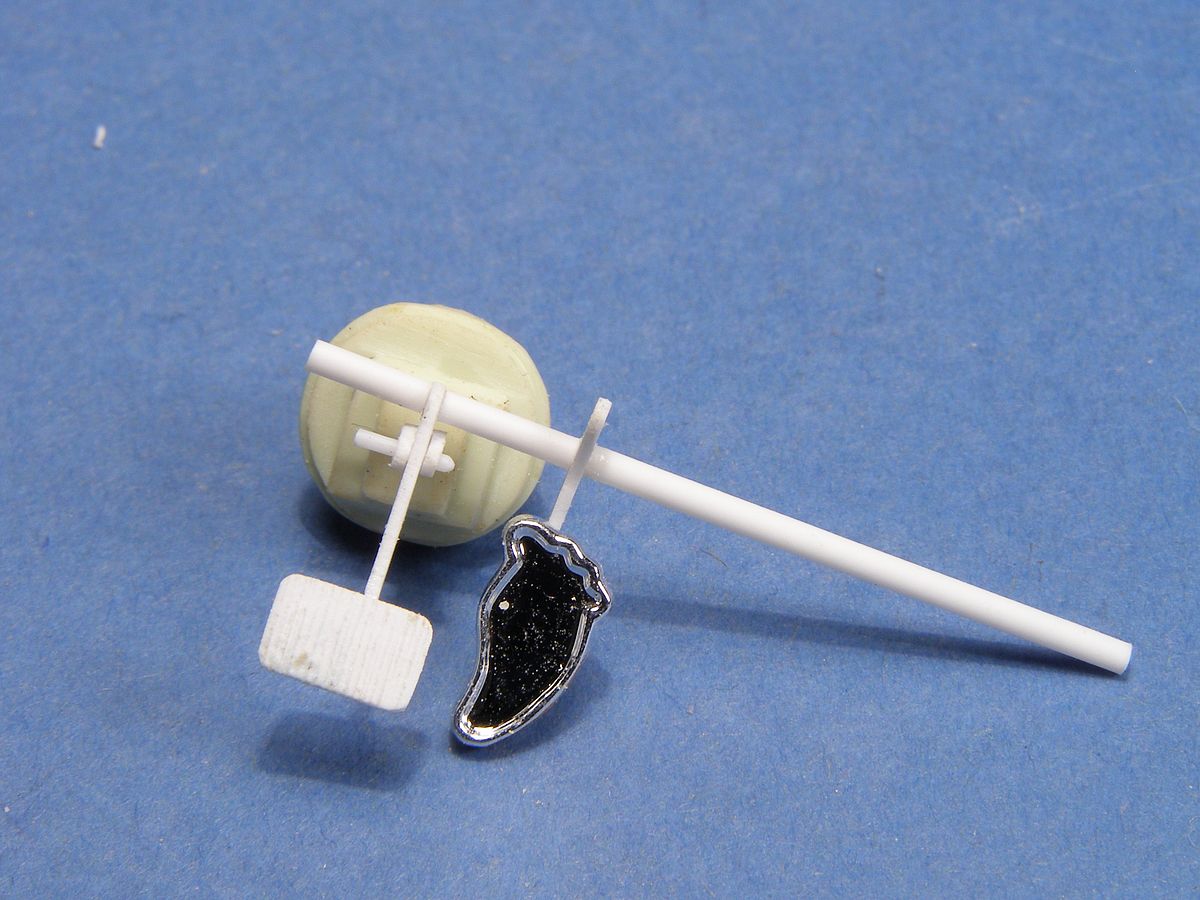
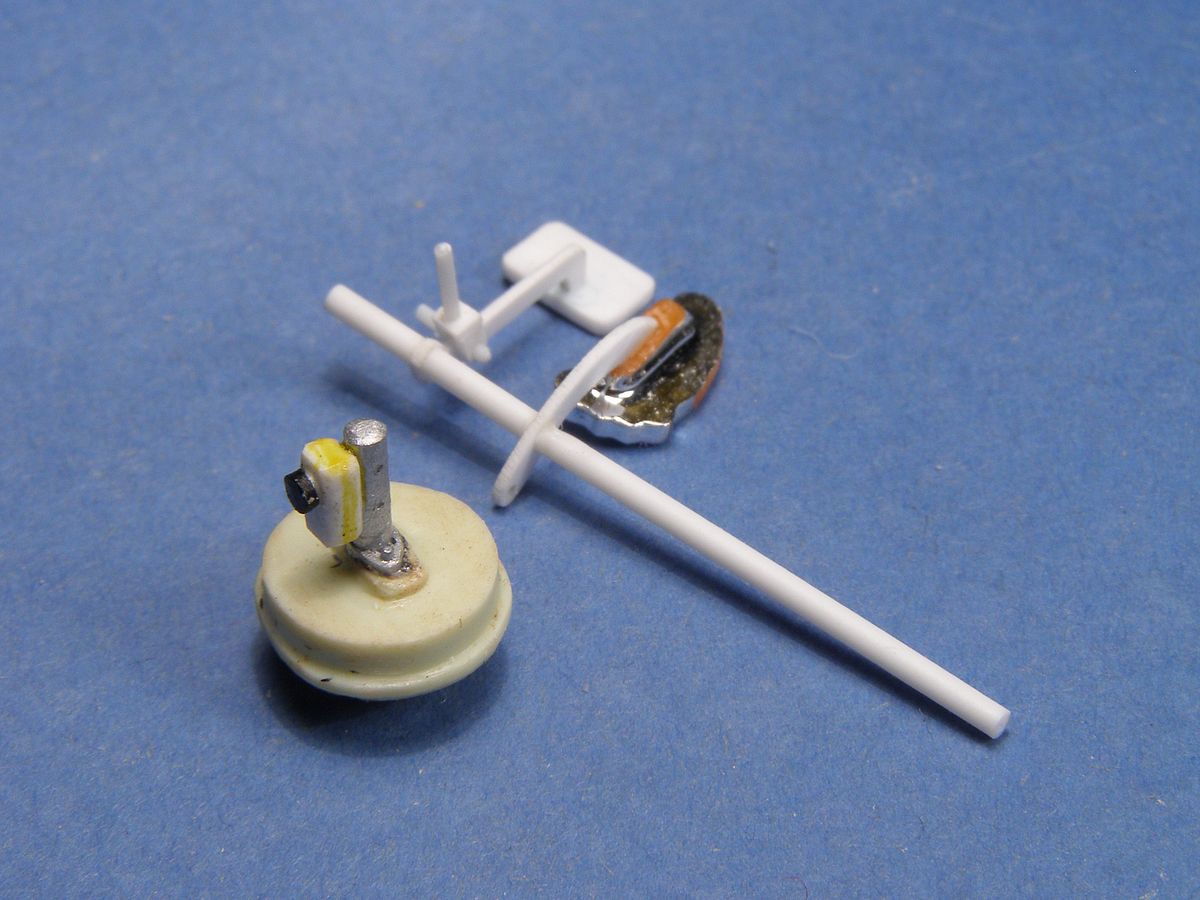
| A brake master cylinder for the taxi. A wheel from a model railroad truck and some plastic strips were glued together. |
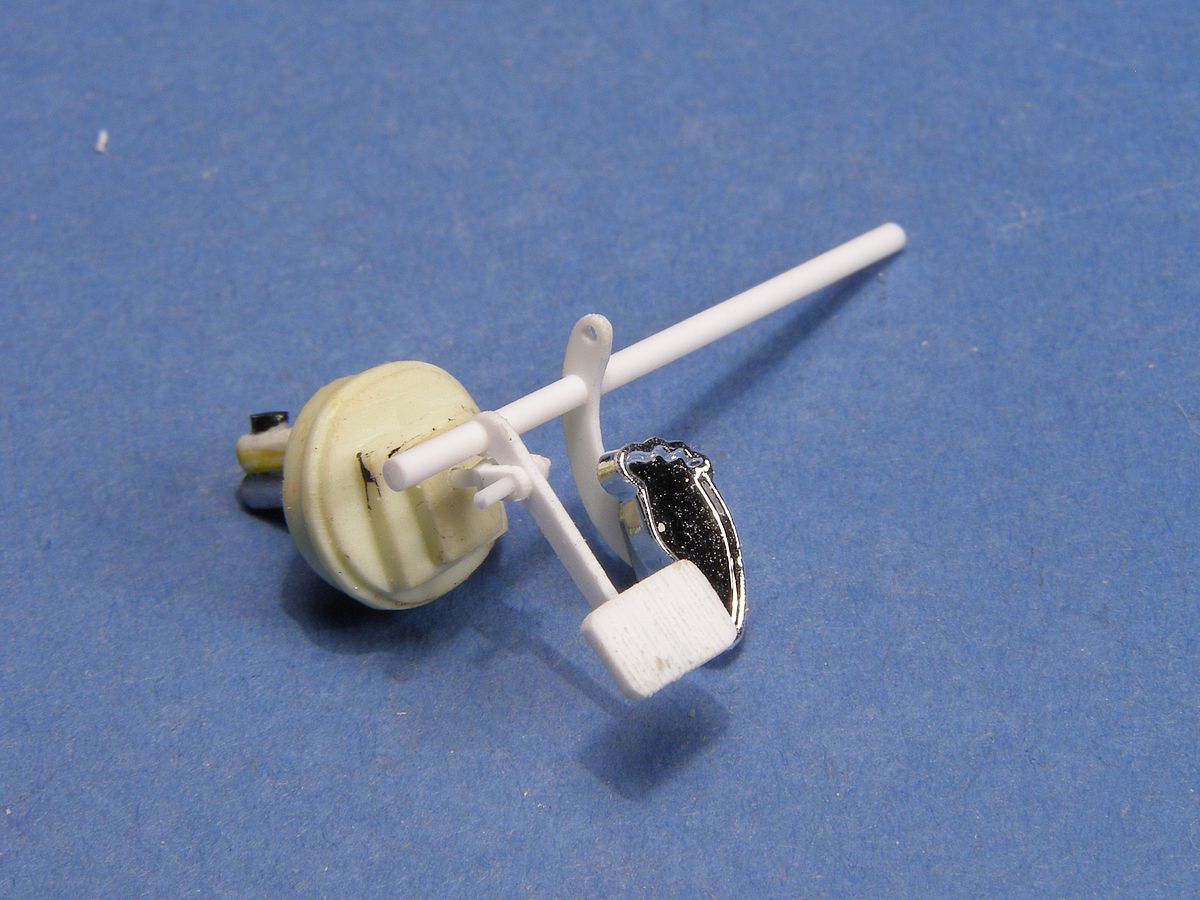
| Pedals are built, they are not so large. |
| I sometime have a feeling that I am overdoing things, but I had so much fun building, so I kept on. |
| I found an old brake servo that I could use parts from instead of the one I built earlier. |
| The pedals are mounted |
| and so are the master brake cylinder. |
| I had to build an electrical water pump. |
| The water pump. |
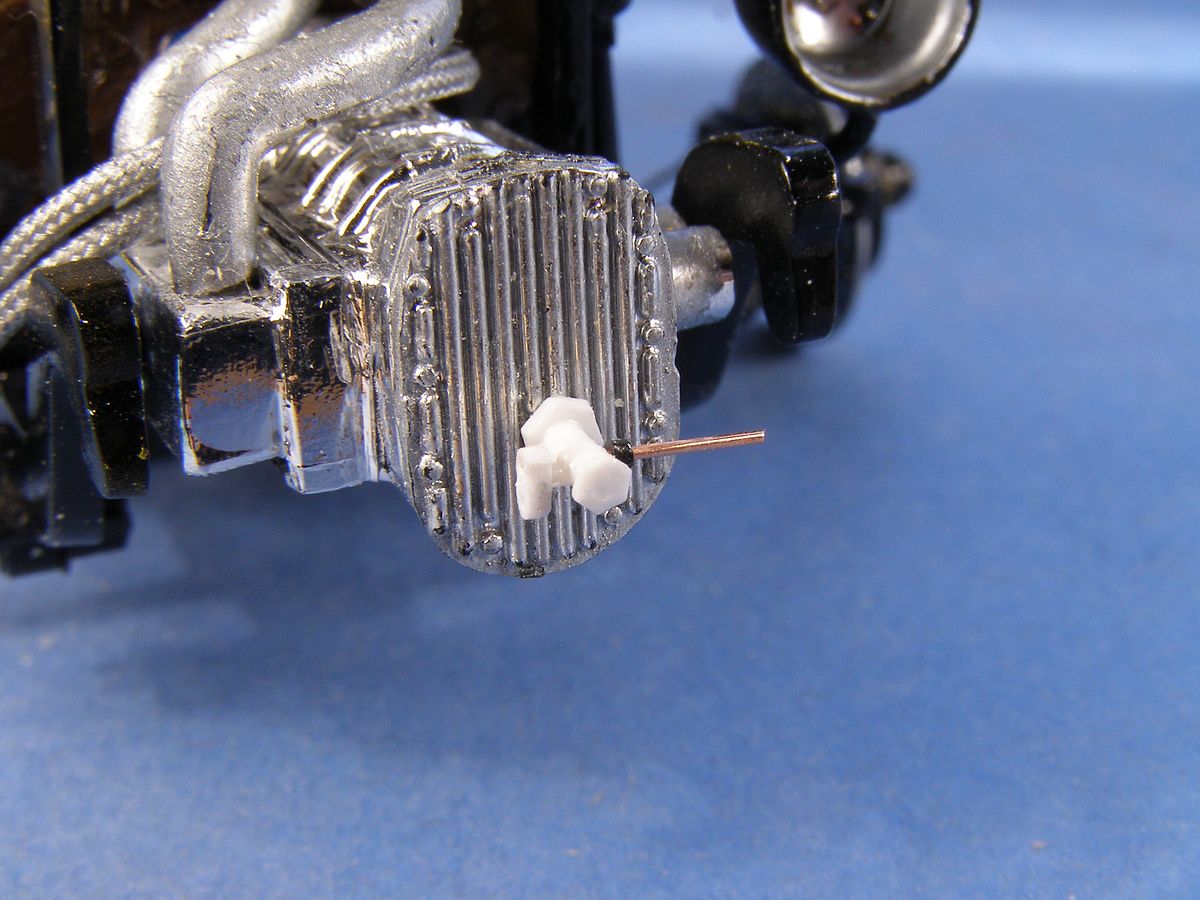
| A fuel pump is being constructed. |
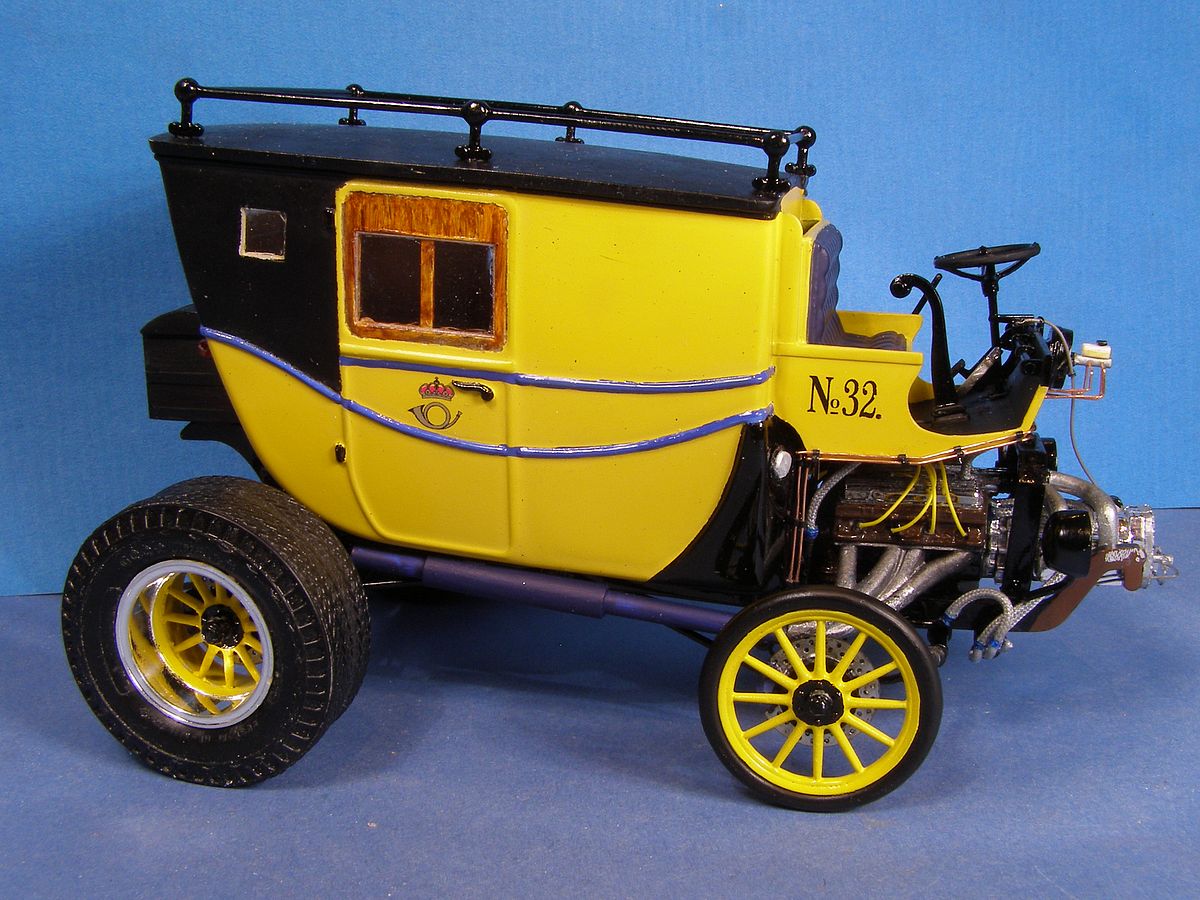
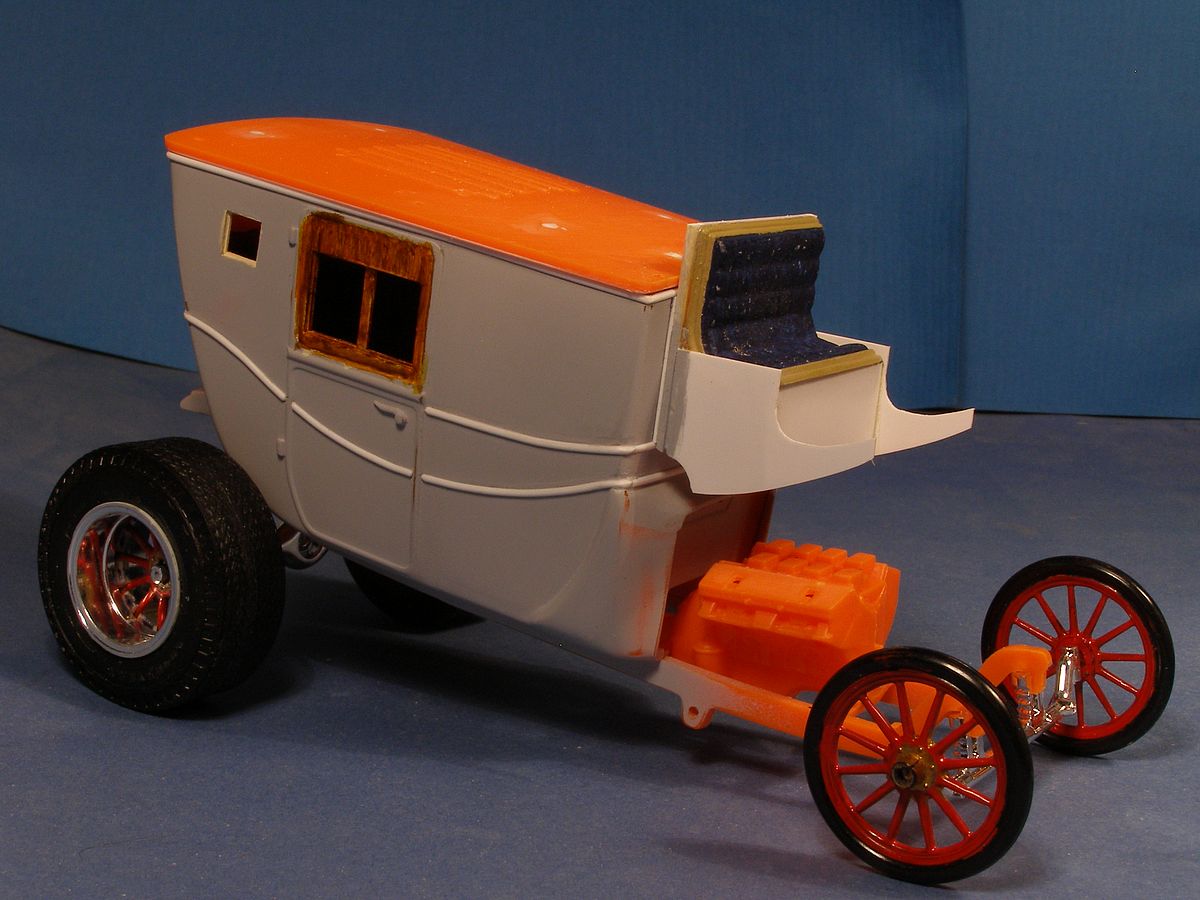
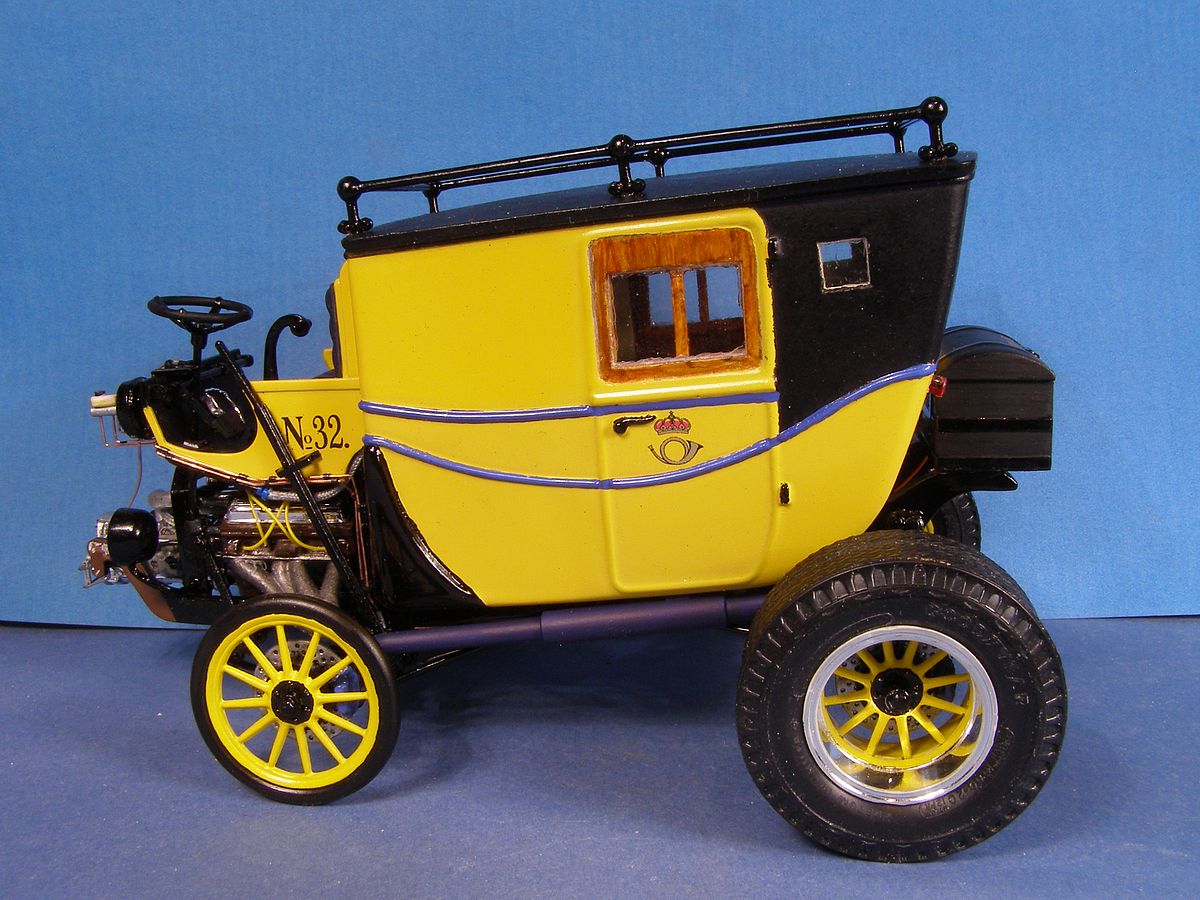
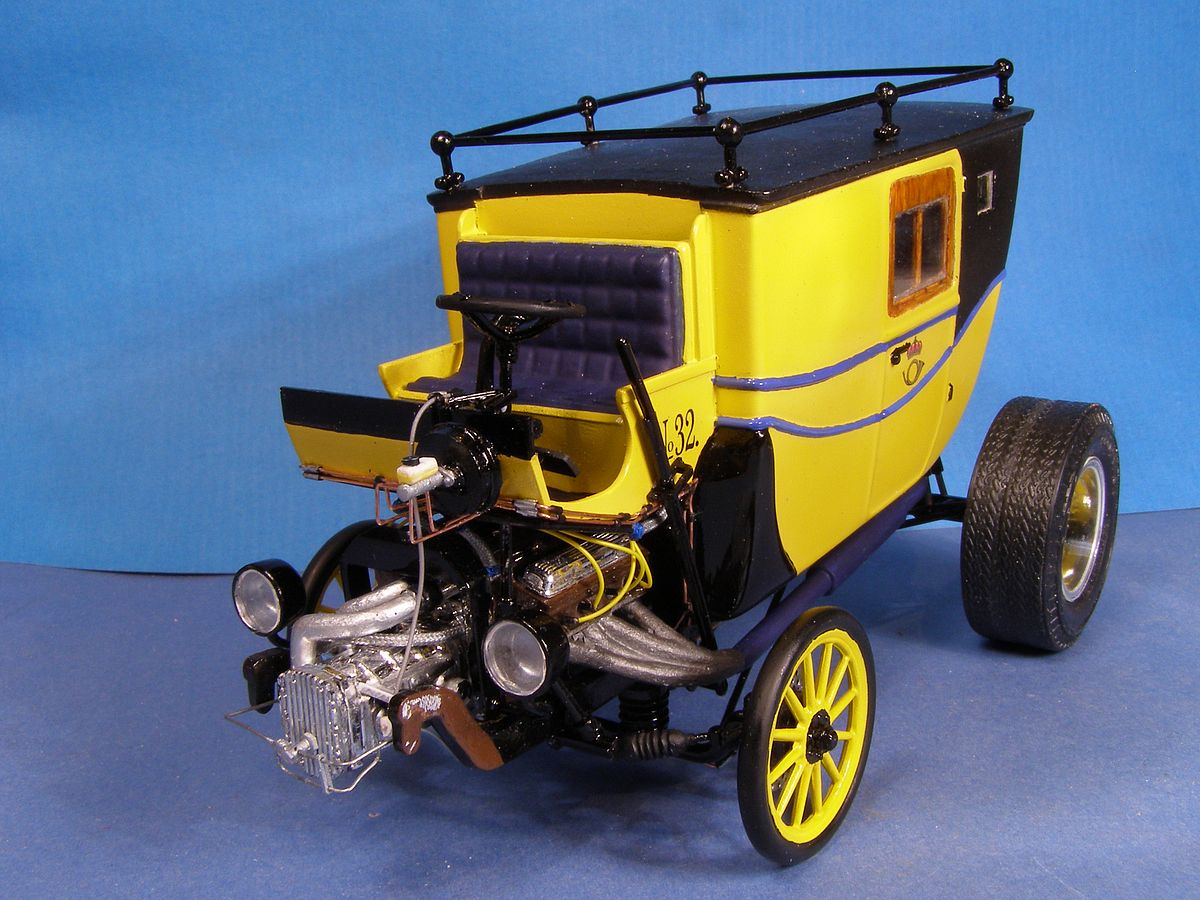
| Finished at last. The front axle got a placement that will give more of a stage coach feeling. |
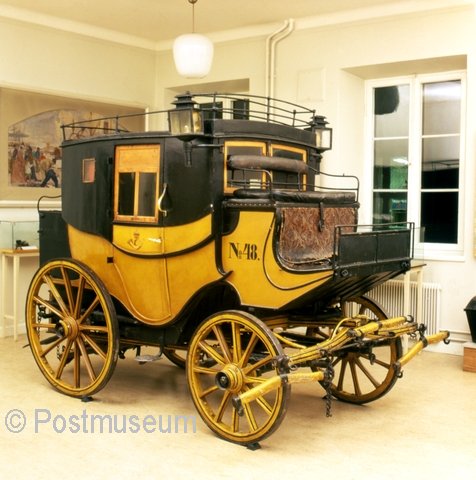
| I got the inspiration from a wagon at the Postmuseum in Stockholm. The museum sent me this picture of the original. I appreciate this. |
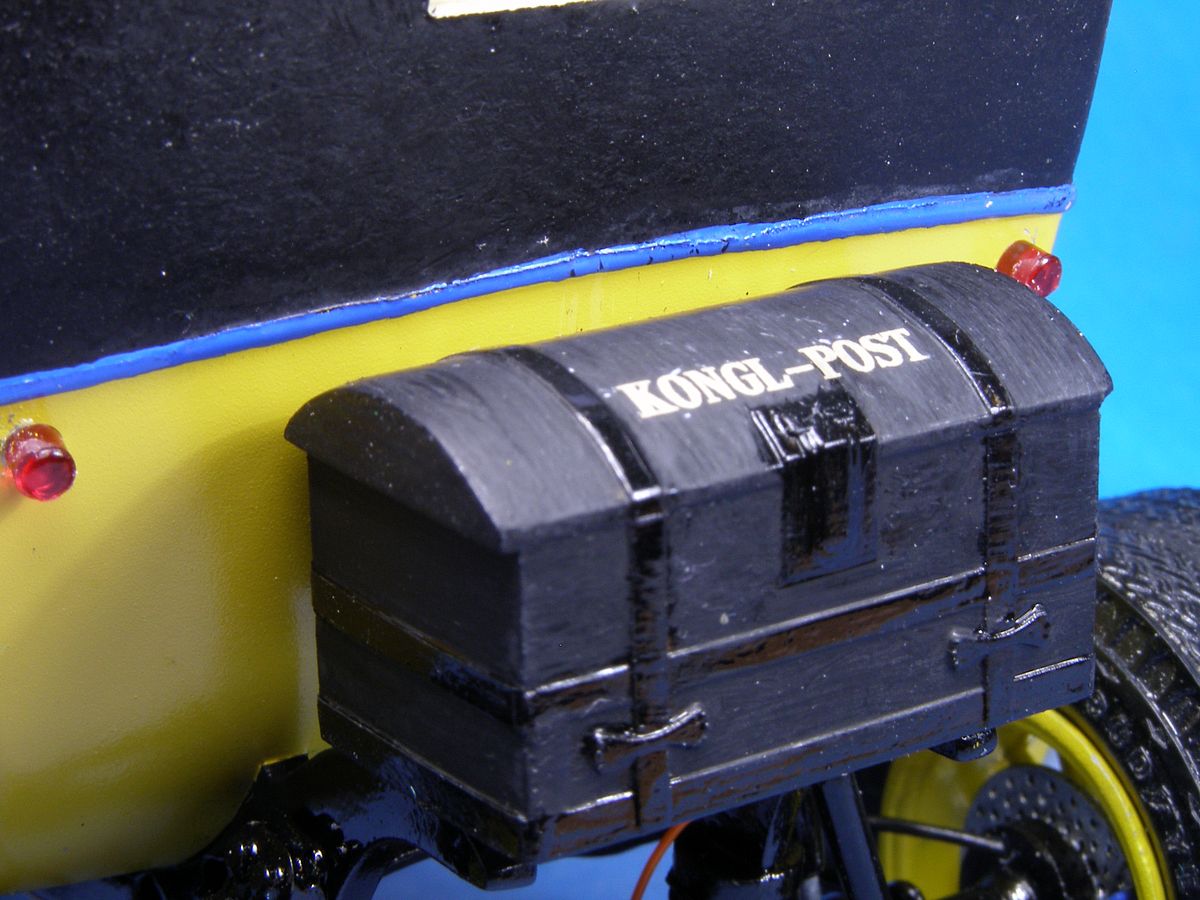
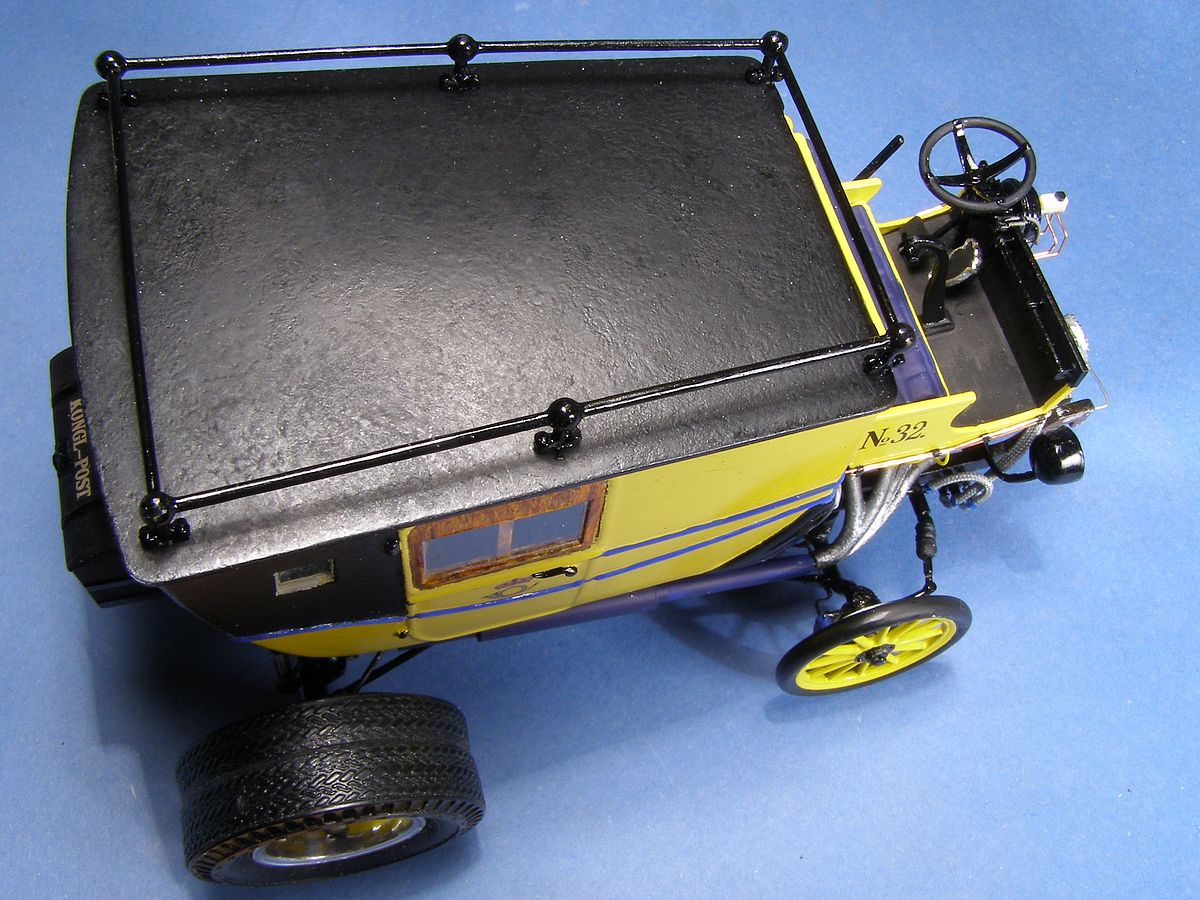
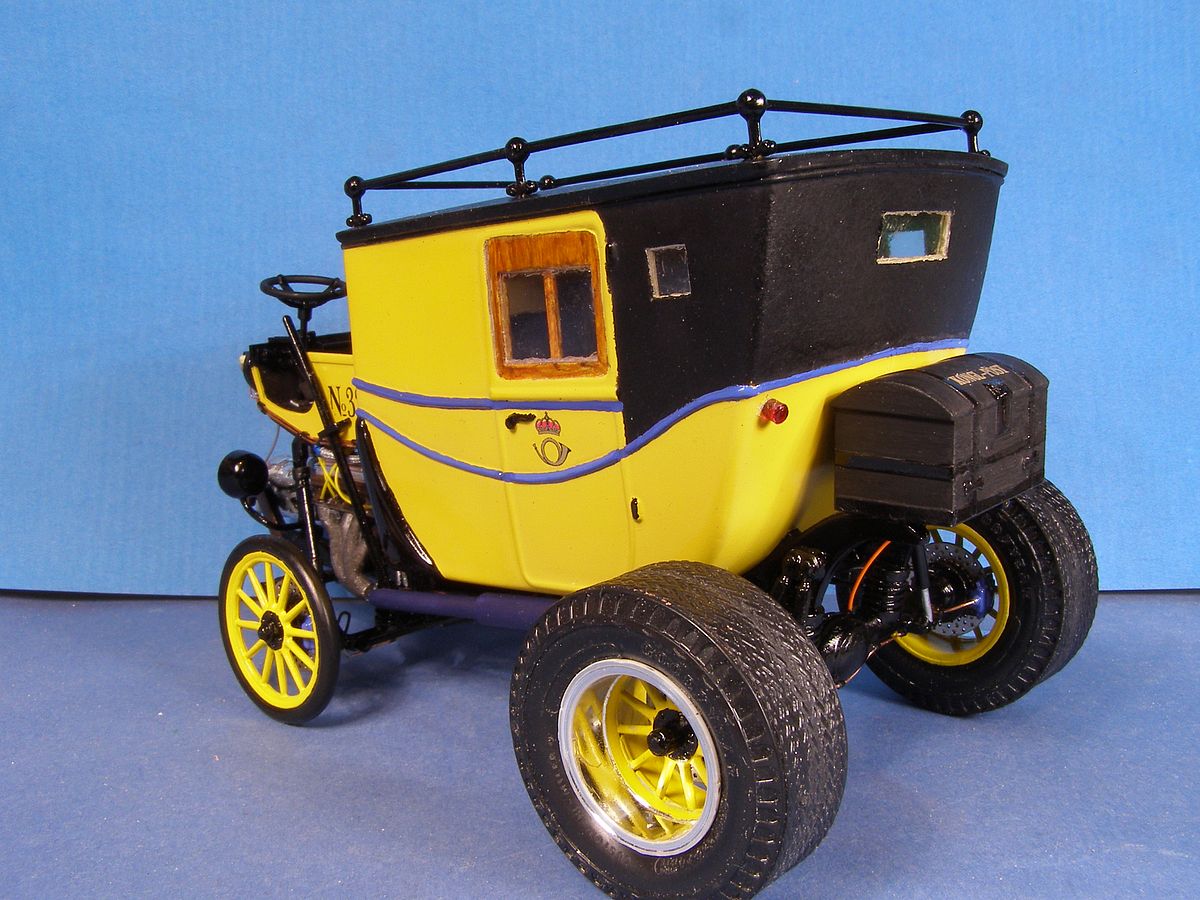
| Here are some pictures of the finished build. |

| Stockholm June 24, 2013 |  |
No updates |
----------------------------------------------.::. chibi models .::. military vehicles .::. automobiles .::. aircrafts .::.
miscellaneous .::.home .::.-------------------------------------------- |